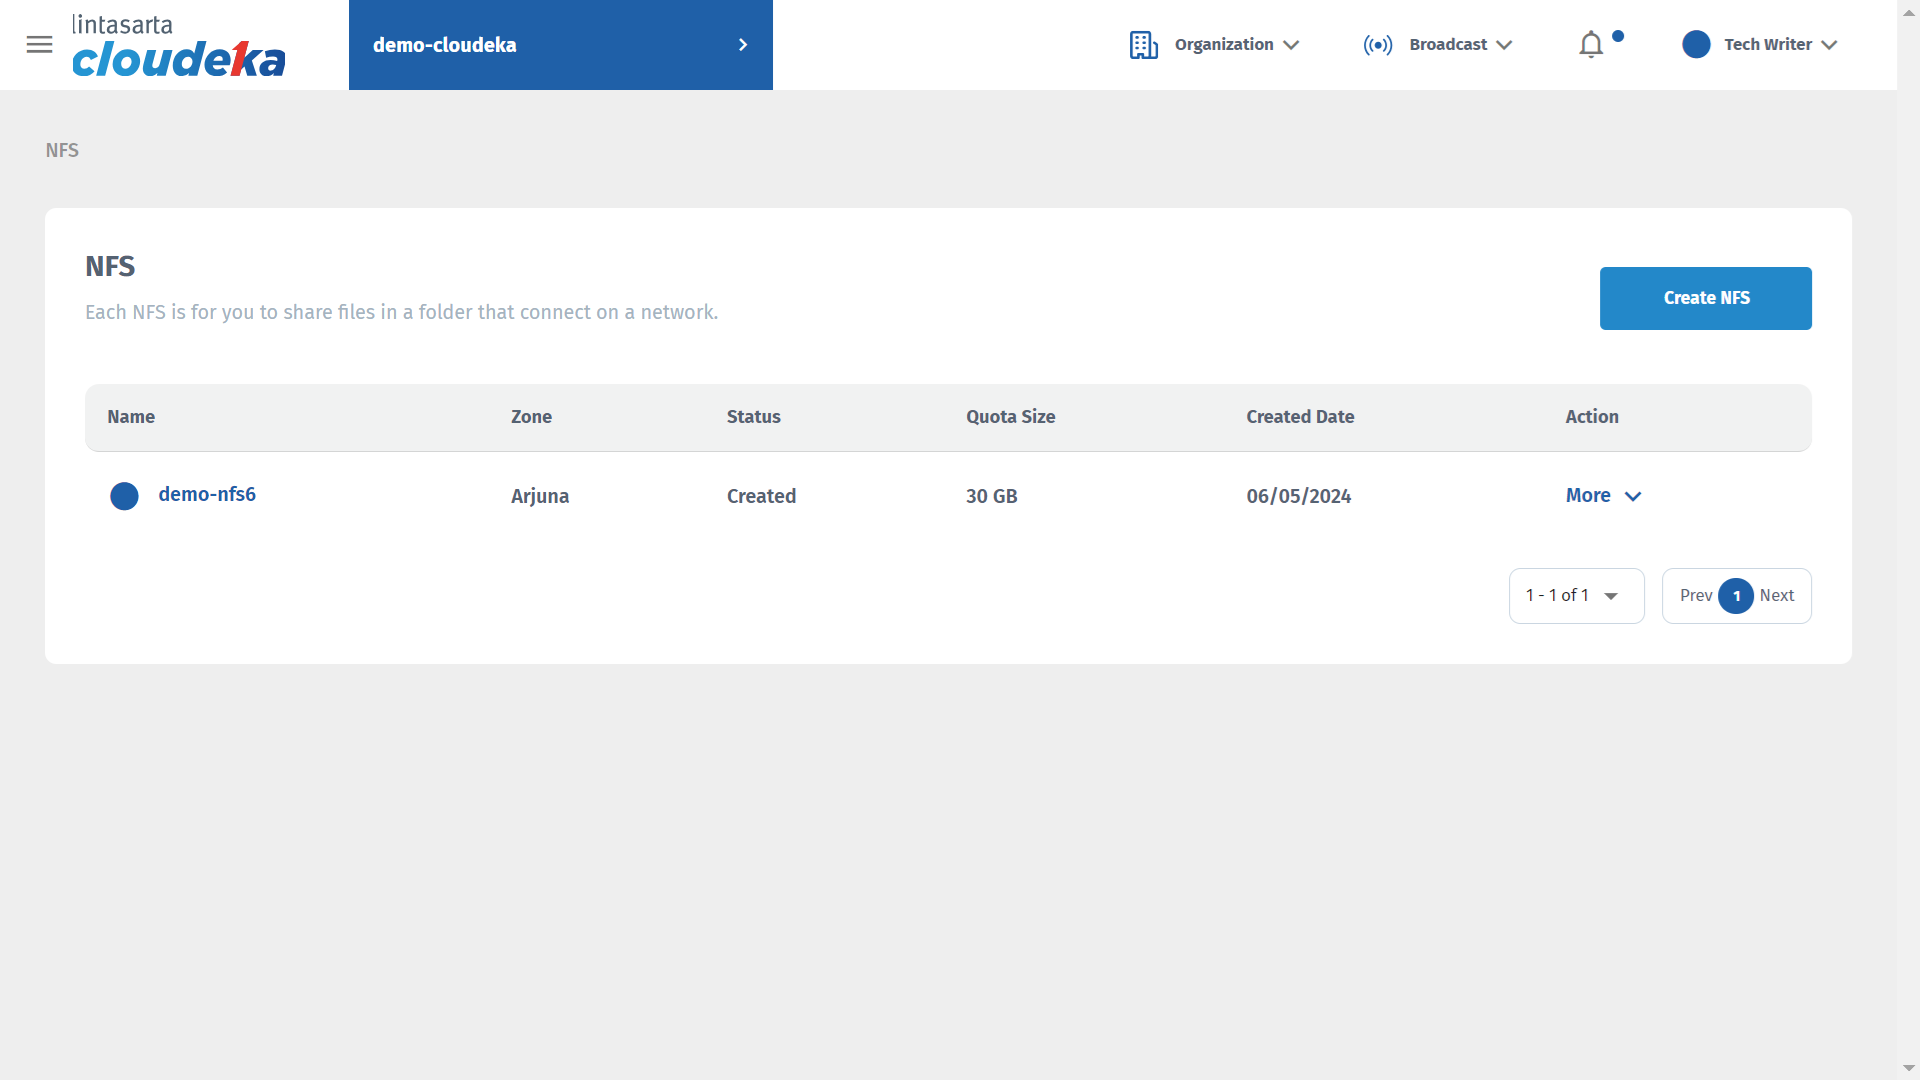
Add Deka NFS Configuration
Add Deka NFS Configuration
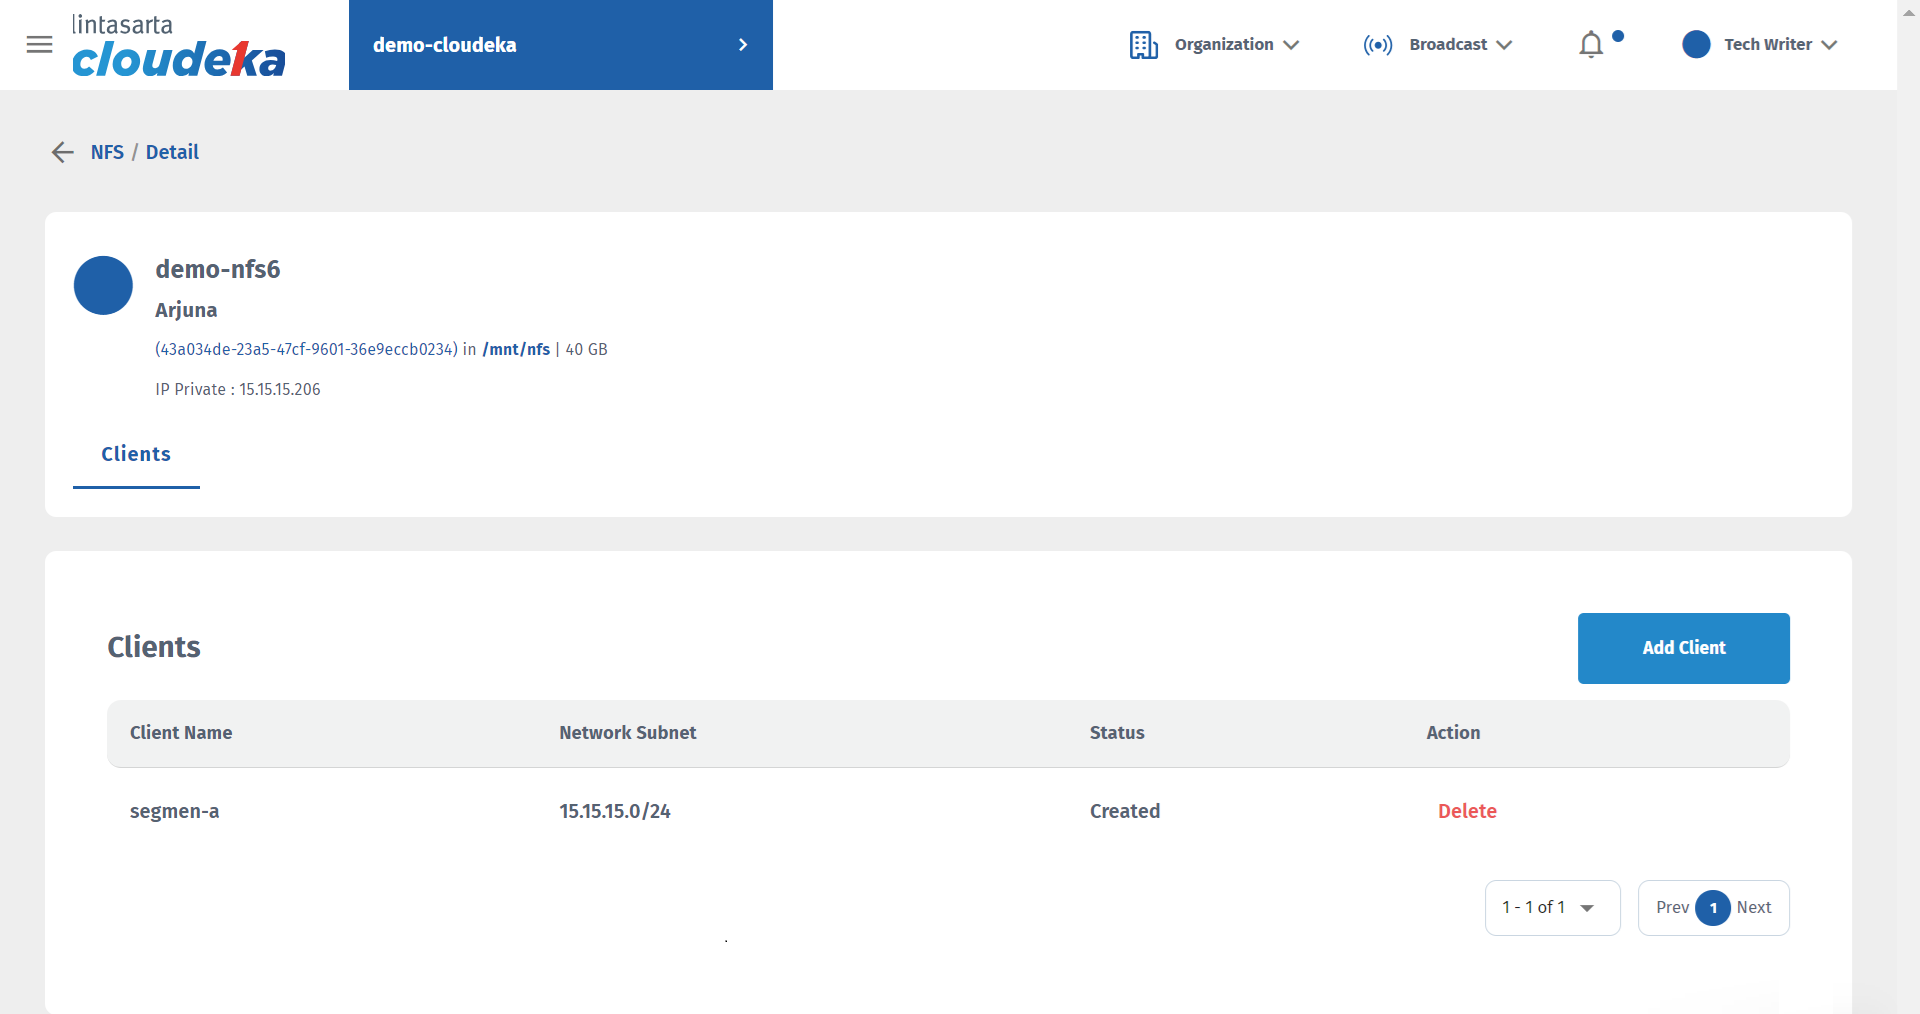
Add Client in Deka NFS Configuration
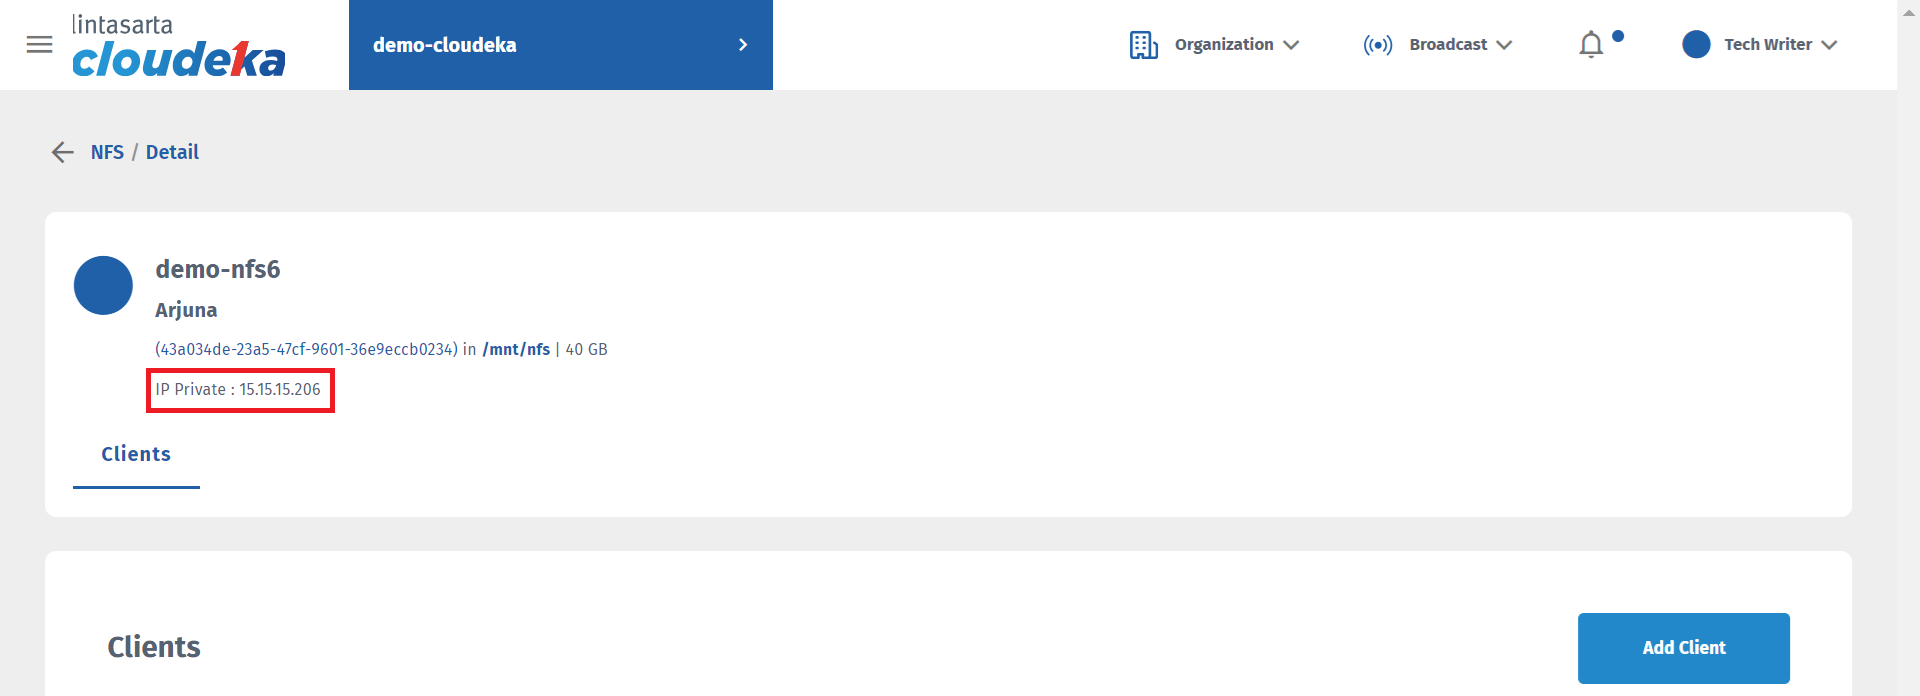
IP Address Deka NFS Configuration

Open Console
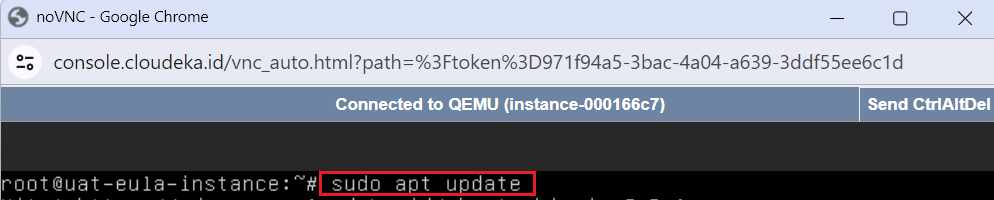
Installing NFS Client Packages
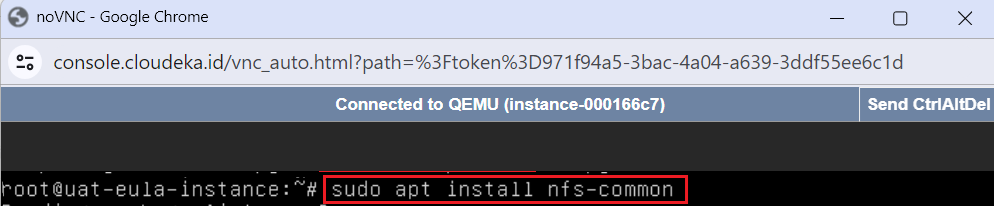
Installing NFS Client Packages
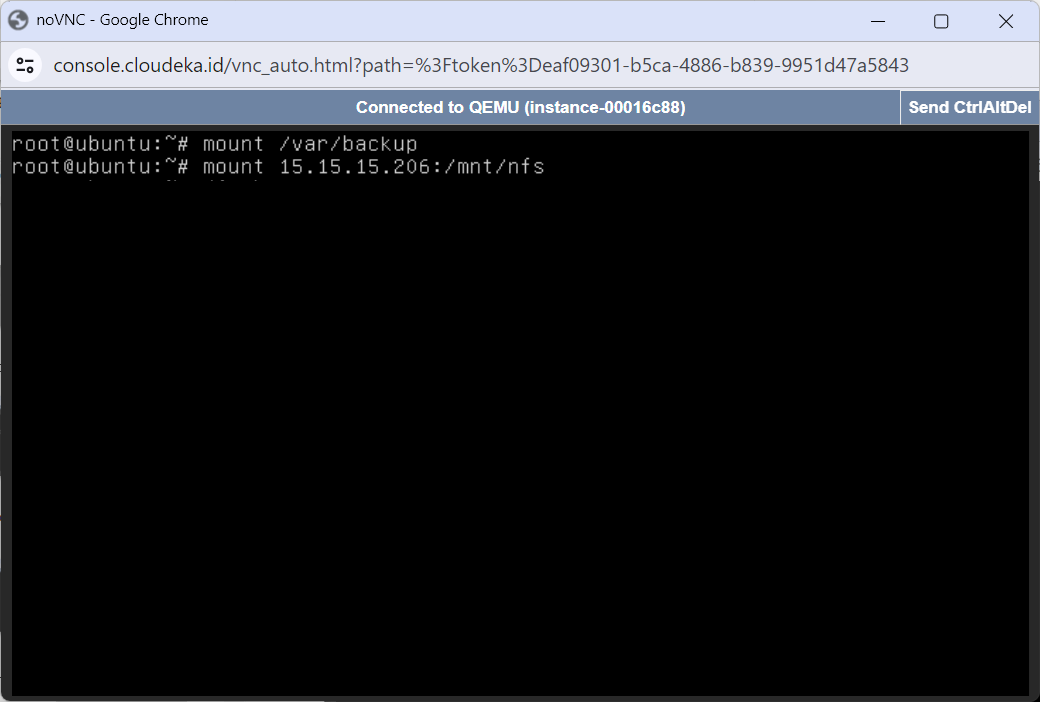
Manually Mounting (a)
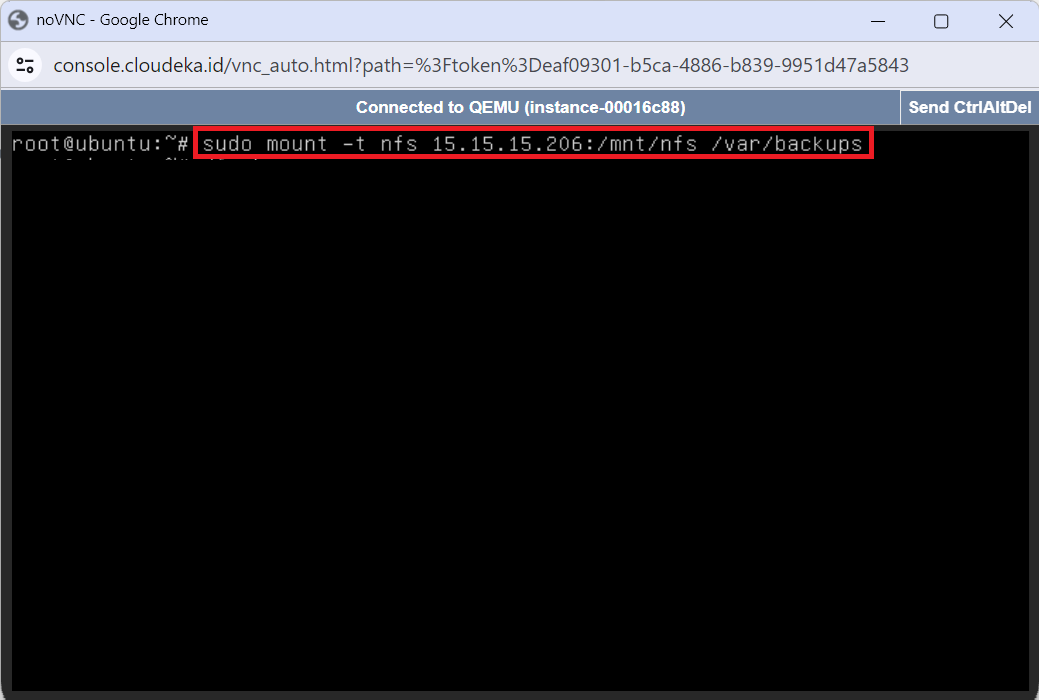
Manually Mounting (b)
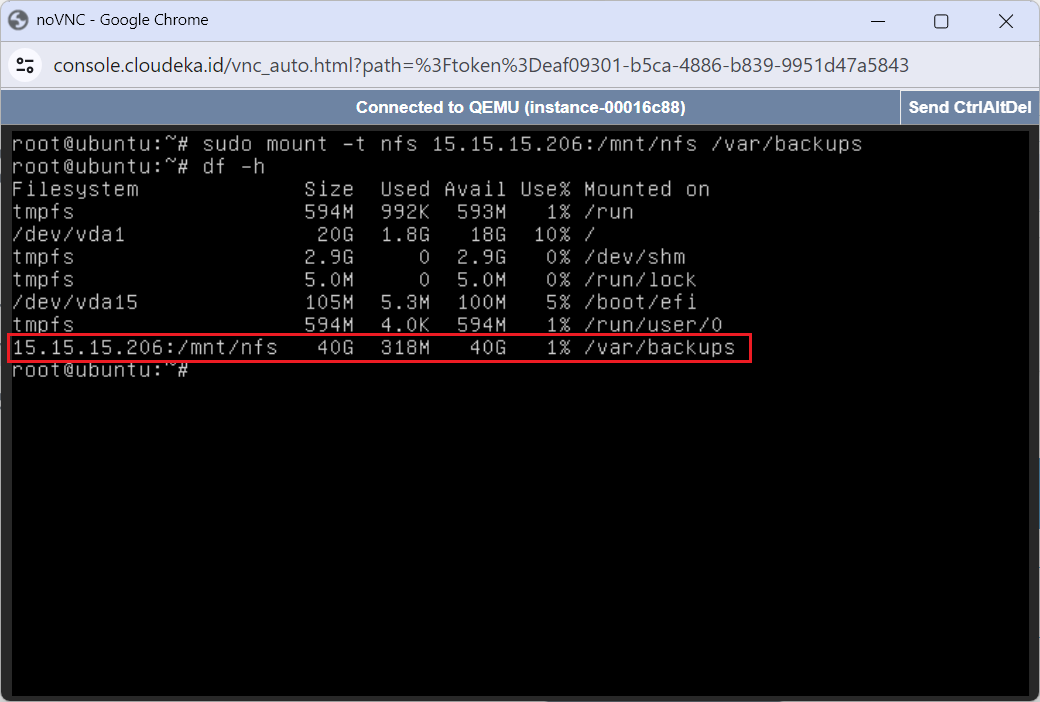
Manually Mounting (c)
Automatically Mounting (a)

Automatically Mounting (b)
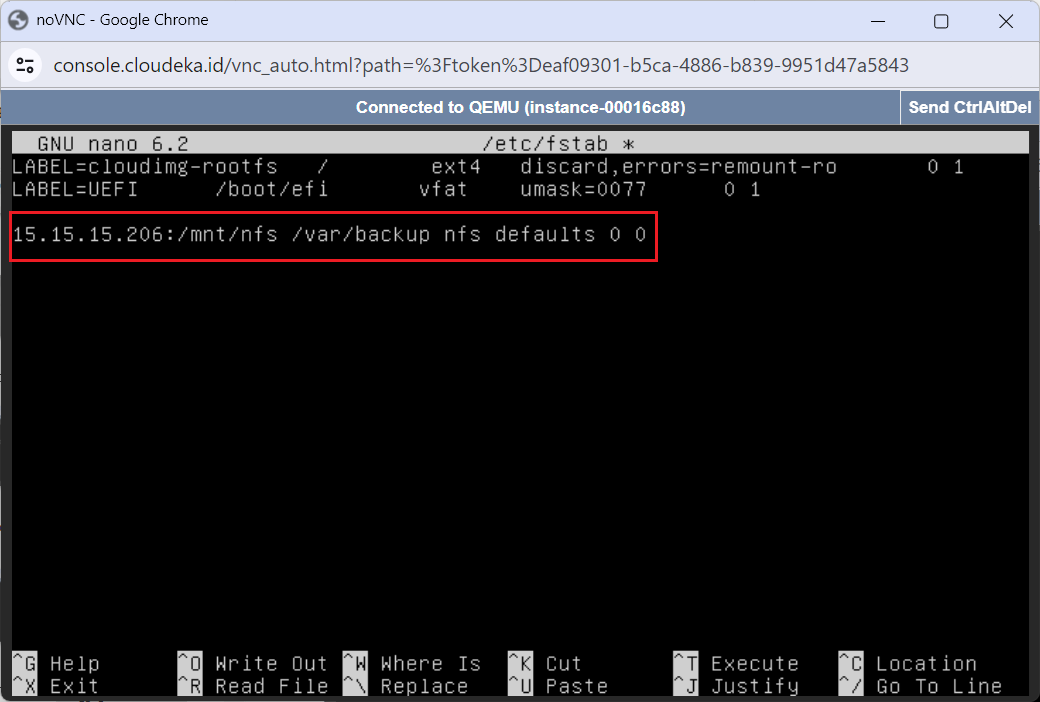
Automatically Mounting (c)
Automatically Mounting (d)
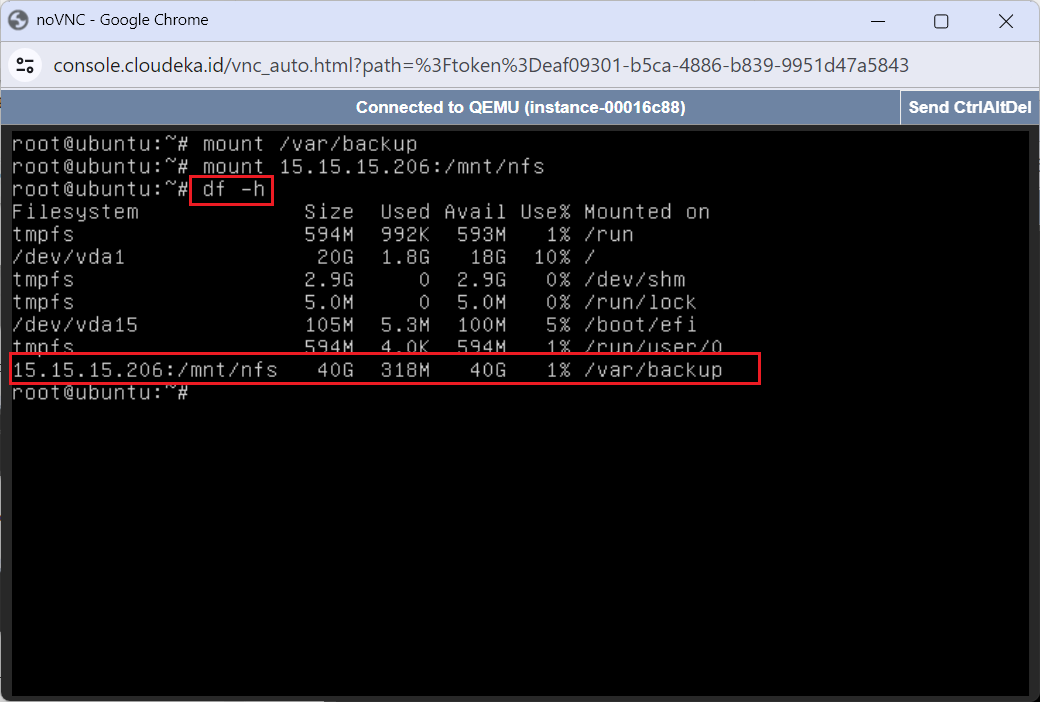
Manually Mounting (c)