Voucher Credit
Voucher Credit
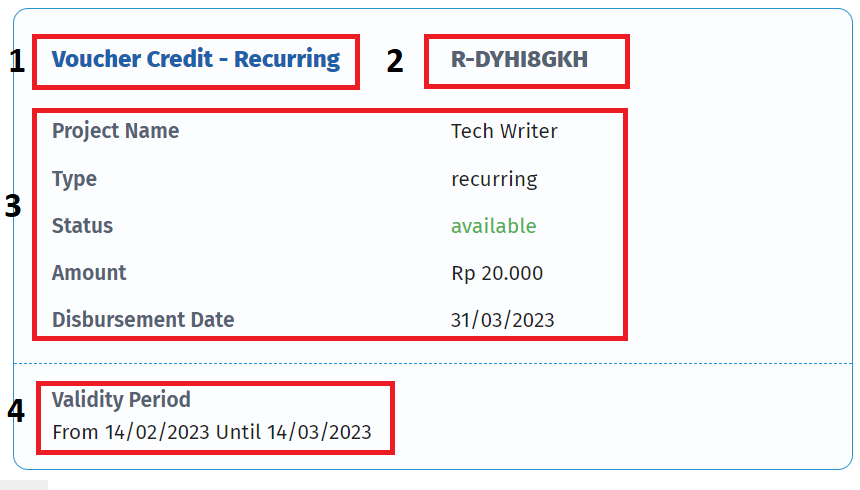
| Column | Description |
|---|---|
| 1. Voucher Name | The name of the project voucher used. |
| 2. Voucher Code | A unique code that is used to identify the credit voucher. |
| 3. Voucher Data | There are several: - Project Name the name of the project using the voucher credit. - Type there are two types of credit vouchers, including one-time vouchers and recurring credit vouchers. - Status there are two statuses on the voucher, namely Available and Unavailable. - Amount is the voucher price that must be paid by the user. - Disbursement Dateis the date on which funds or payments from the voucher will be given or distributed to the recipient of the voucher. |
| 4. Validity Period | The date on which funds or payments from the voucher will be given or distributed to the recipient of the voucher. |
Claim Voucher Credit
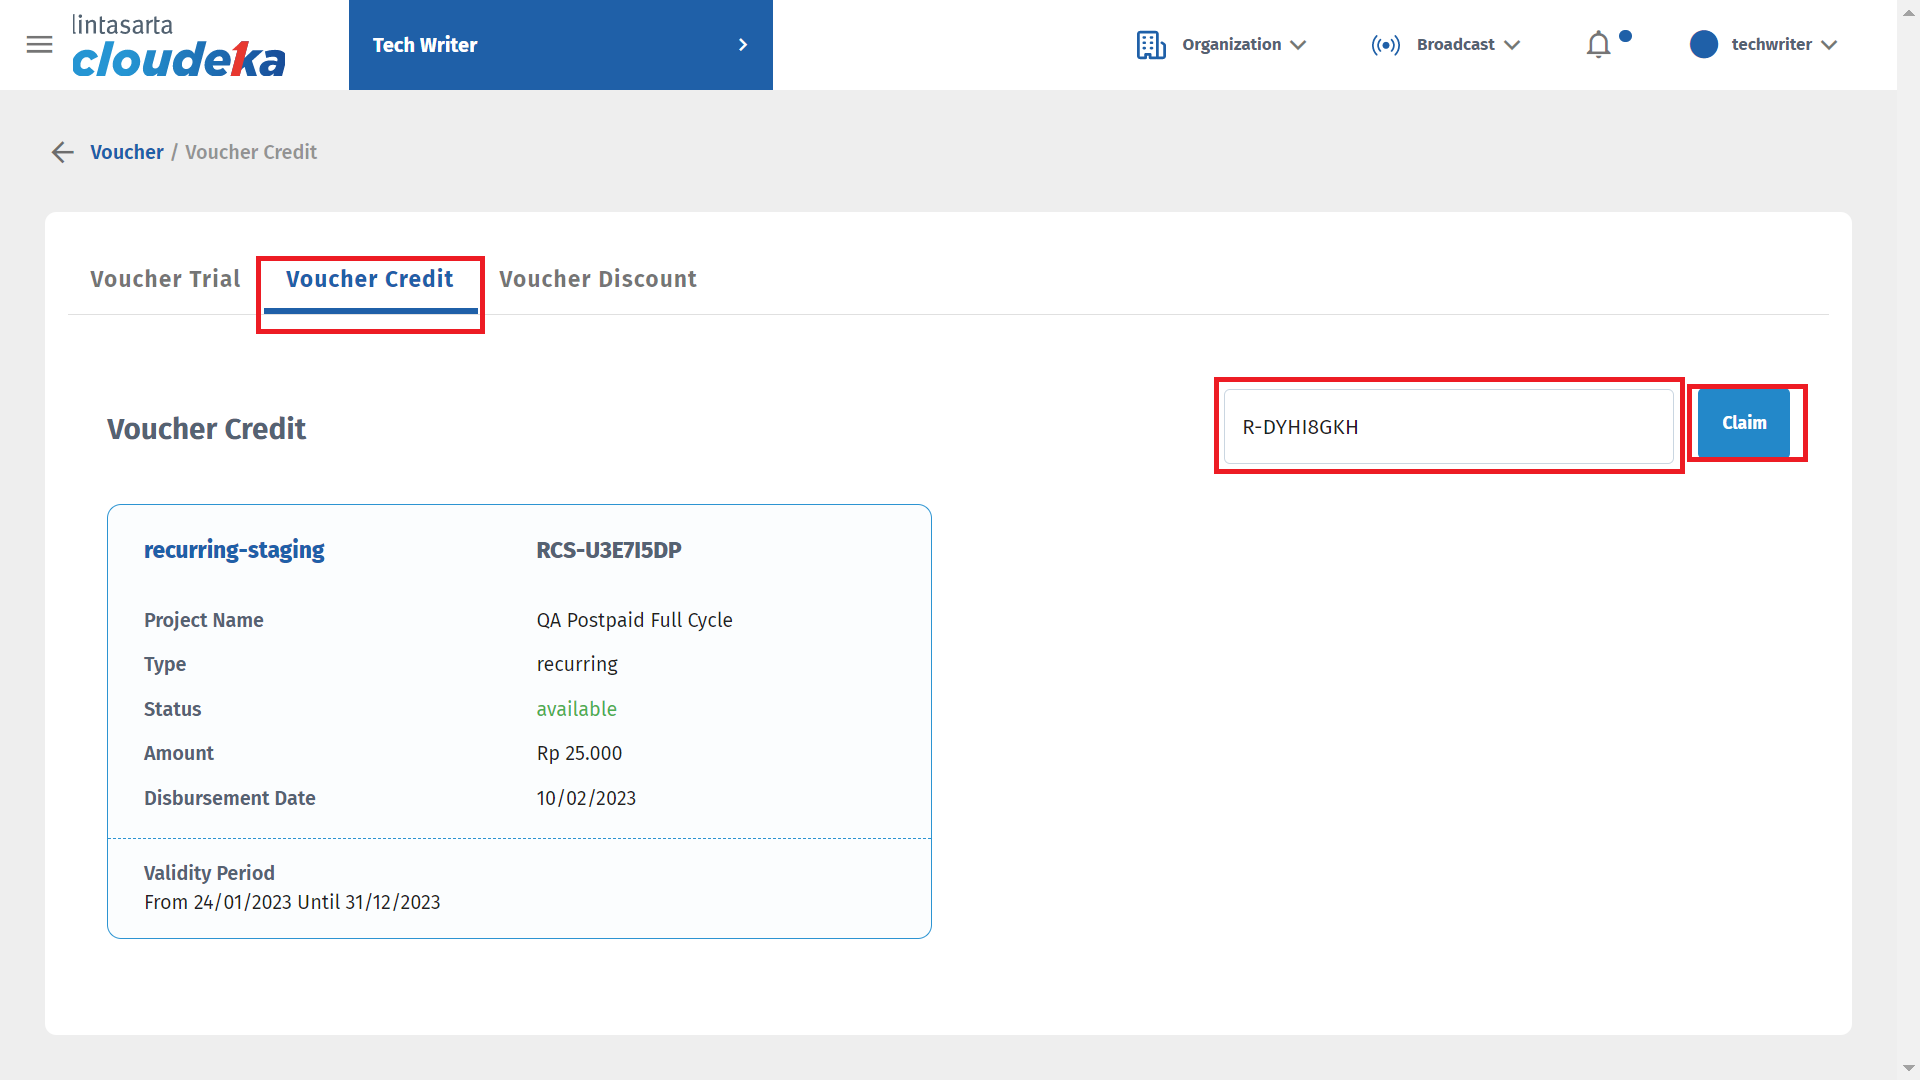
Claim Voucher Credit
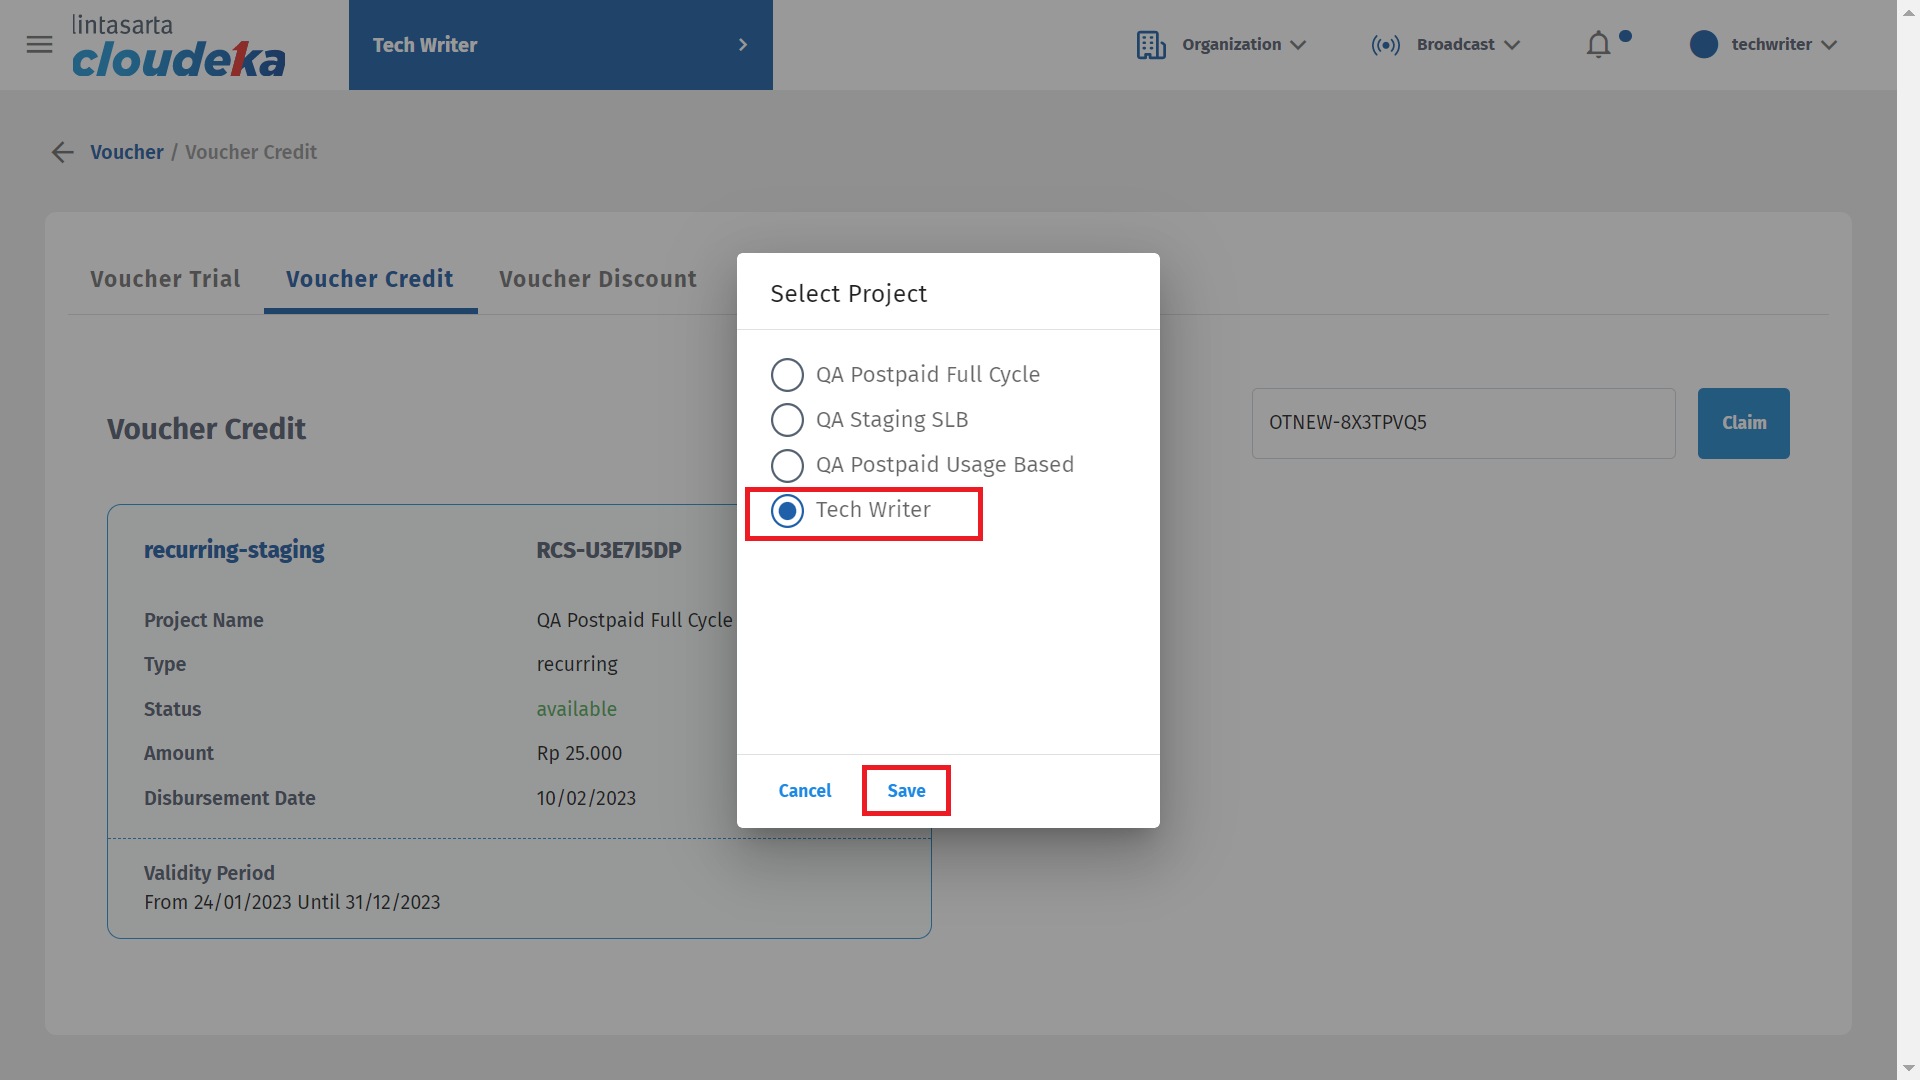
Claim Voucher Credit

Claim Voucher Credit