> For the complete documentation index, see [llms.txt](https://docs.cloudeka.id/llms.txt). Markdown versions of documentation pages are available by appending `.md` to page URLs; this page is available as [Markdown](https://docs.cloudeka.id/cloudeka_portal_service/project/create-a-new-project.md).
# Create a New Project
On this page, you can create a new project that will be registered in the Cloudeka application. Customers can create more than one project.
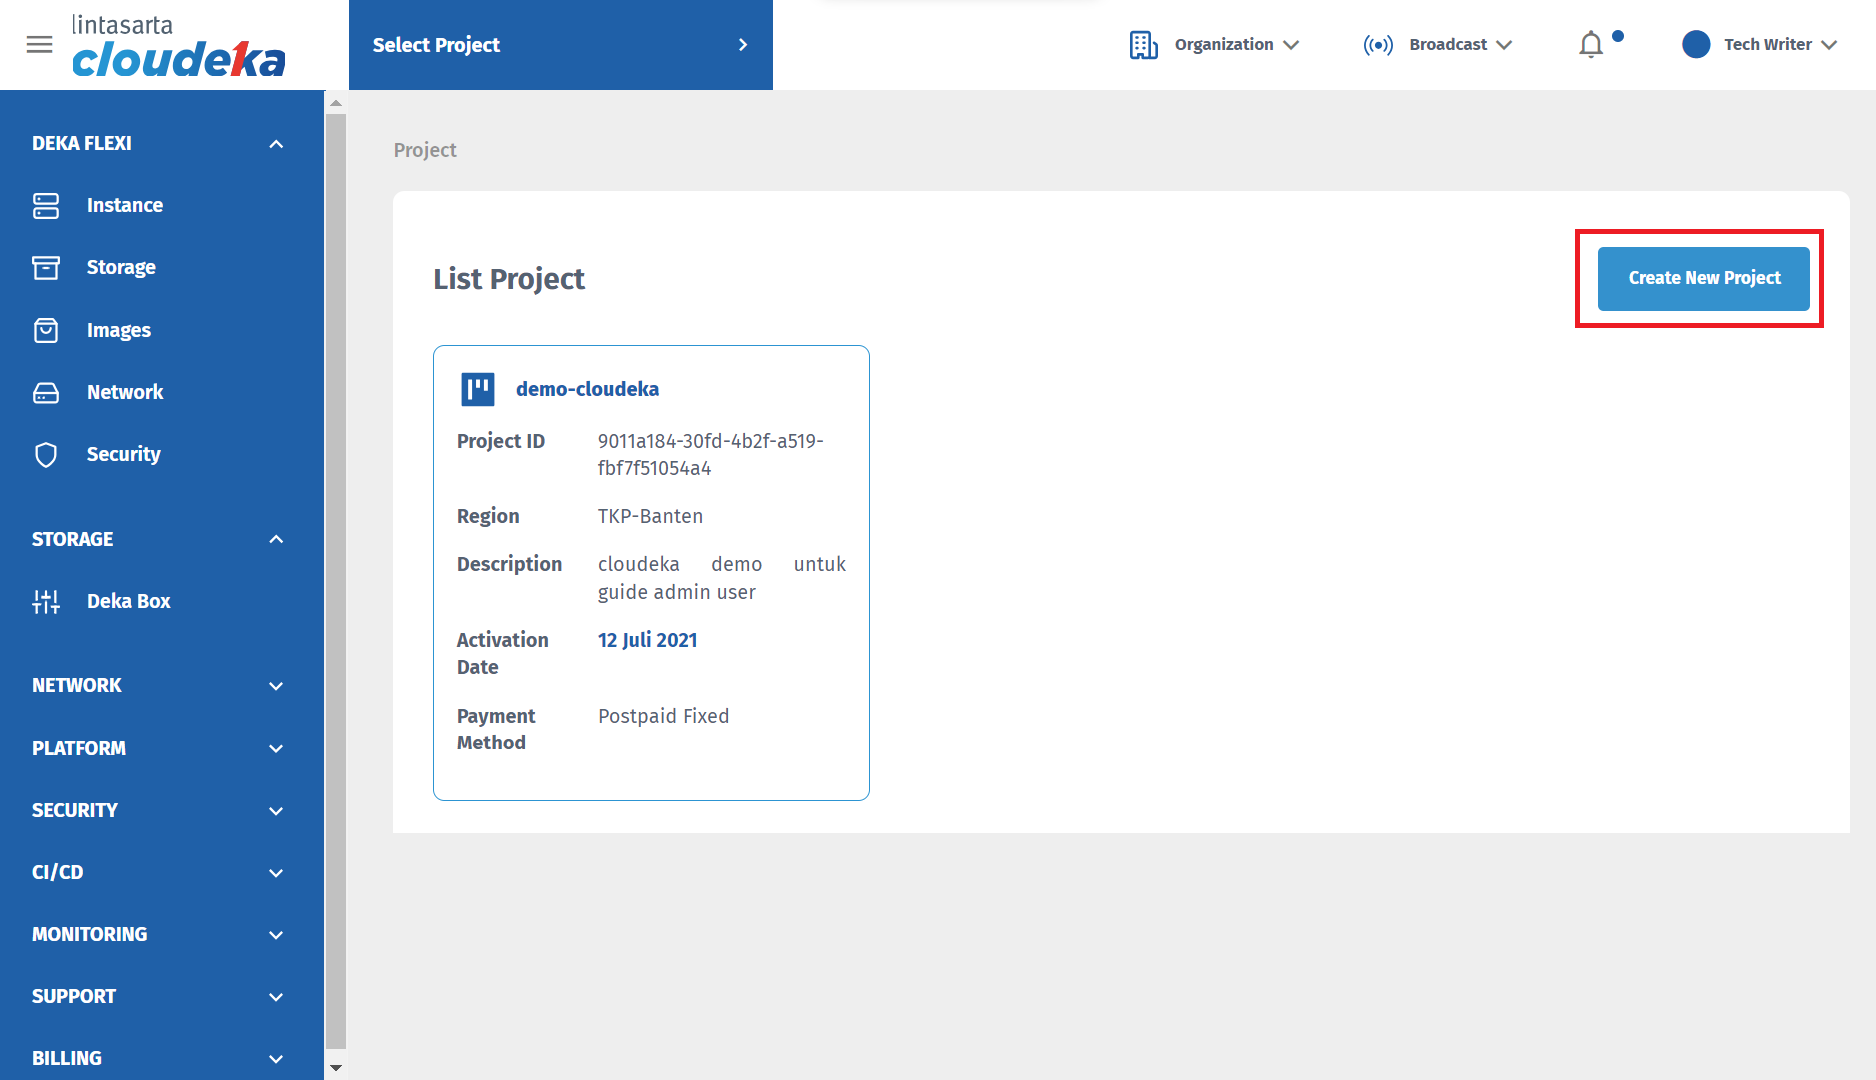
* Click the **New Project** menu.
List Project
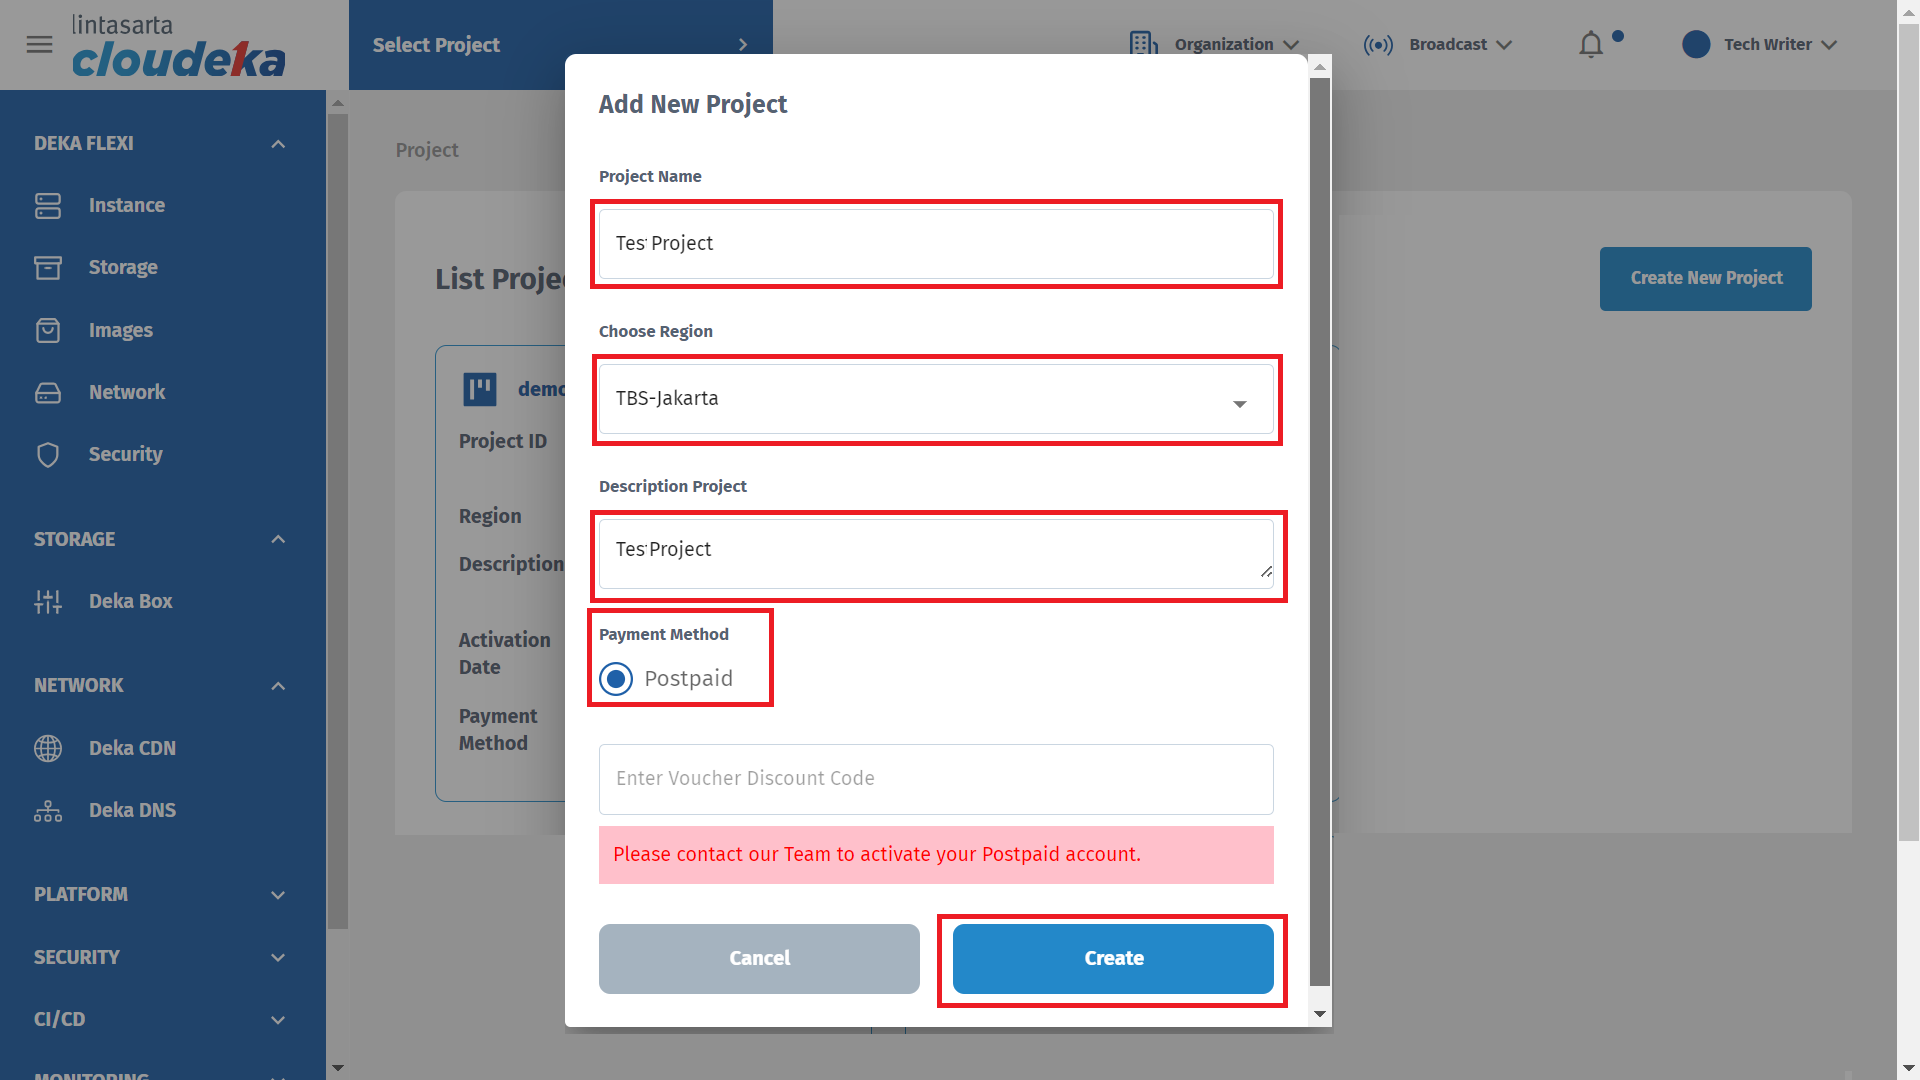
* Fill the fields in the Add New Project window.
Column
Description
Project Name
The name of your project
Description Project
Description of your project
You must be fill the fields, then click the **Create** button.
Add New Project
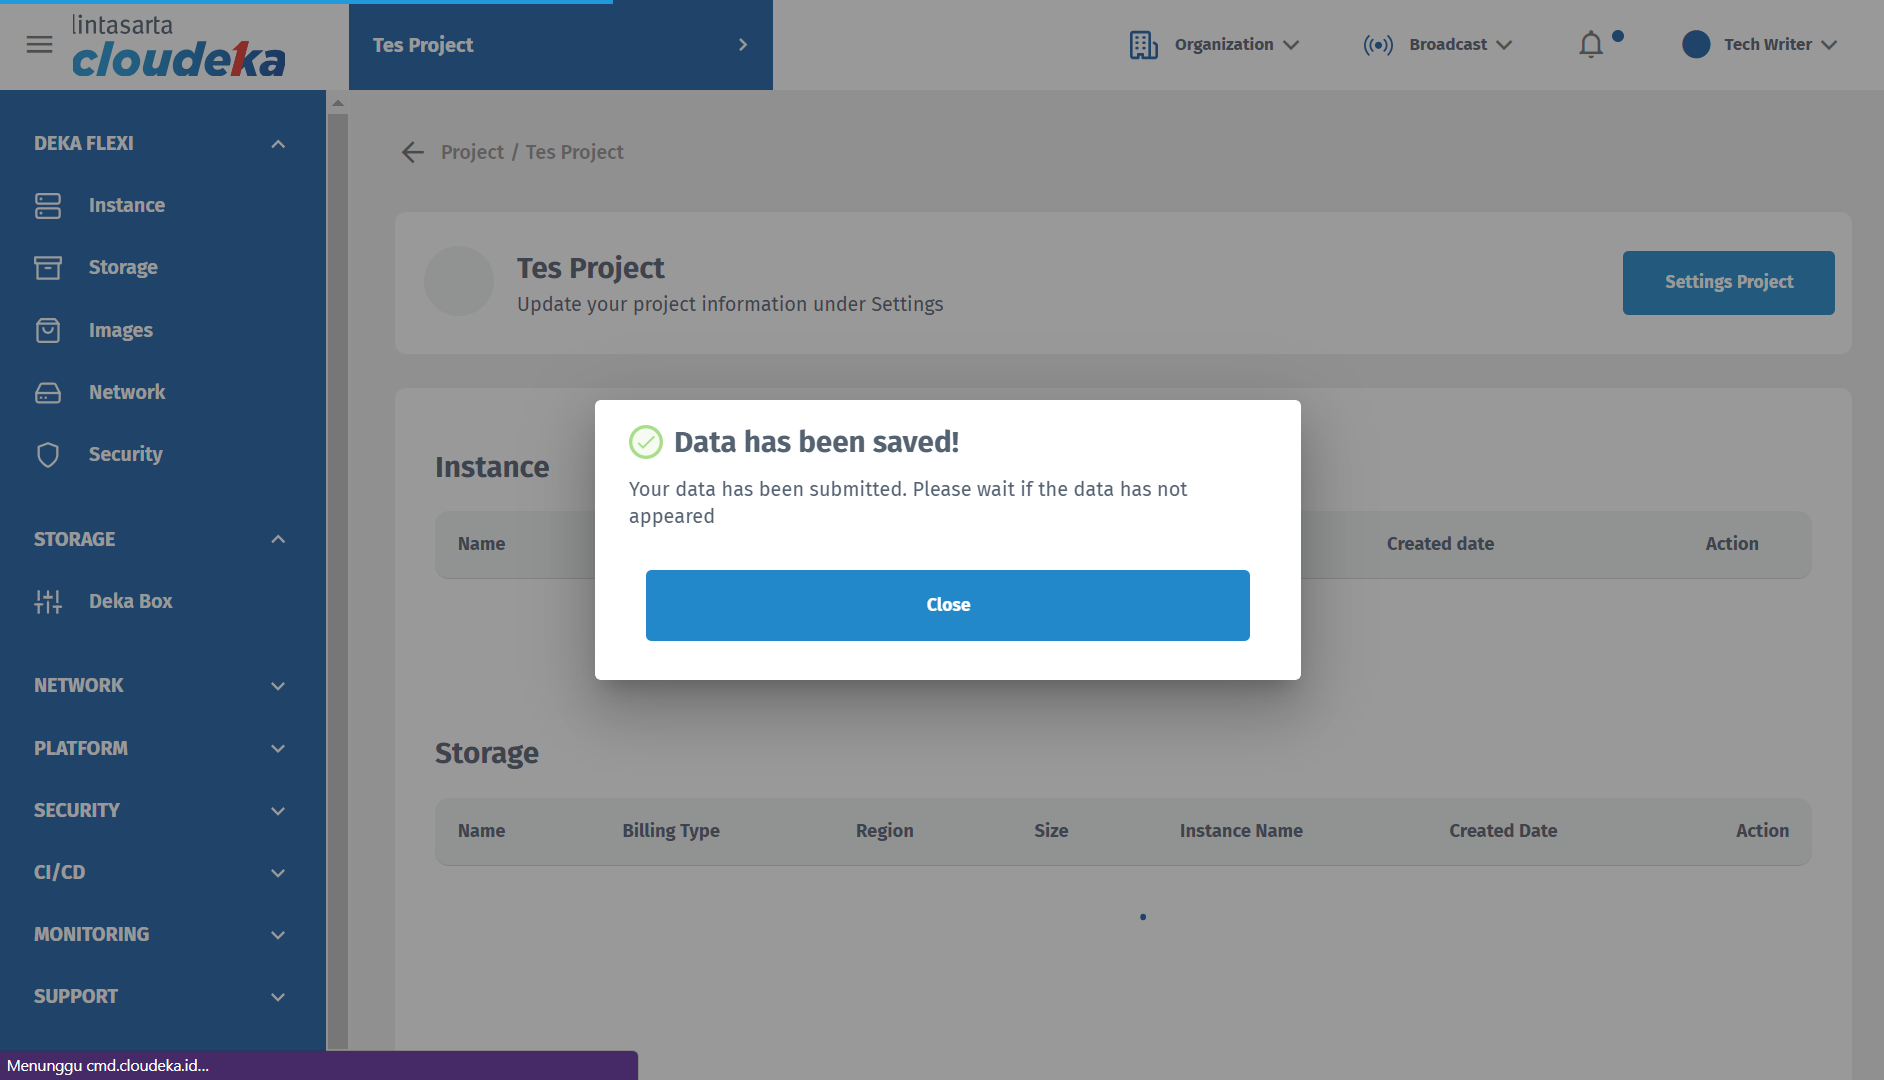
* If the new project has been successfully created, a pop up will appear **"Data has been saved! Your data has been submitted. Please wait if the data has not appeard".**