Create VPC
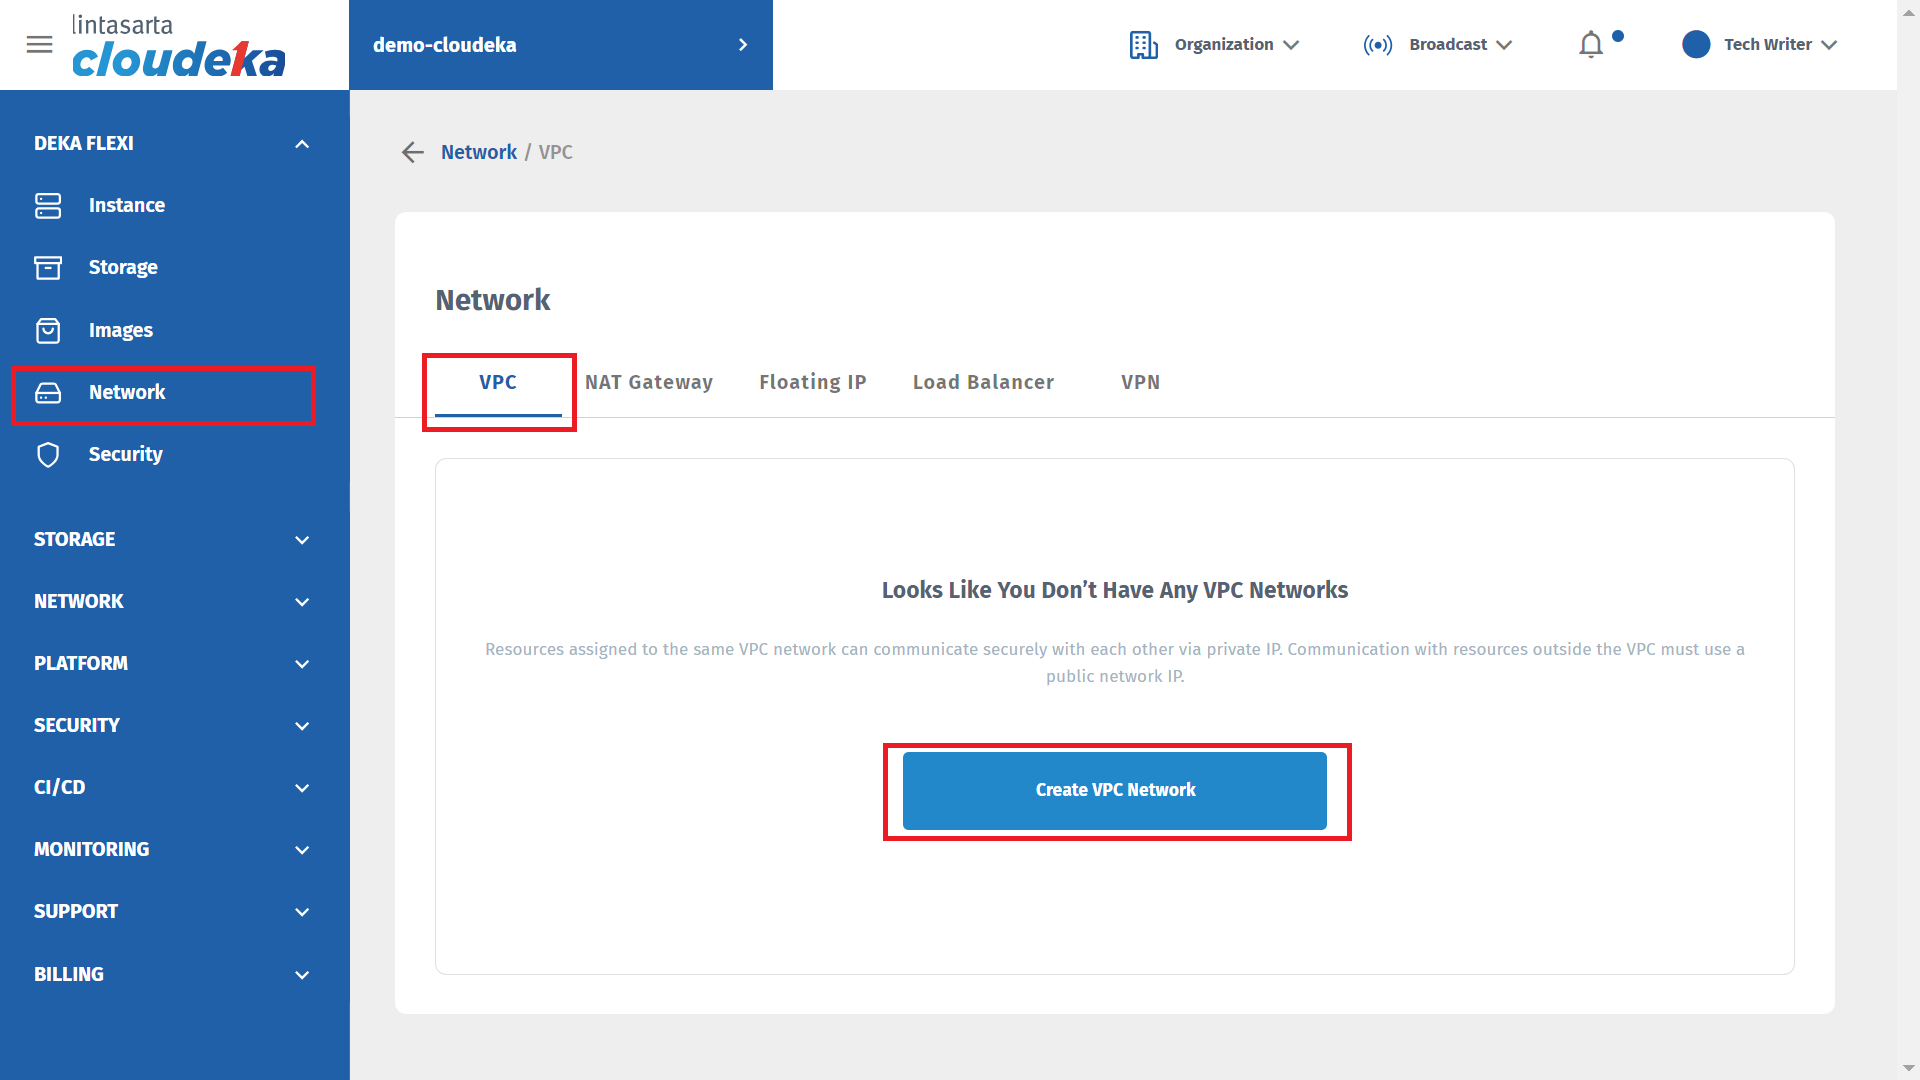
The first step for this guide is to create a VPC. This guide creates two VPCs: expert type and simple type. Make sure to use two different IP subnet addresses. On the Cloud services portal page select the Network menu. On the Network page select the VPC tab, and press the Create VPC Network key.

To create an expert type VPC select the Expert Wizard tab, a more detailed description of creating an expert type vpc can be found in this link. To create a simple VPC select the Simple Wizard tab, a more detailed explanation can be found in this link.

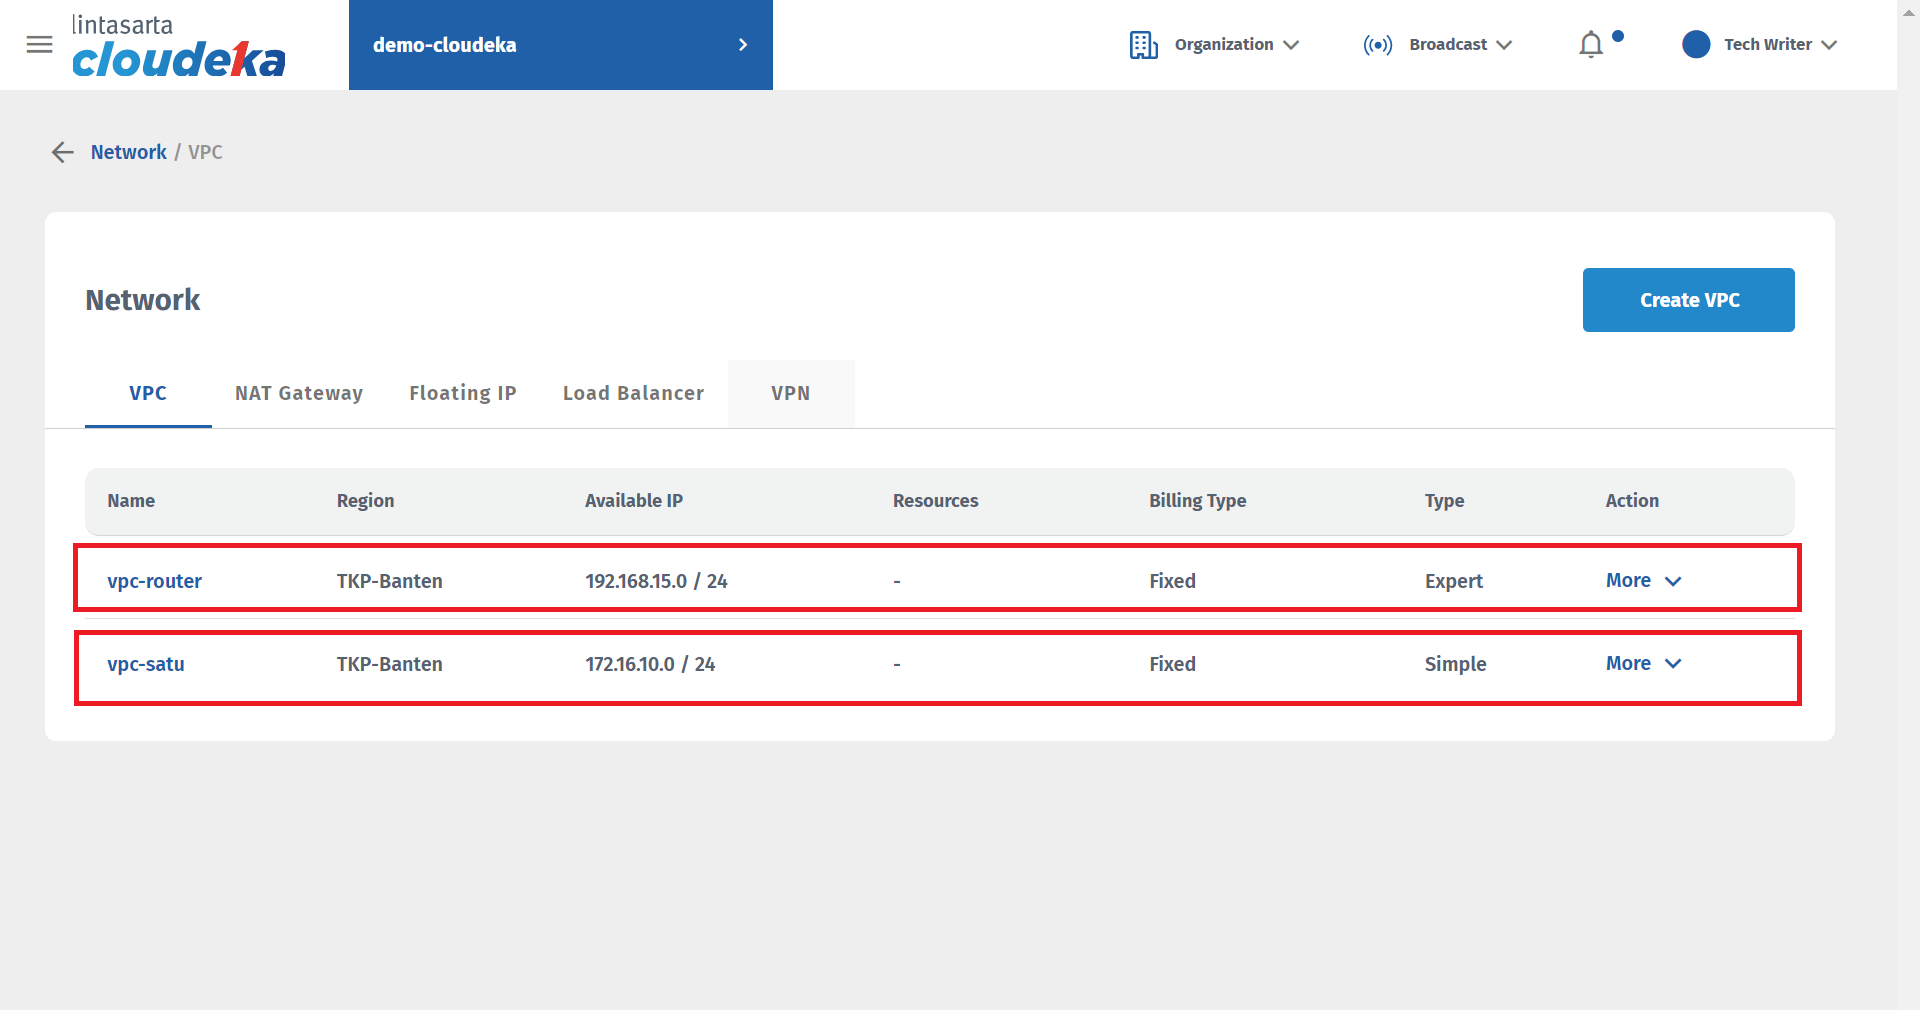
In VPC the expert type is vpc-router uses the IP subnet address at 192.168.15.0/24 while in simple type vpc-one uses the IP subnet address at 172.16.10.0/24. Since the CIDR used is 24 means for the number of hosts that can be used up to 254, it is commonly used for host 1 as the gateway IP address. In VPC the expert type starts from 192.168.15.1 to 192.168.15.254 while in VPC the simple type starts from 172.16.10.1 to 172.16.10.254.

Last updated
