
Jenkins
Jenkins
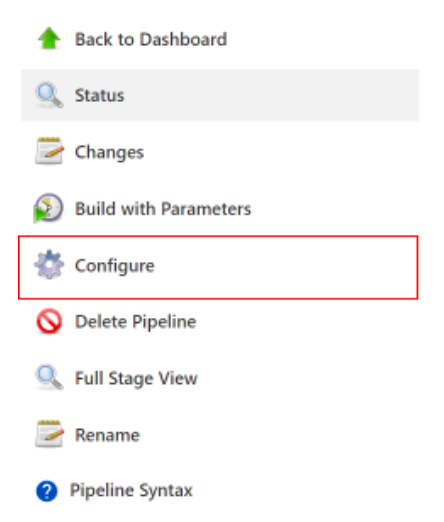
Integration without Jenkinsfile
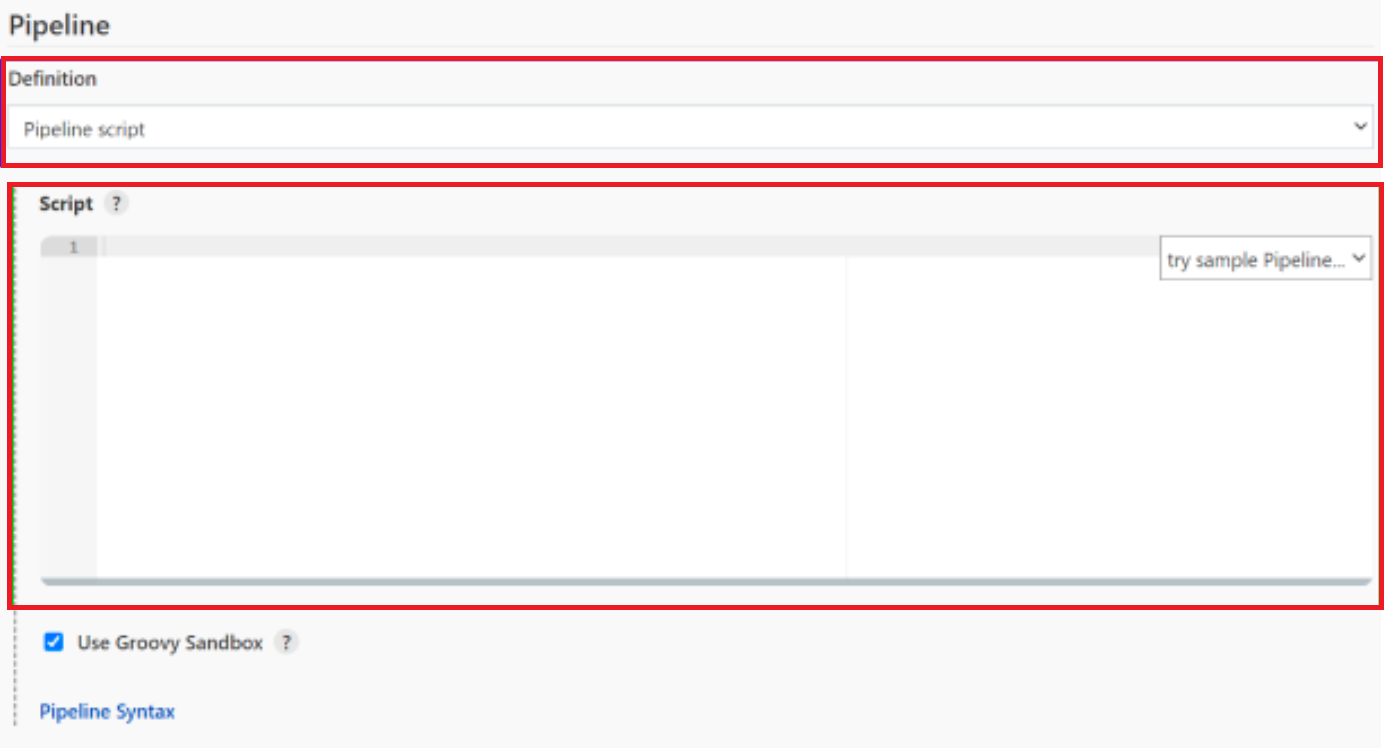
Integration without Jenkinsfile
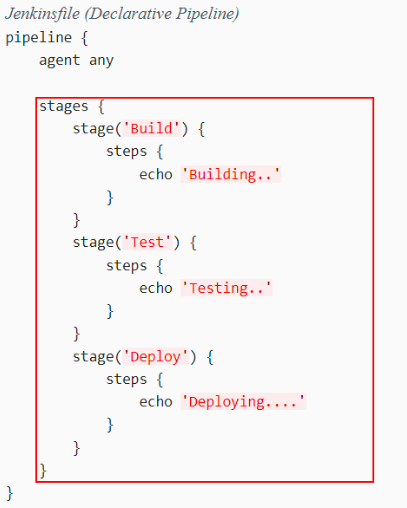
Integration with Jenkinsfile

Bamboo
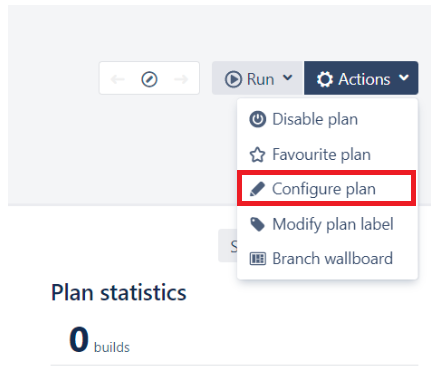
Integration with Bamboo

Integration with Bamboo
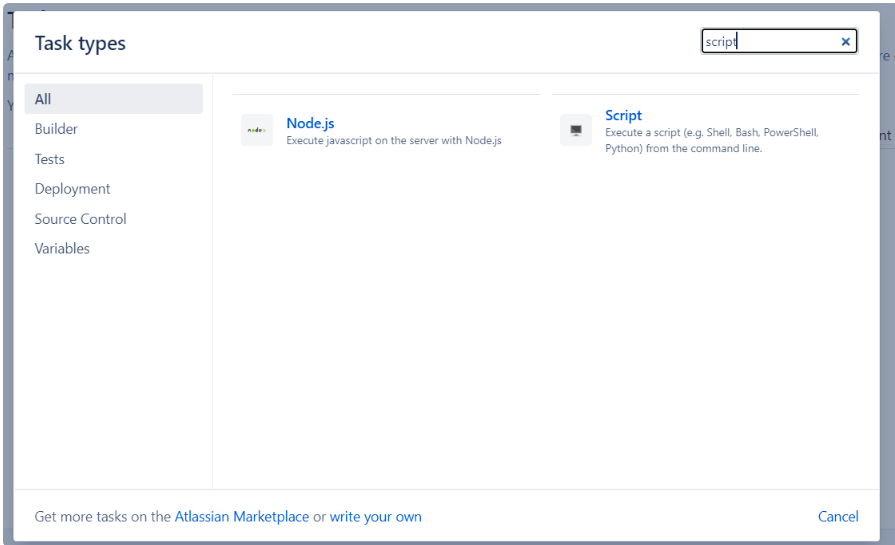
Integration with Bamboo
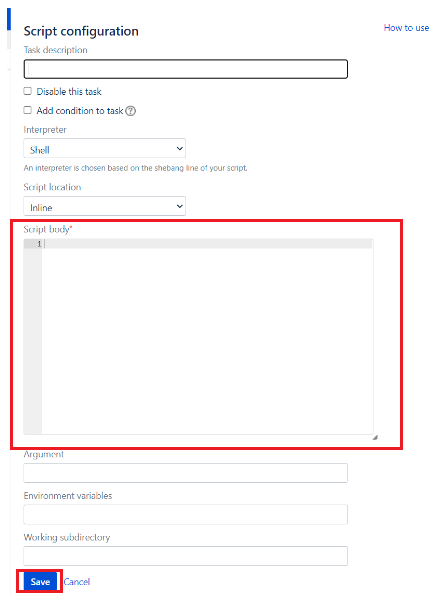
Integration with Bamboo

Gitlab

Integration Gitlab
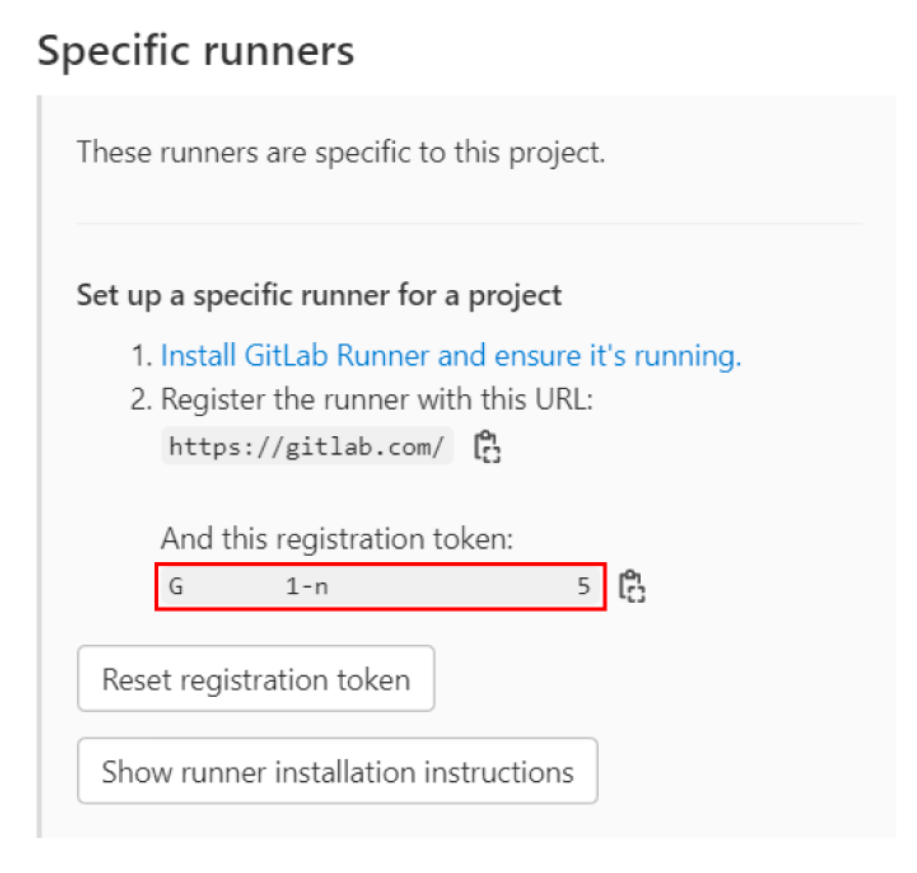
Integration Gitlab

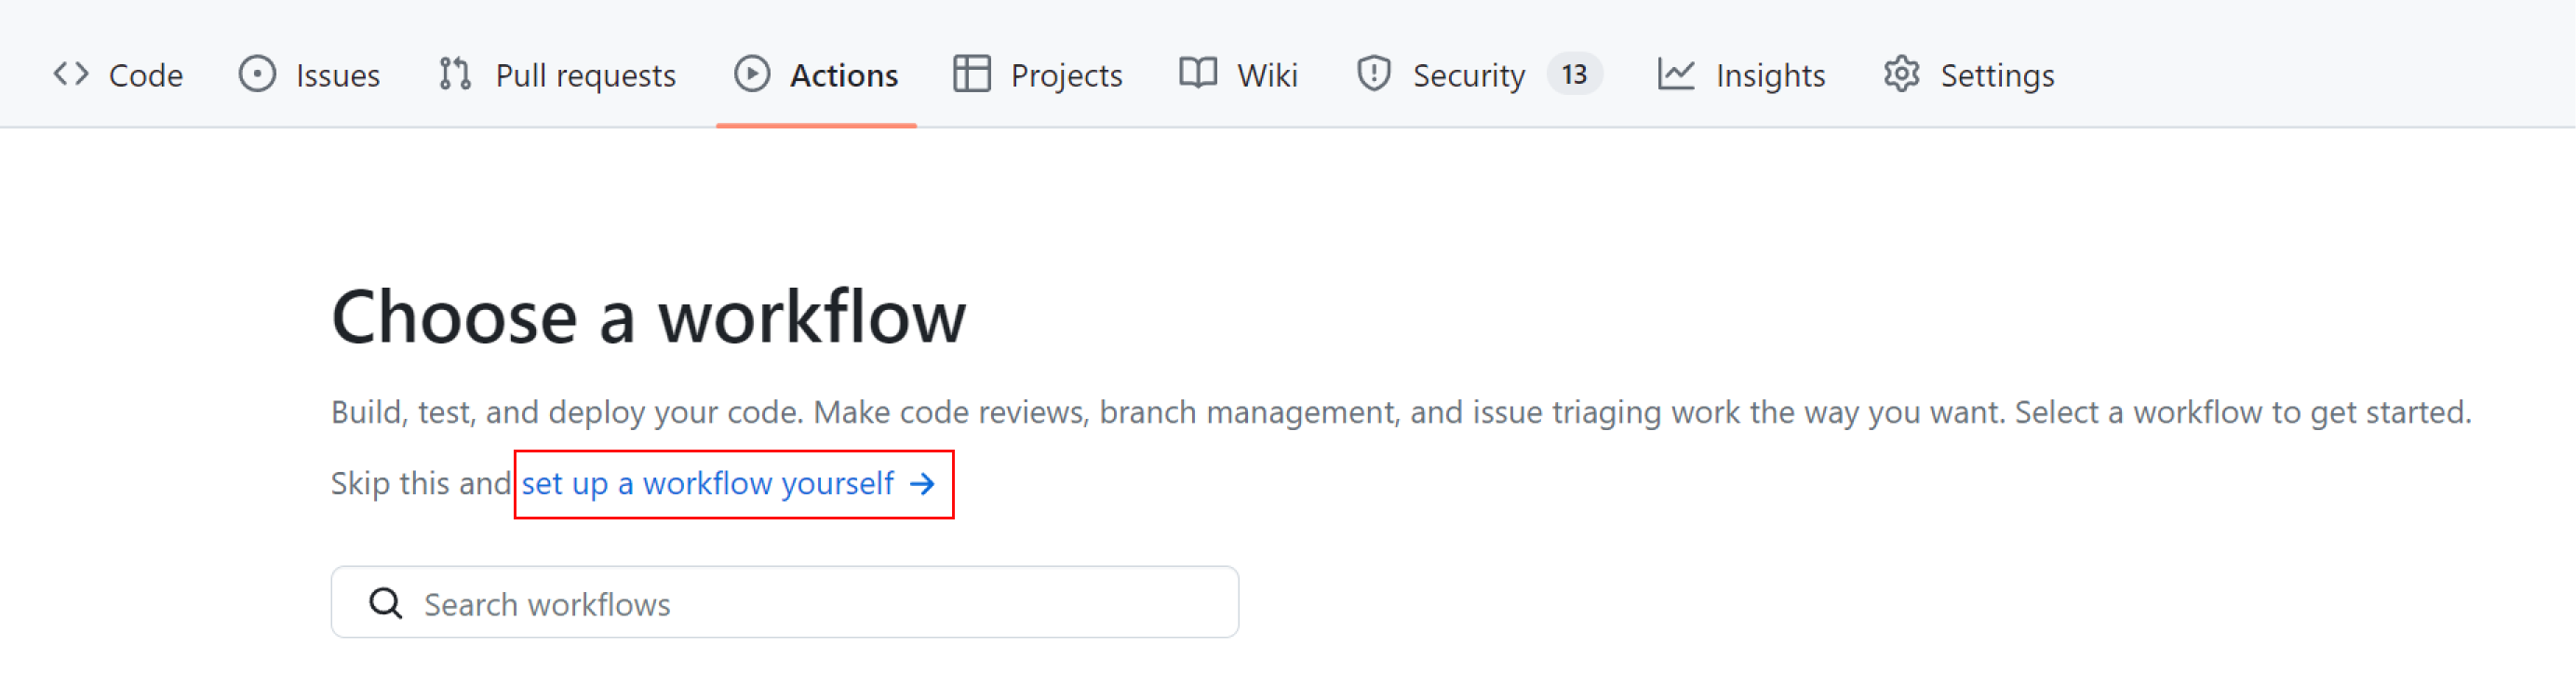
Github
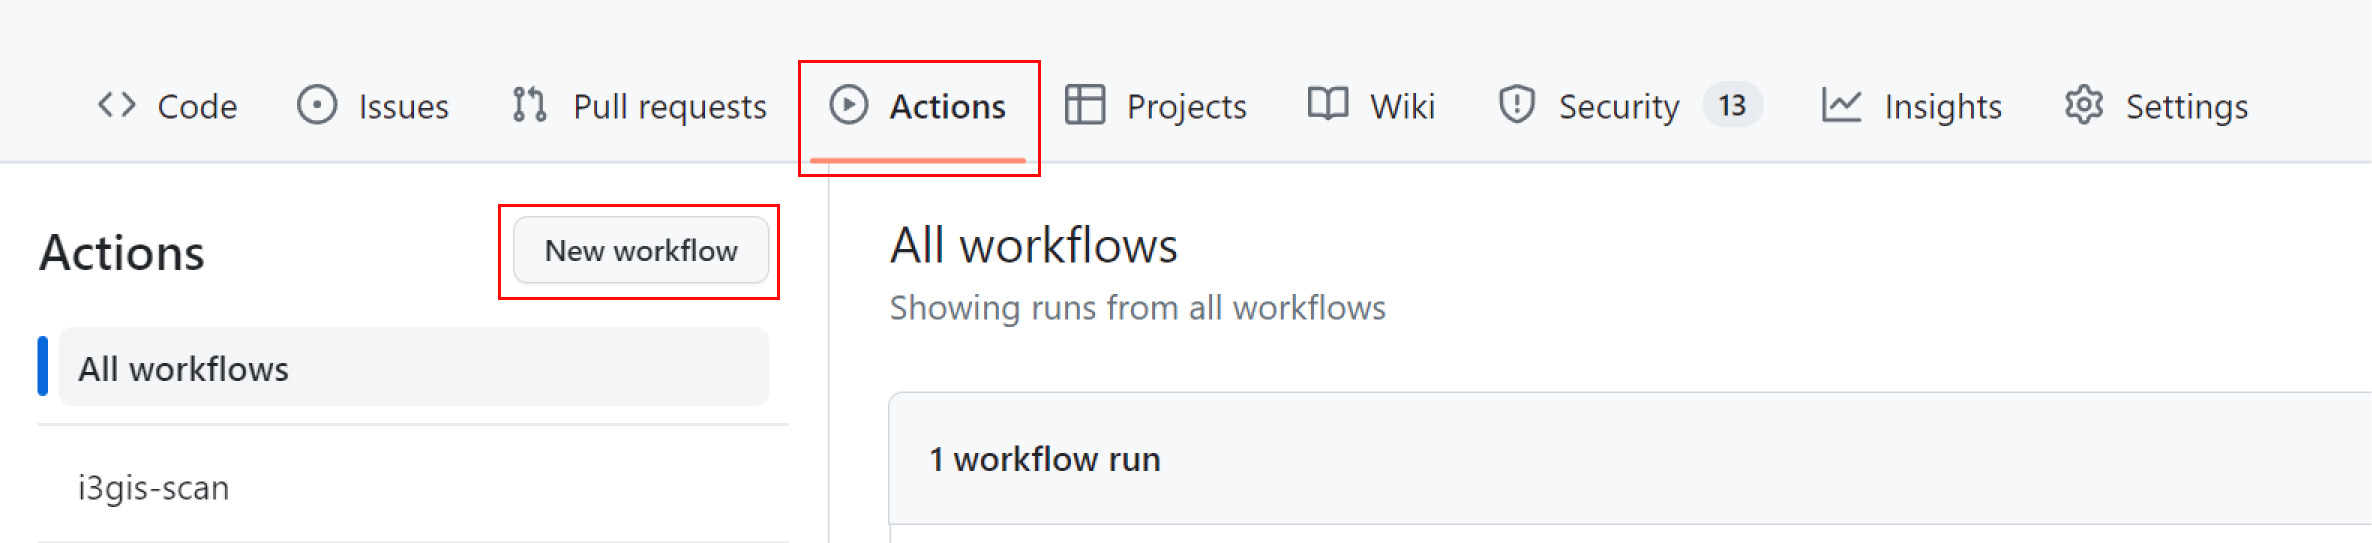
Integration Github (a)
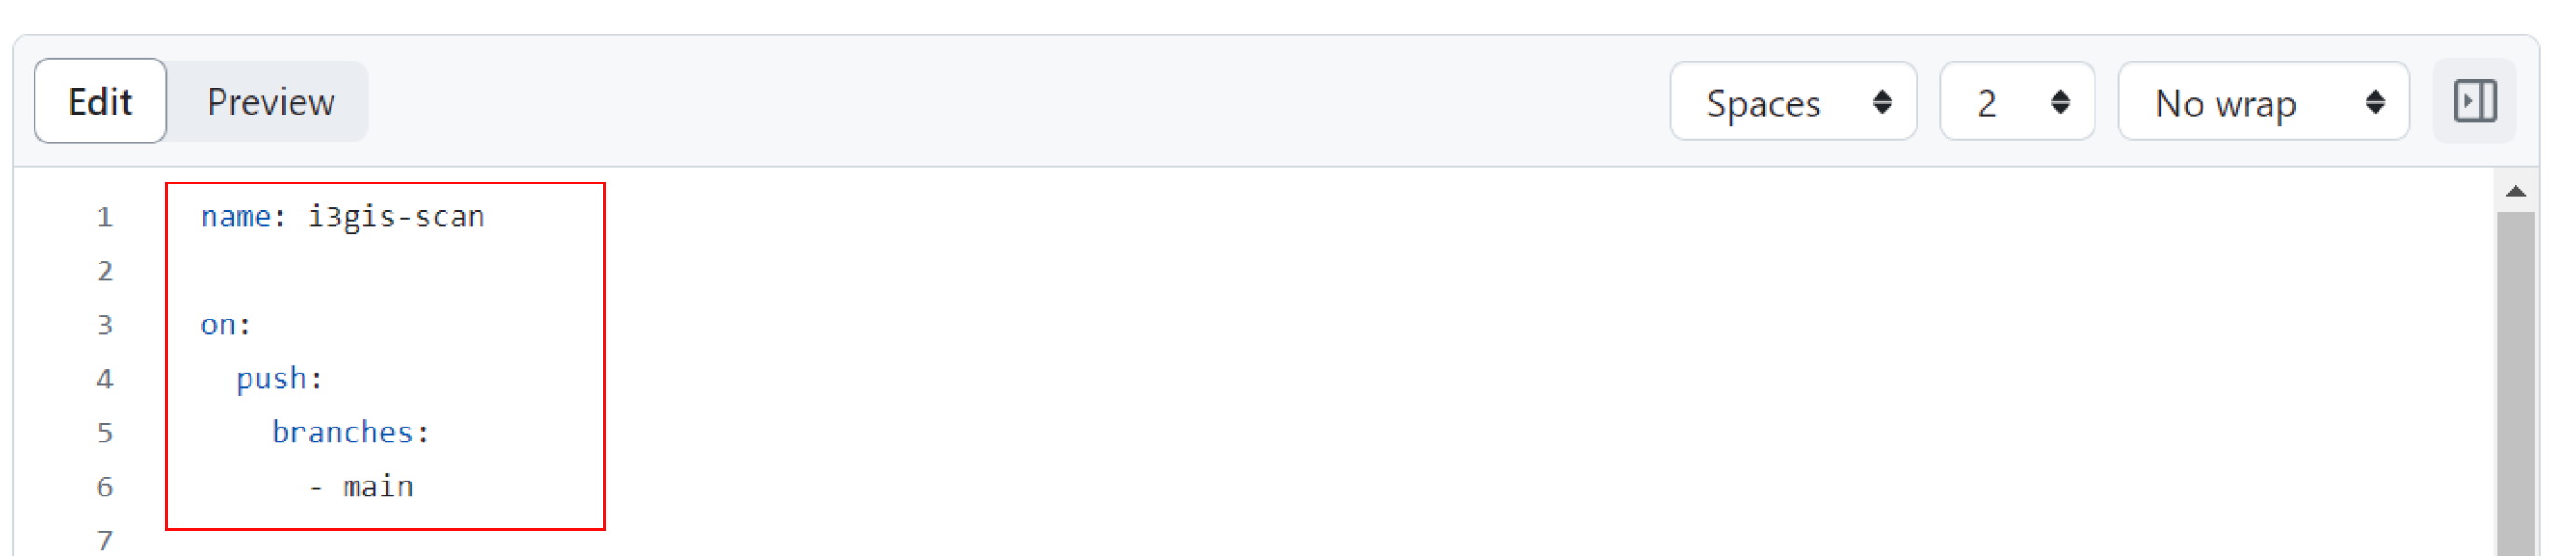
Integration Github (b)
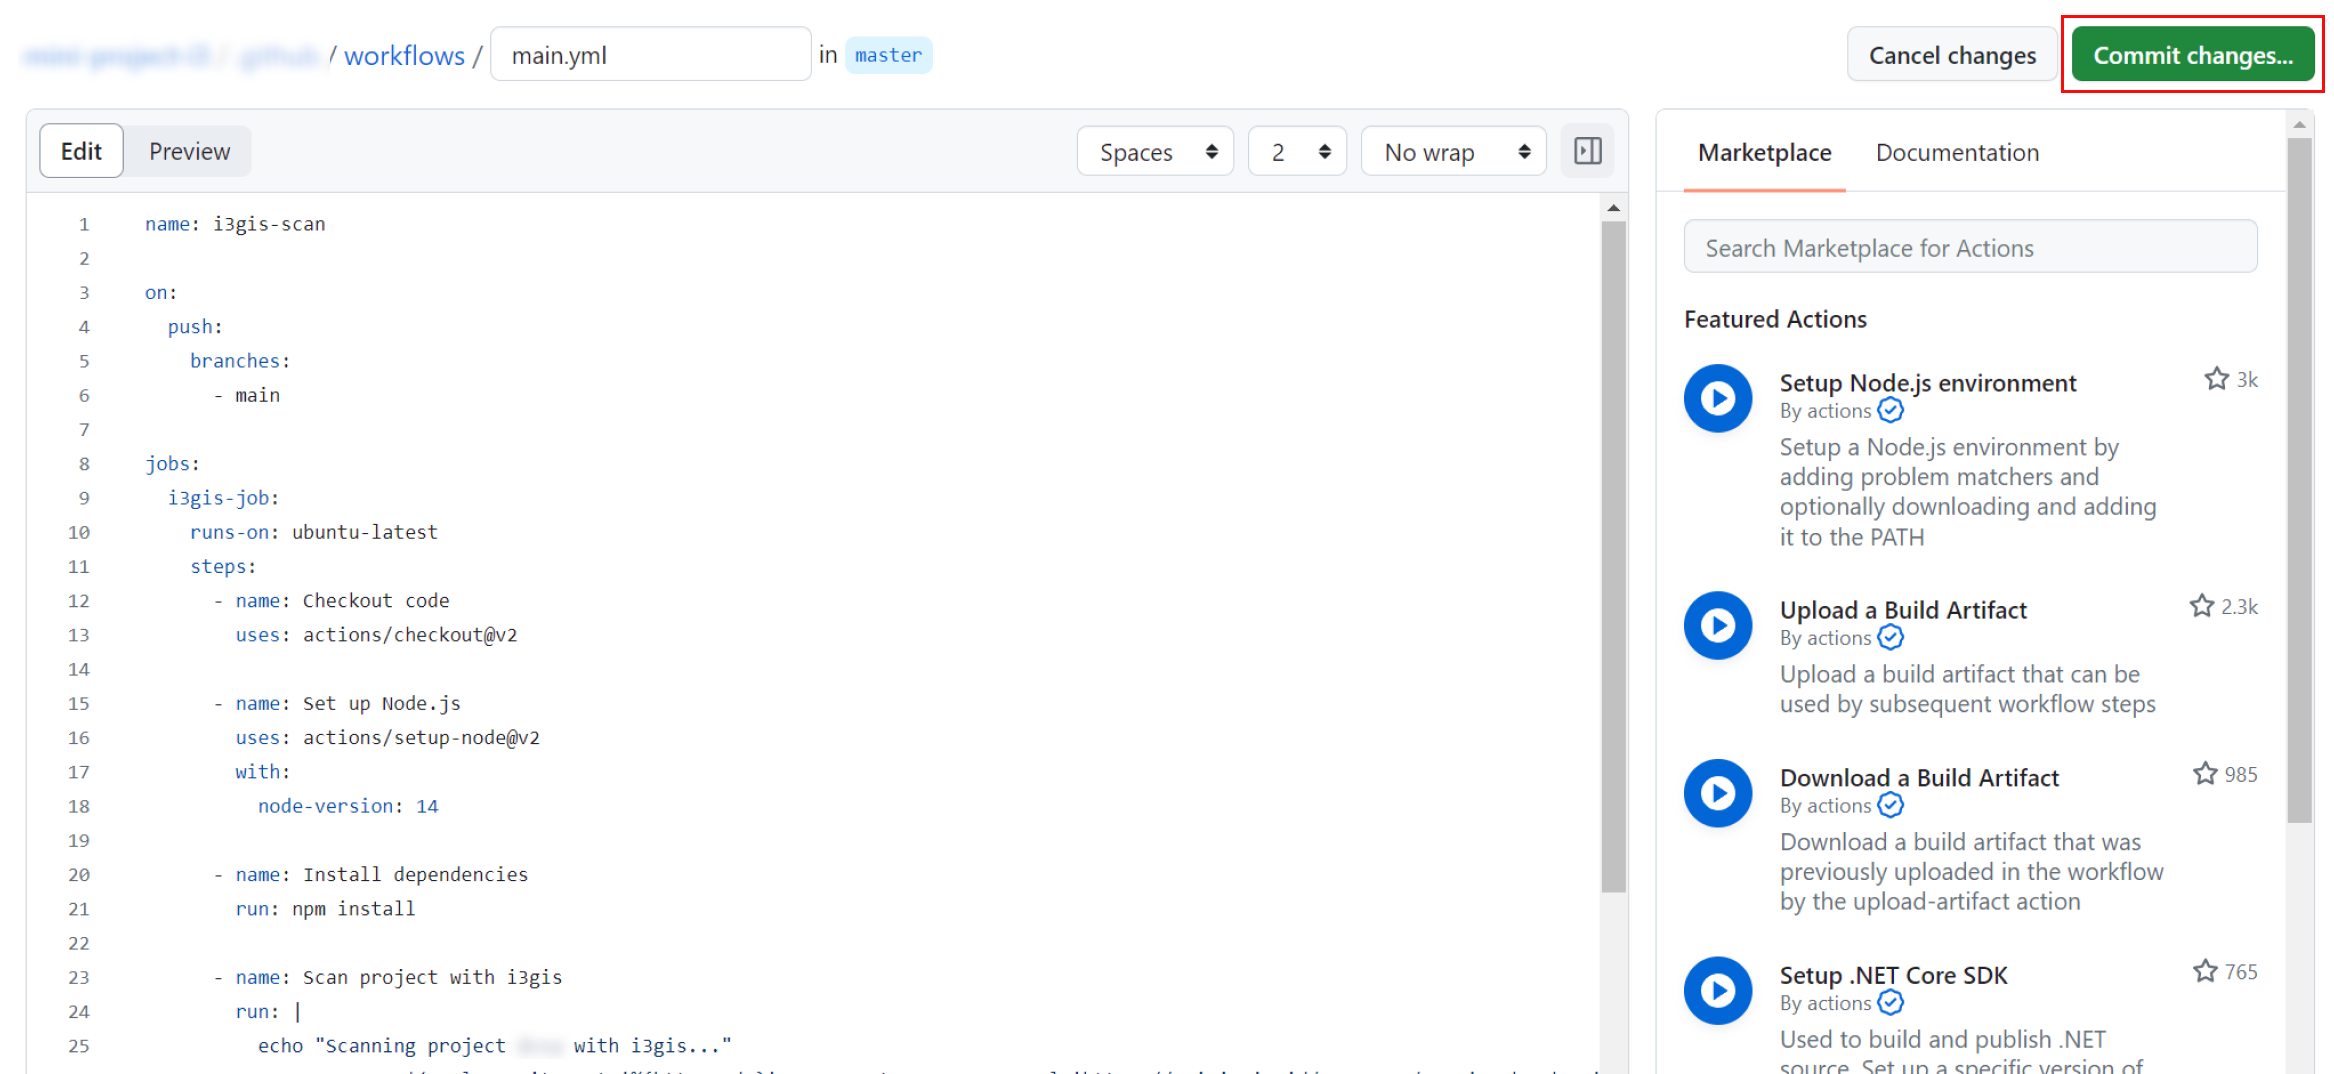
Integration Github (c)
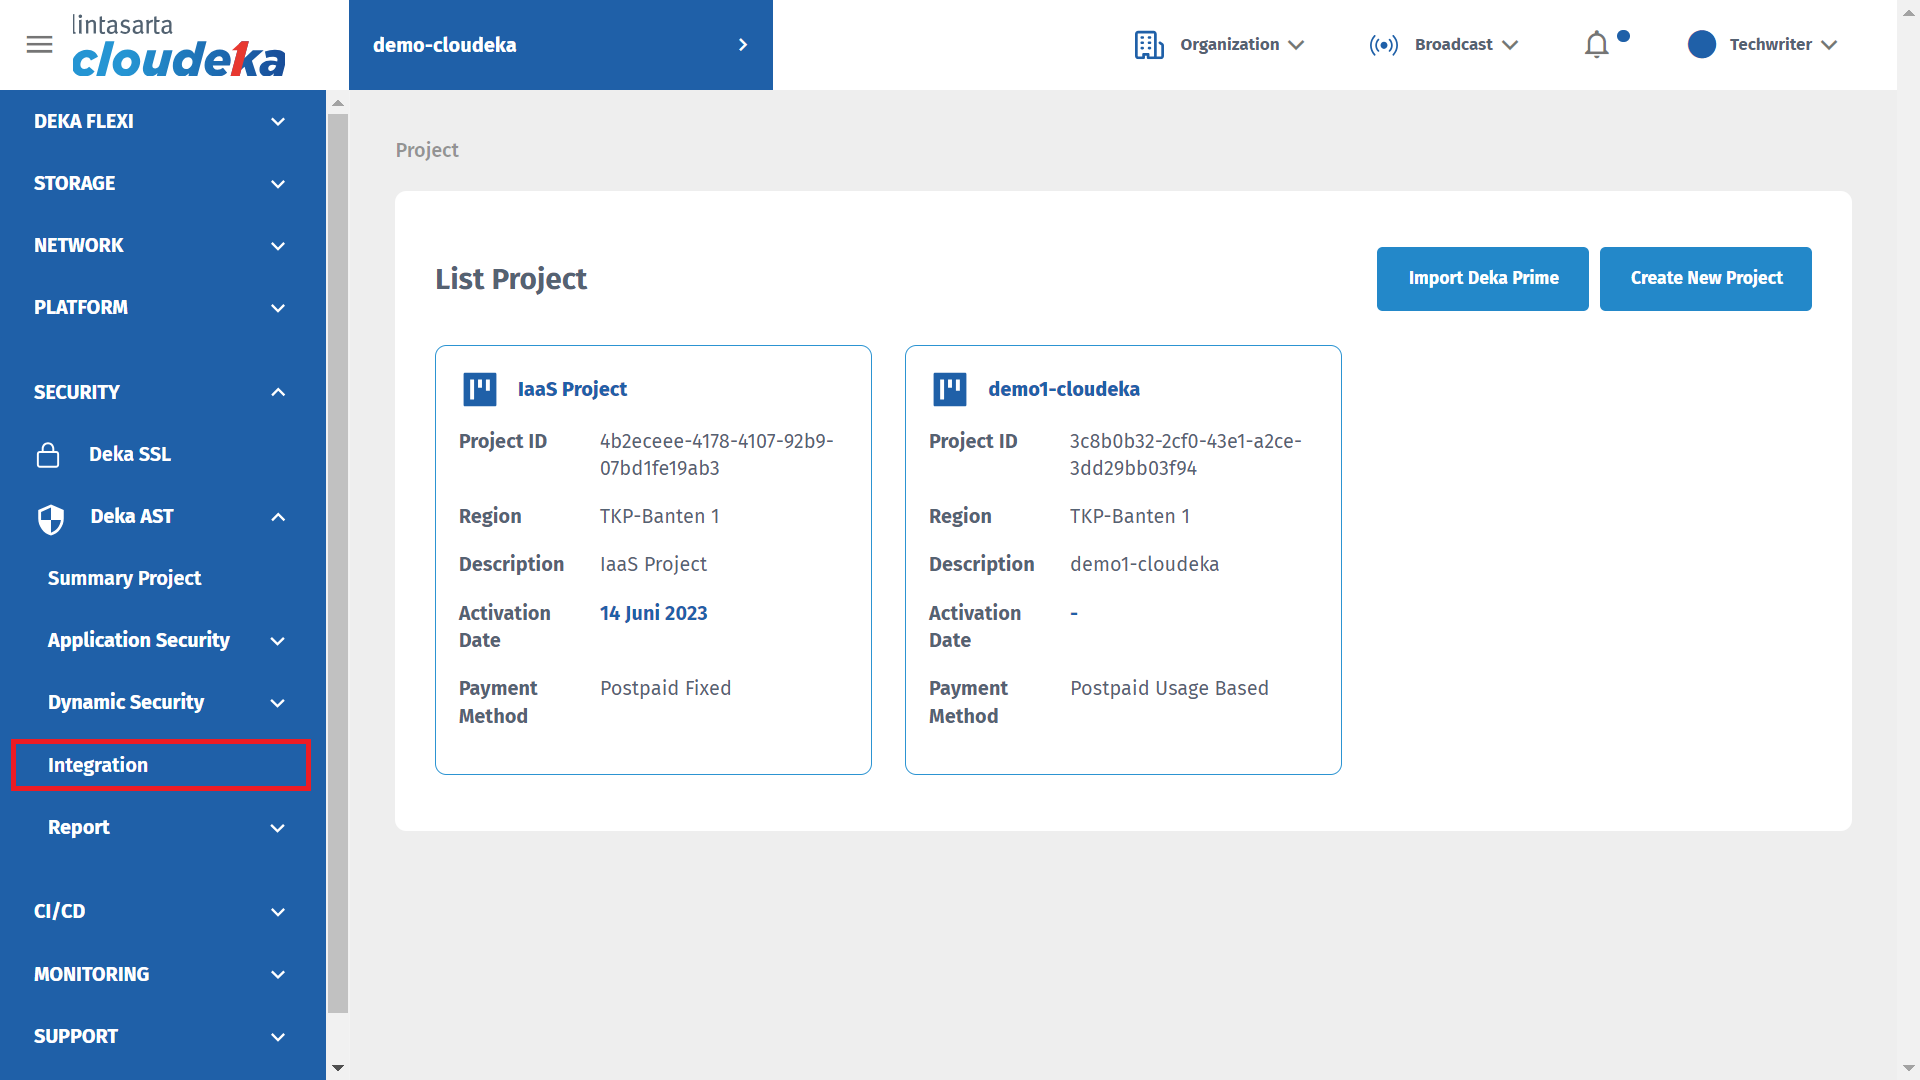
Integration Github (d)

SMTP
Add SMTP (a)
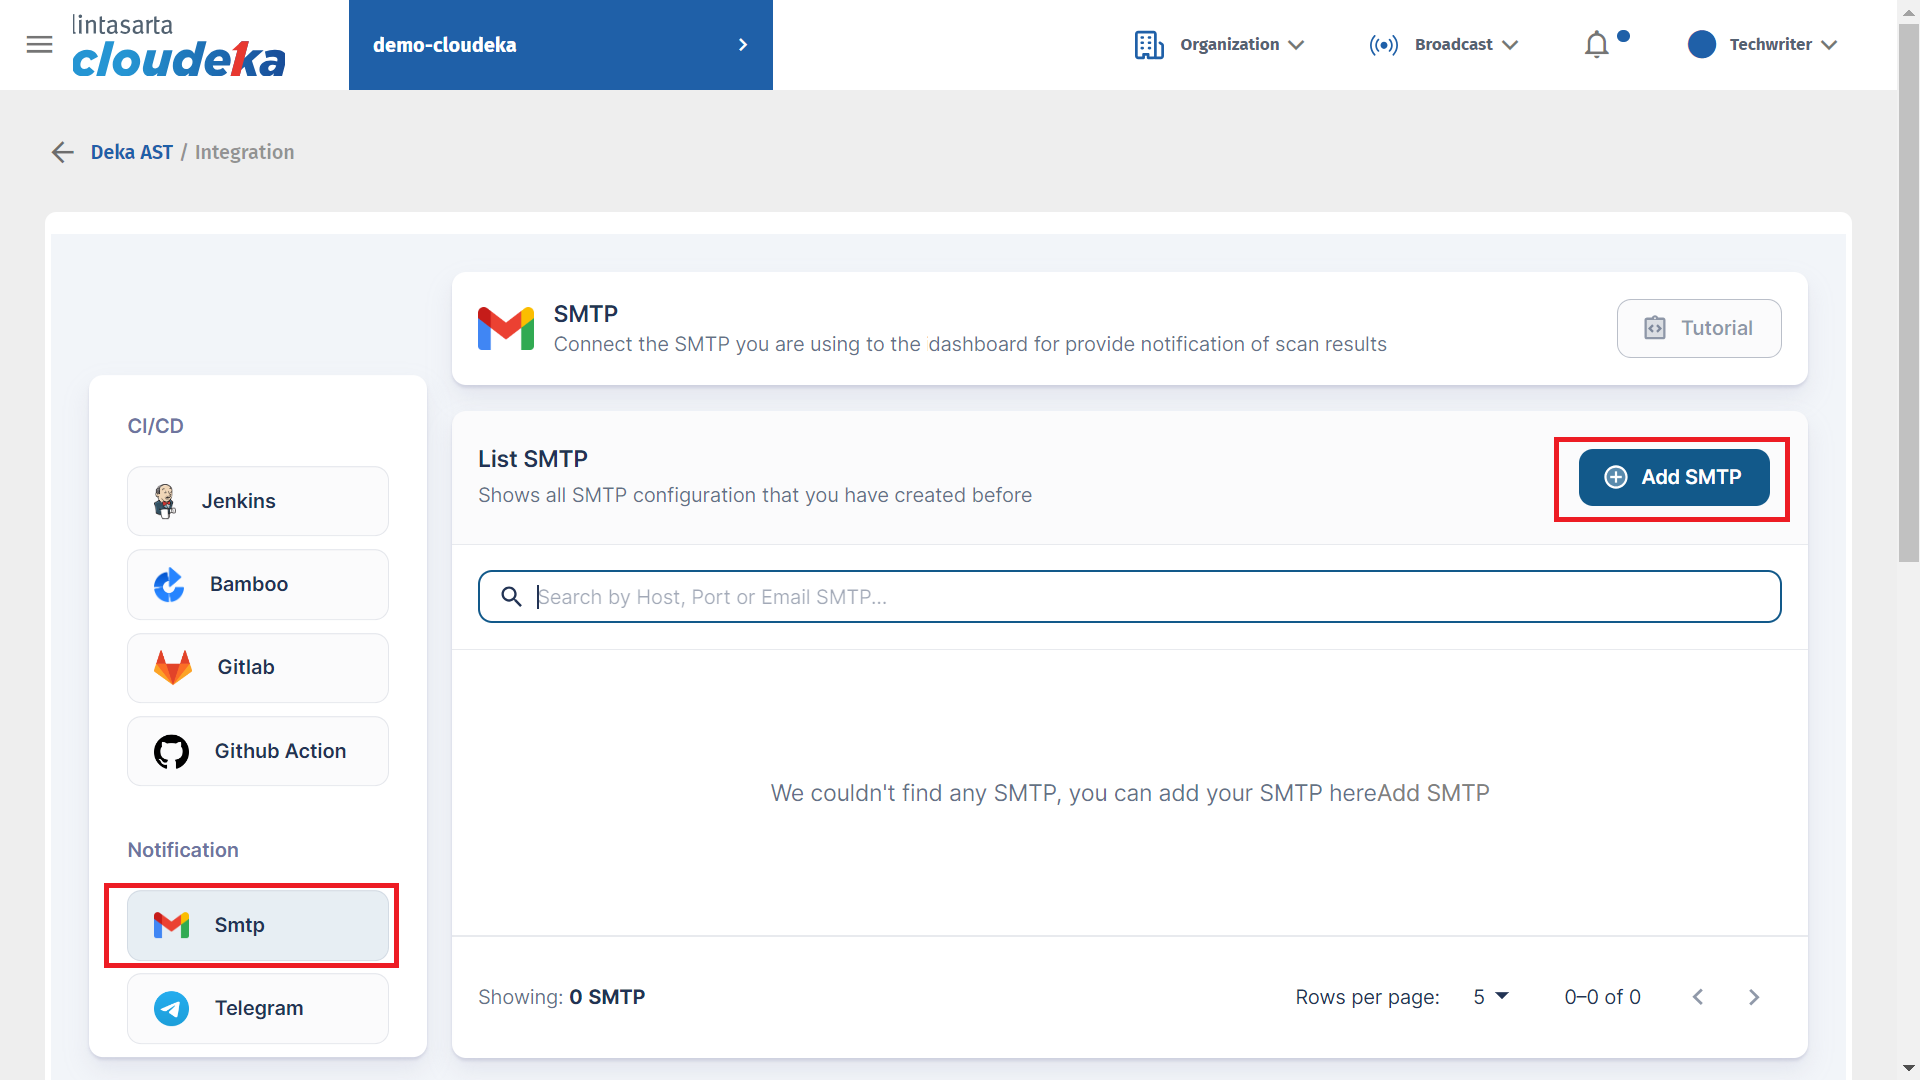
Add SMTP (b)
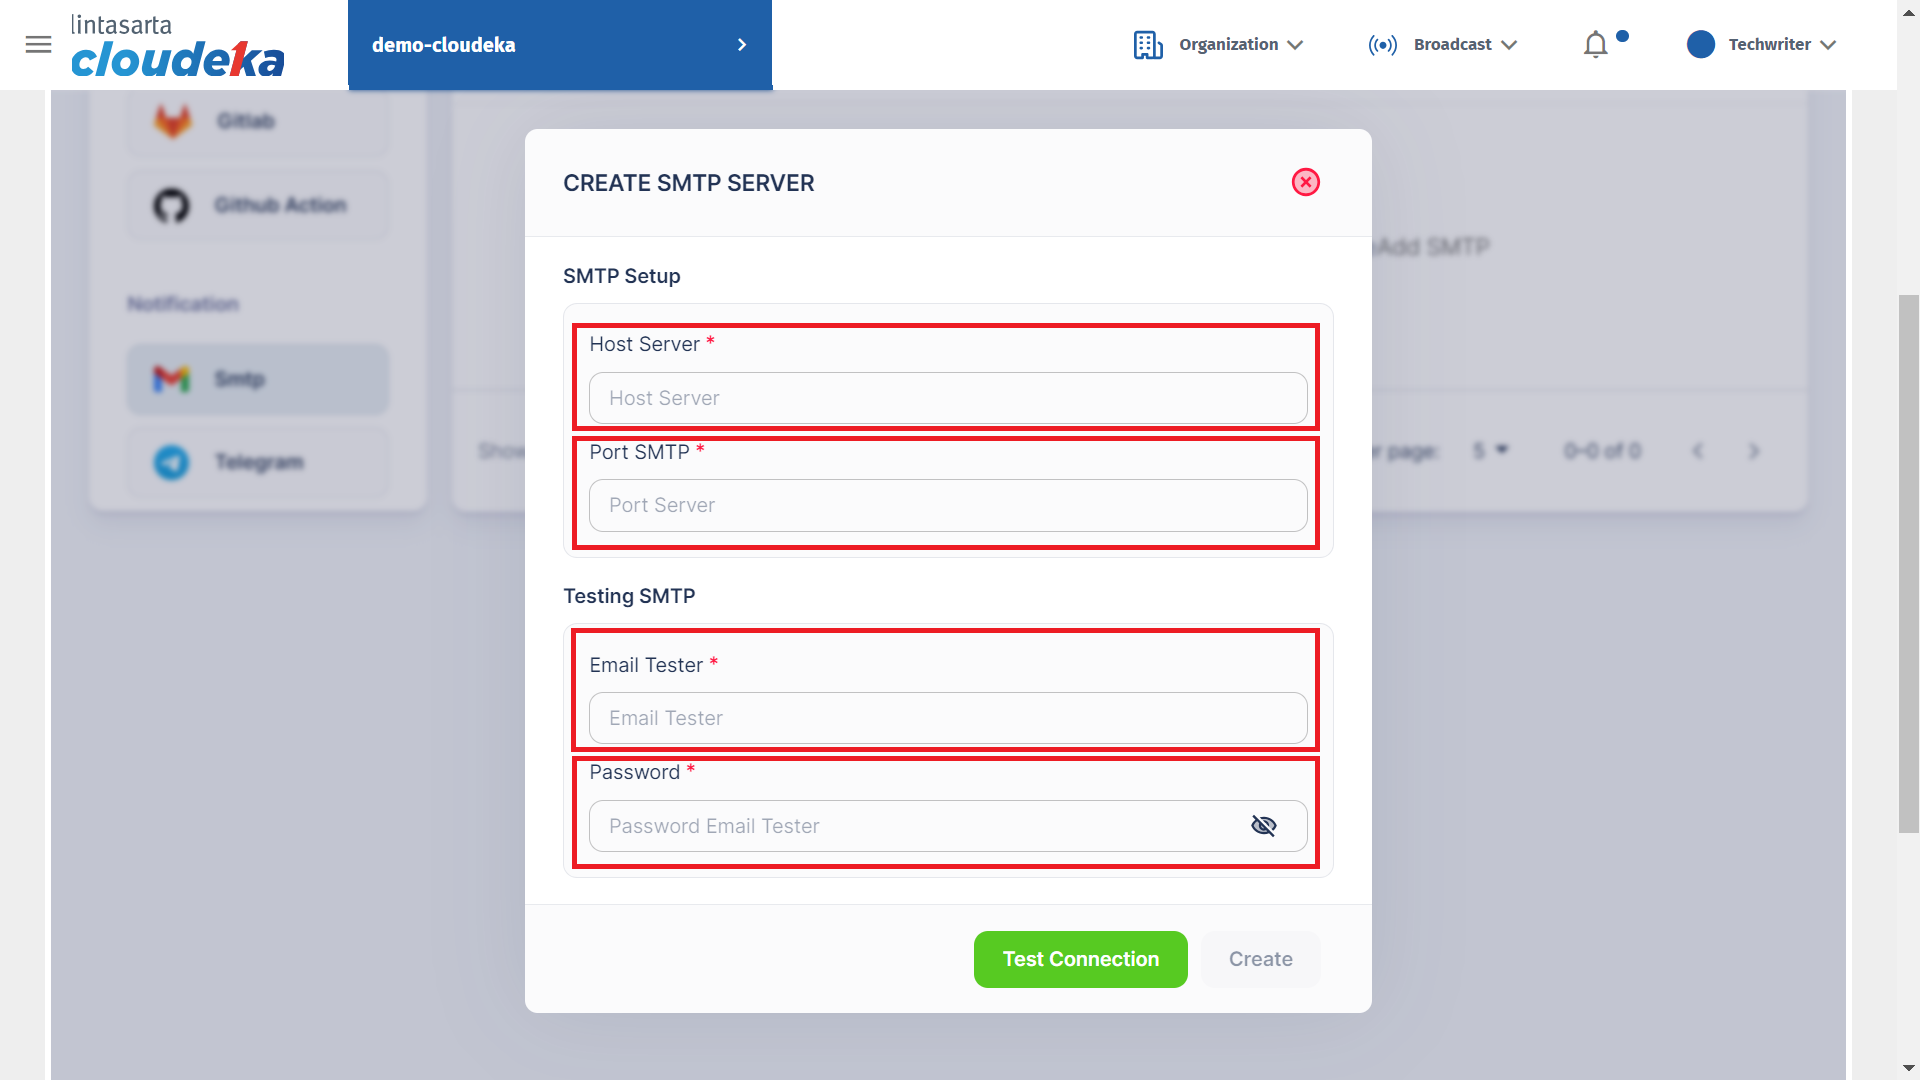
Add SMTP (c)

Telegram
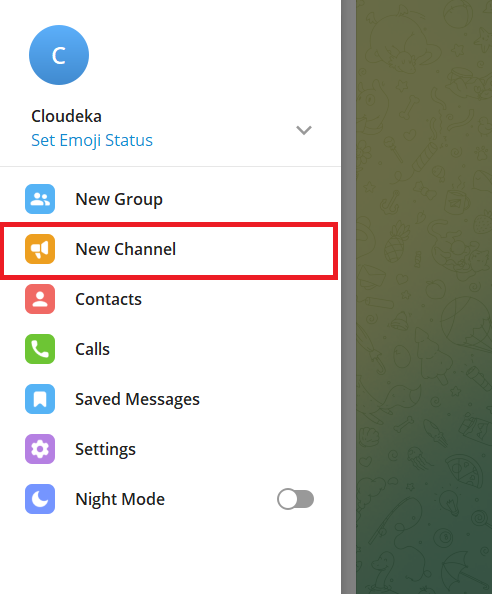
Create Bot (a)
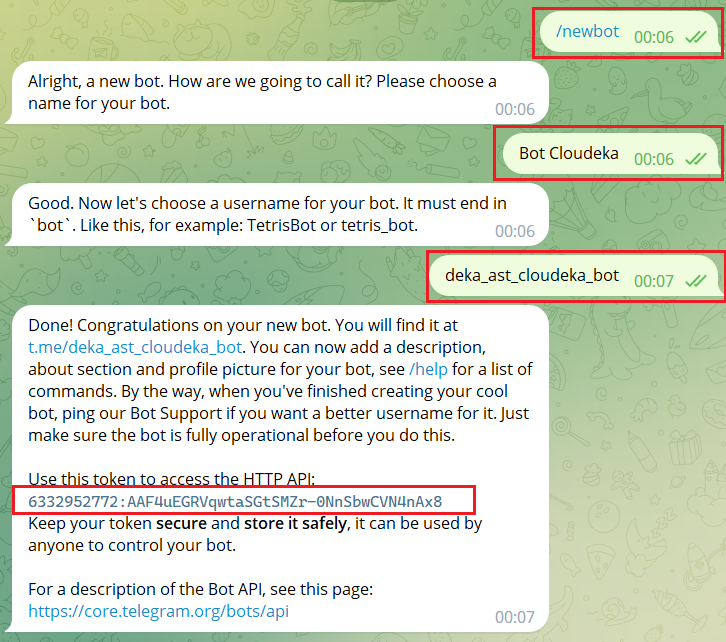
Create Bot (b)
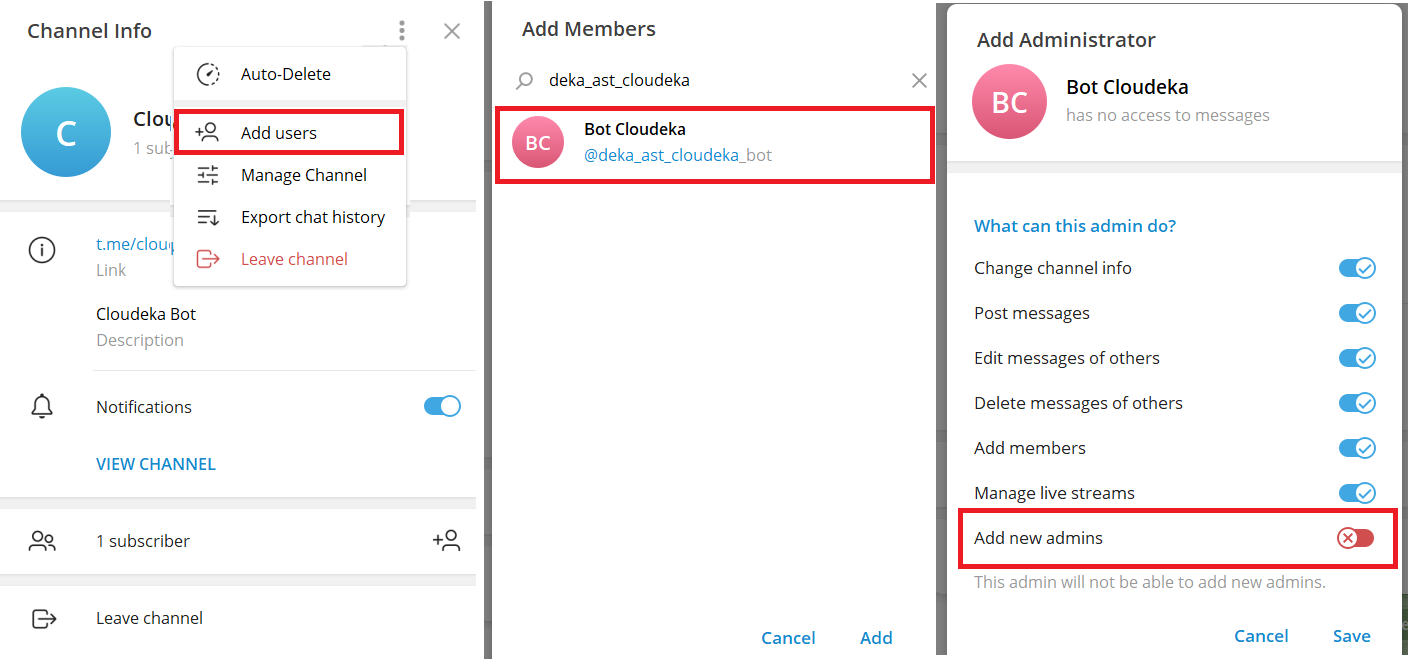
Create Bot (c)

Create Bot (d)
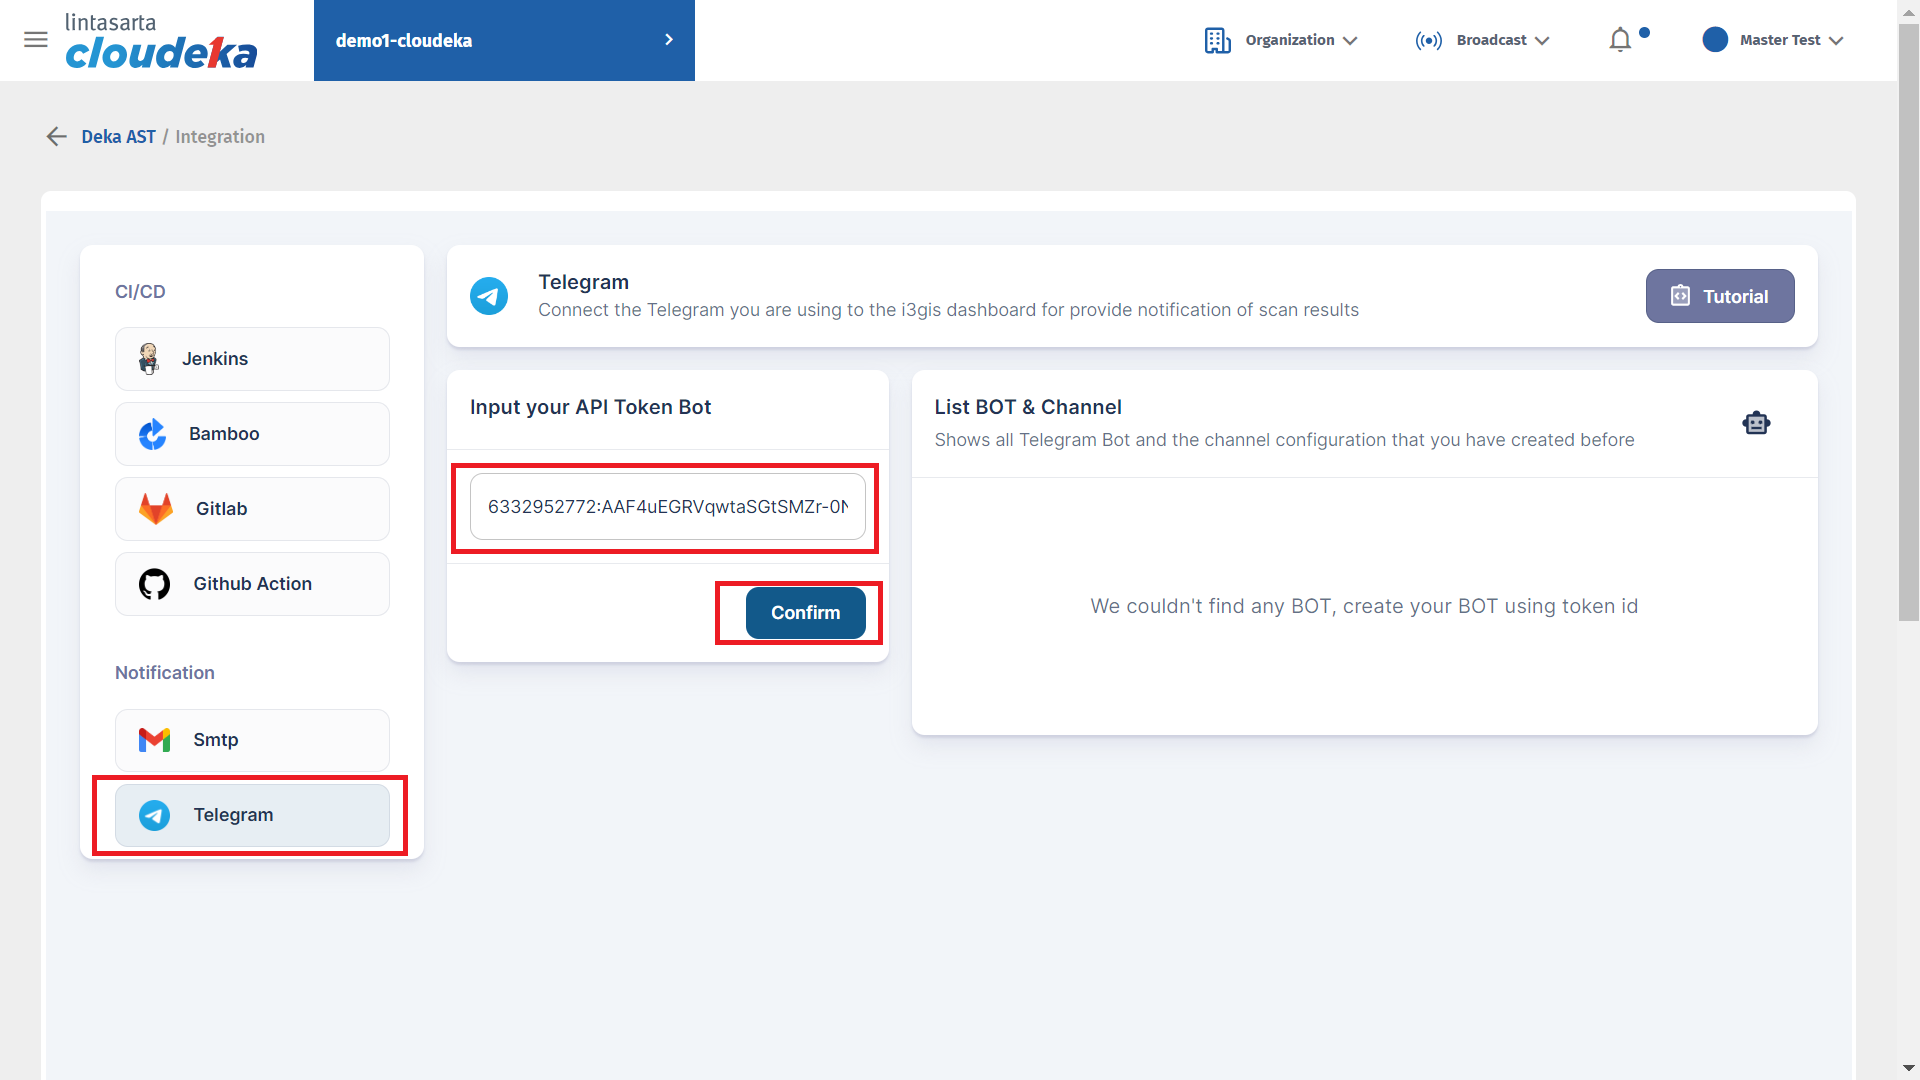
Create Bot (e)
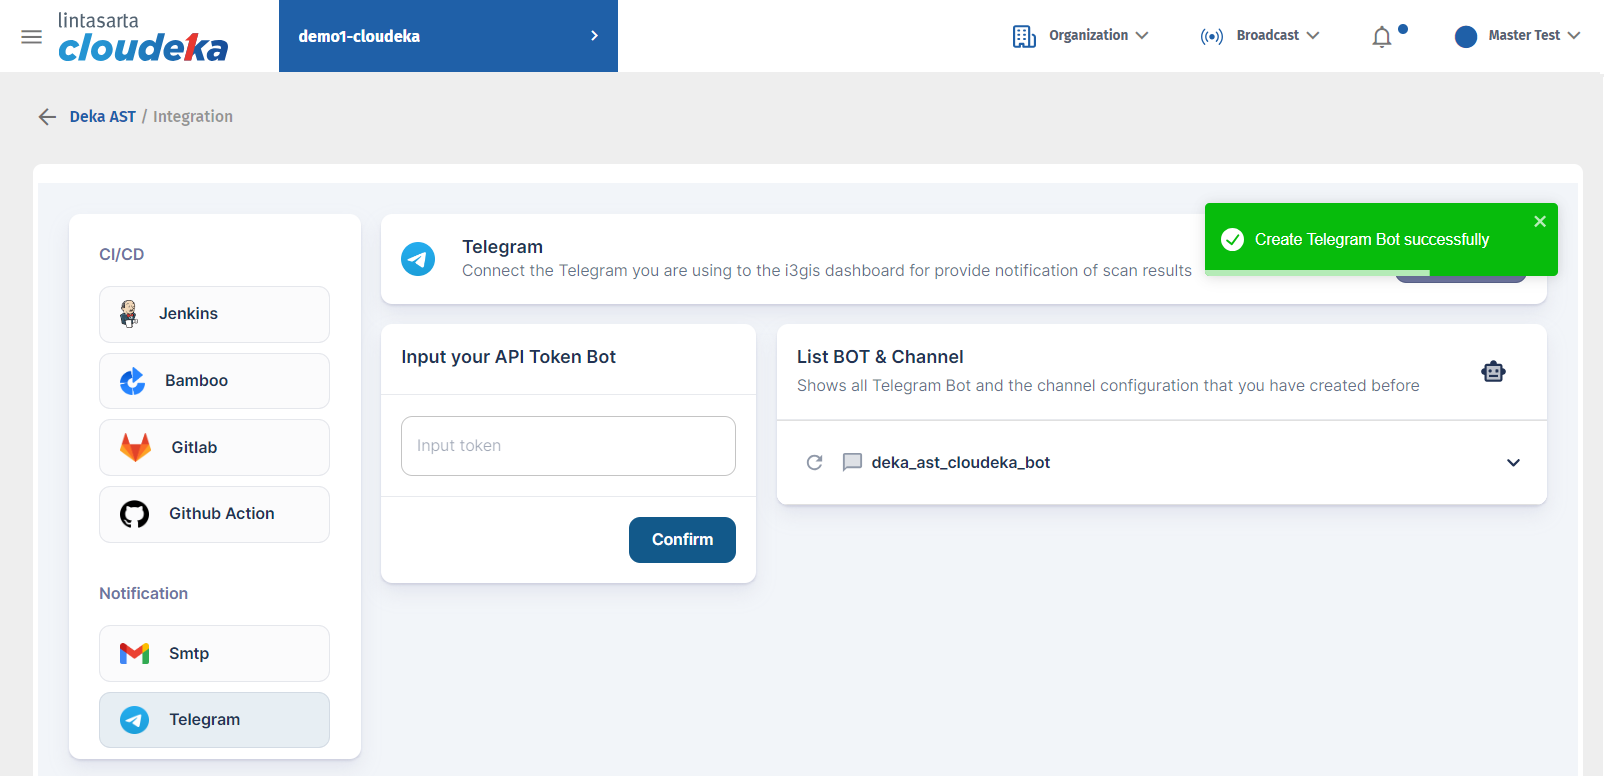
Create Bot (f)