
Network Page - Floating IP
Network Page - Floating IP

Network Page - Floating IP - Floating IP Type

Network Page - Floating IP - Billing Type
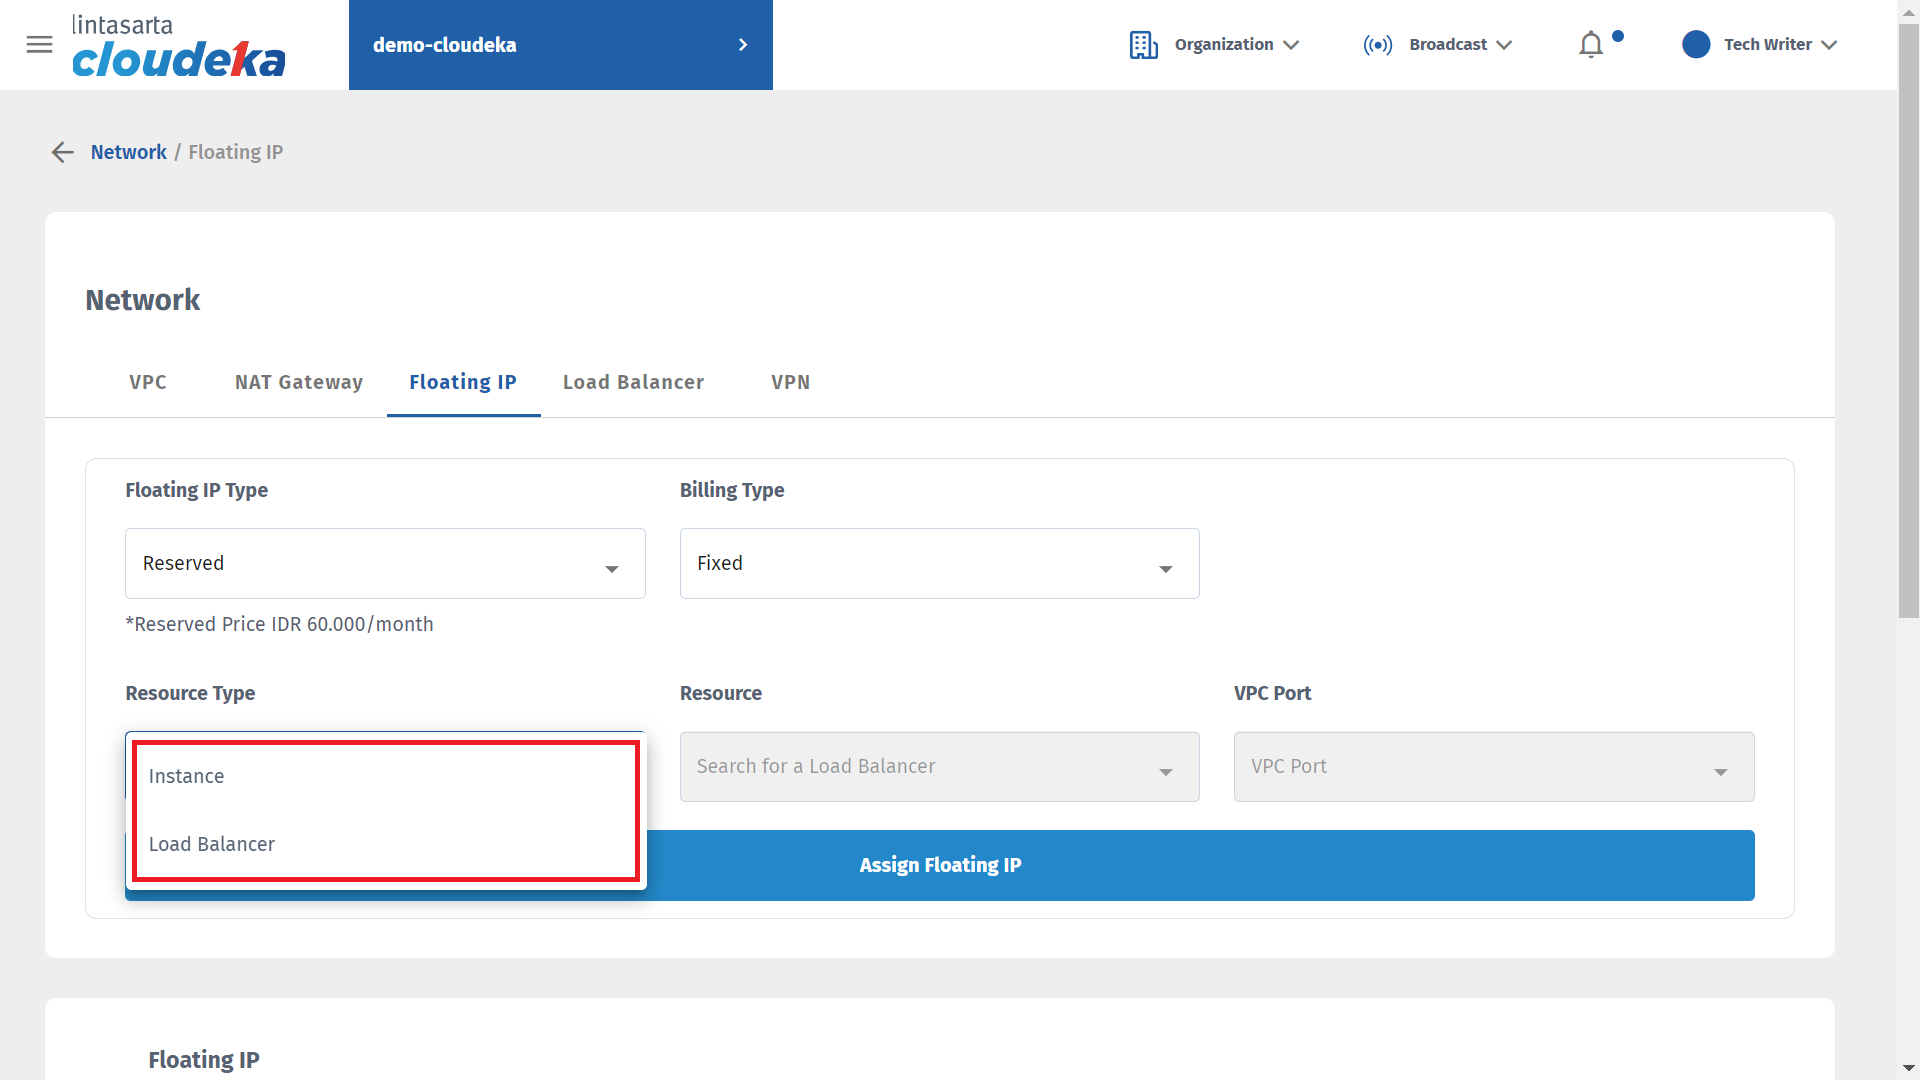
Network Page - Floating IP - Resource Type
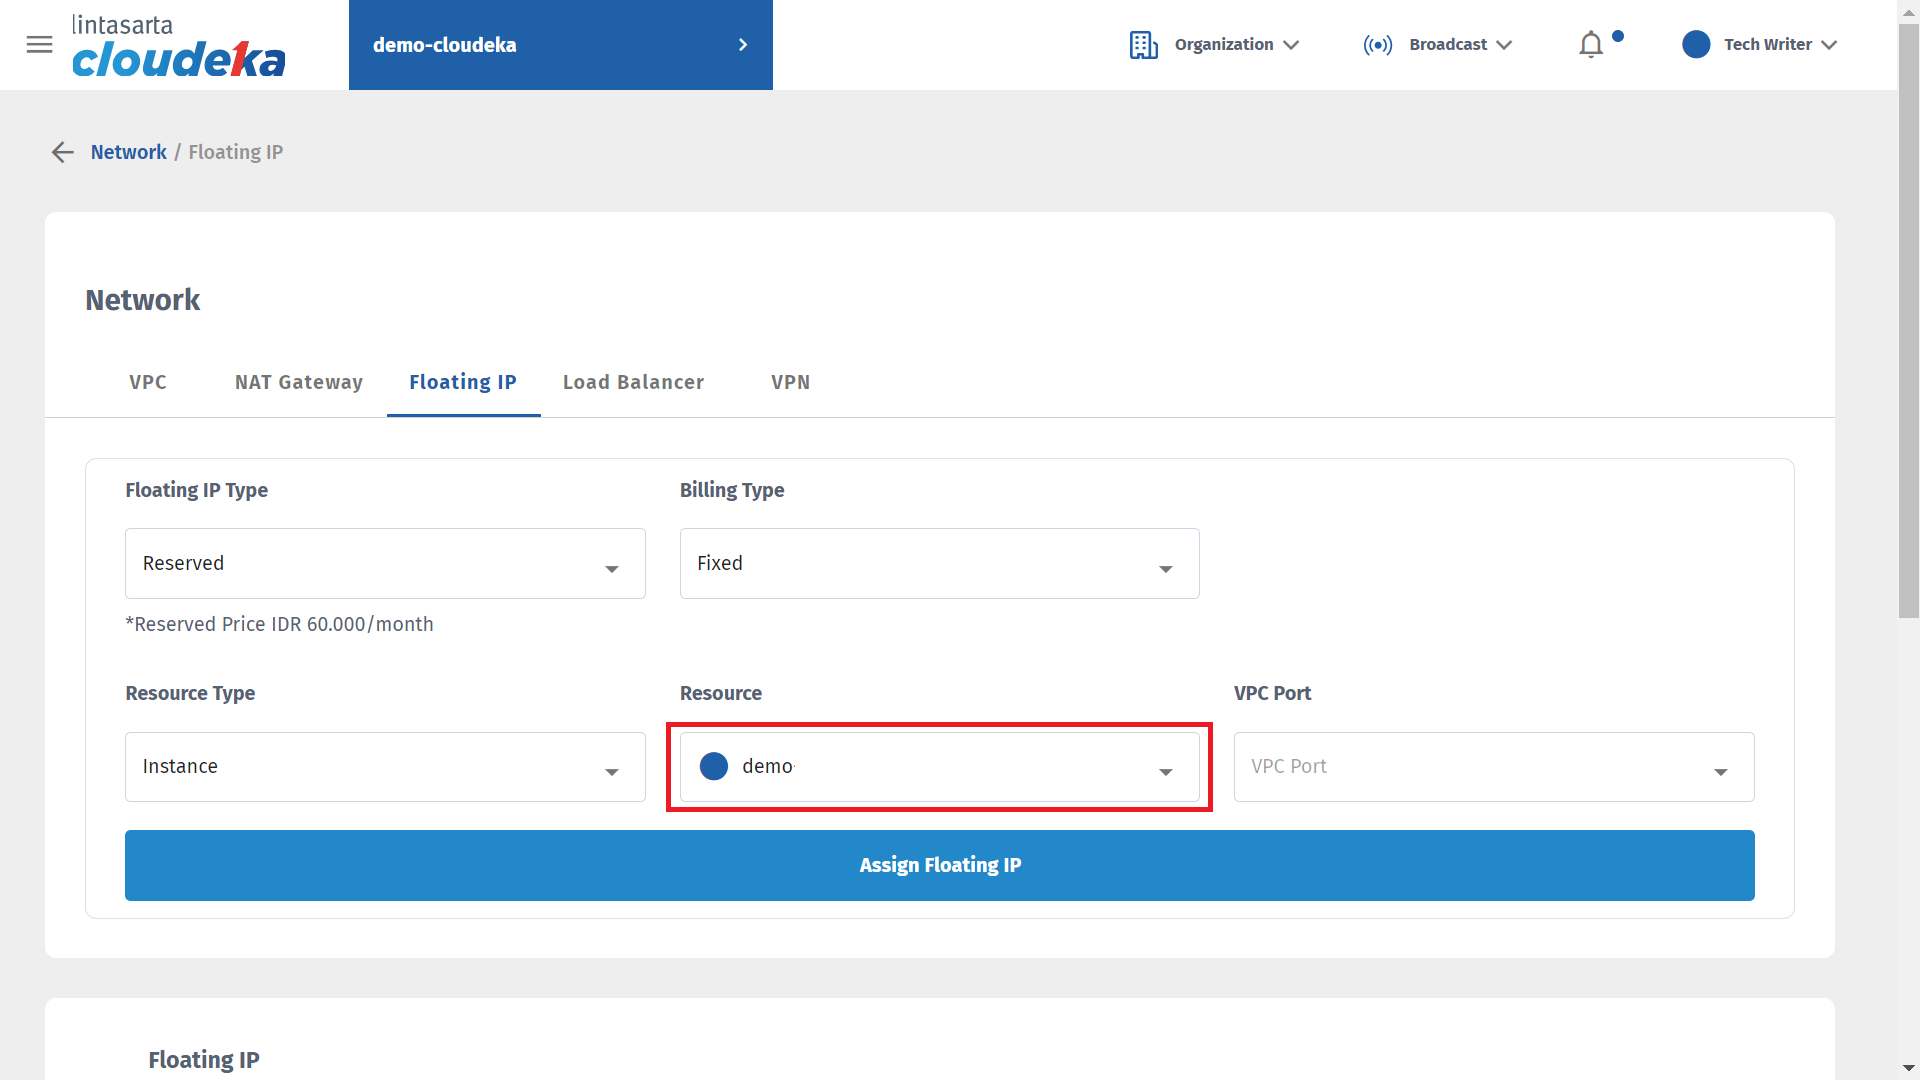
Network Page - Floating IP - Resource

Assign Floating IP
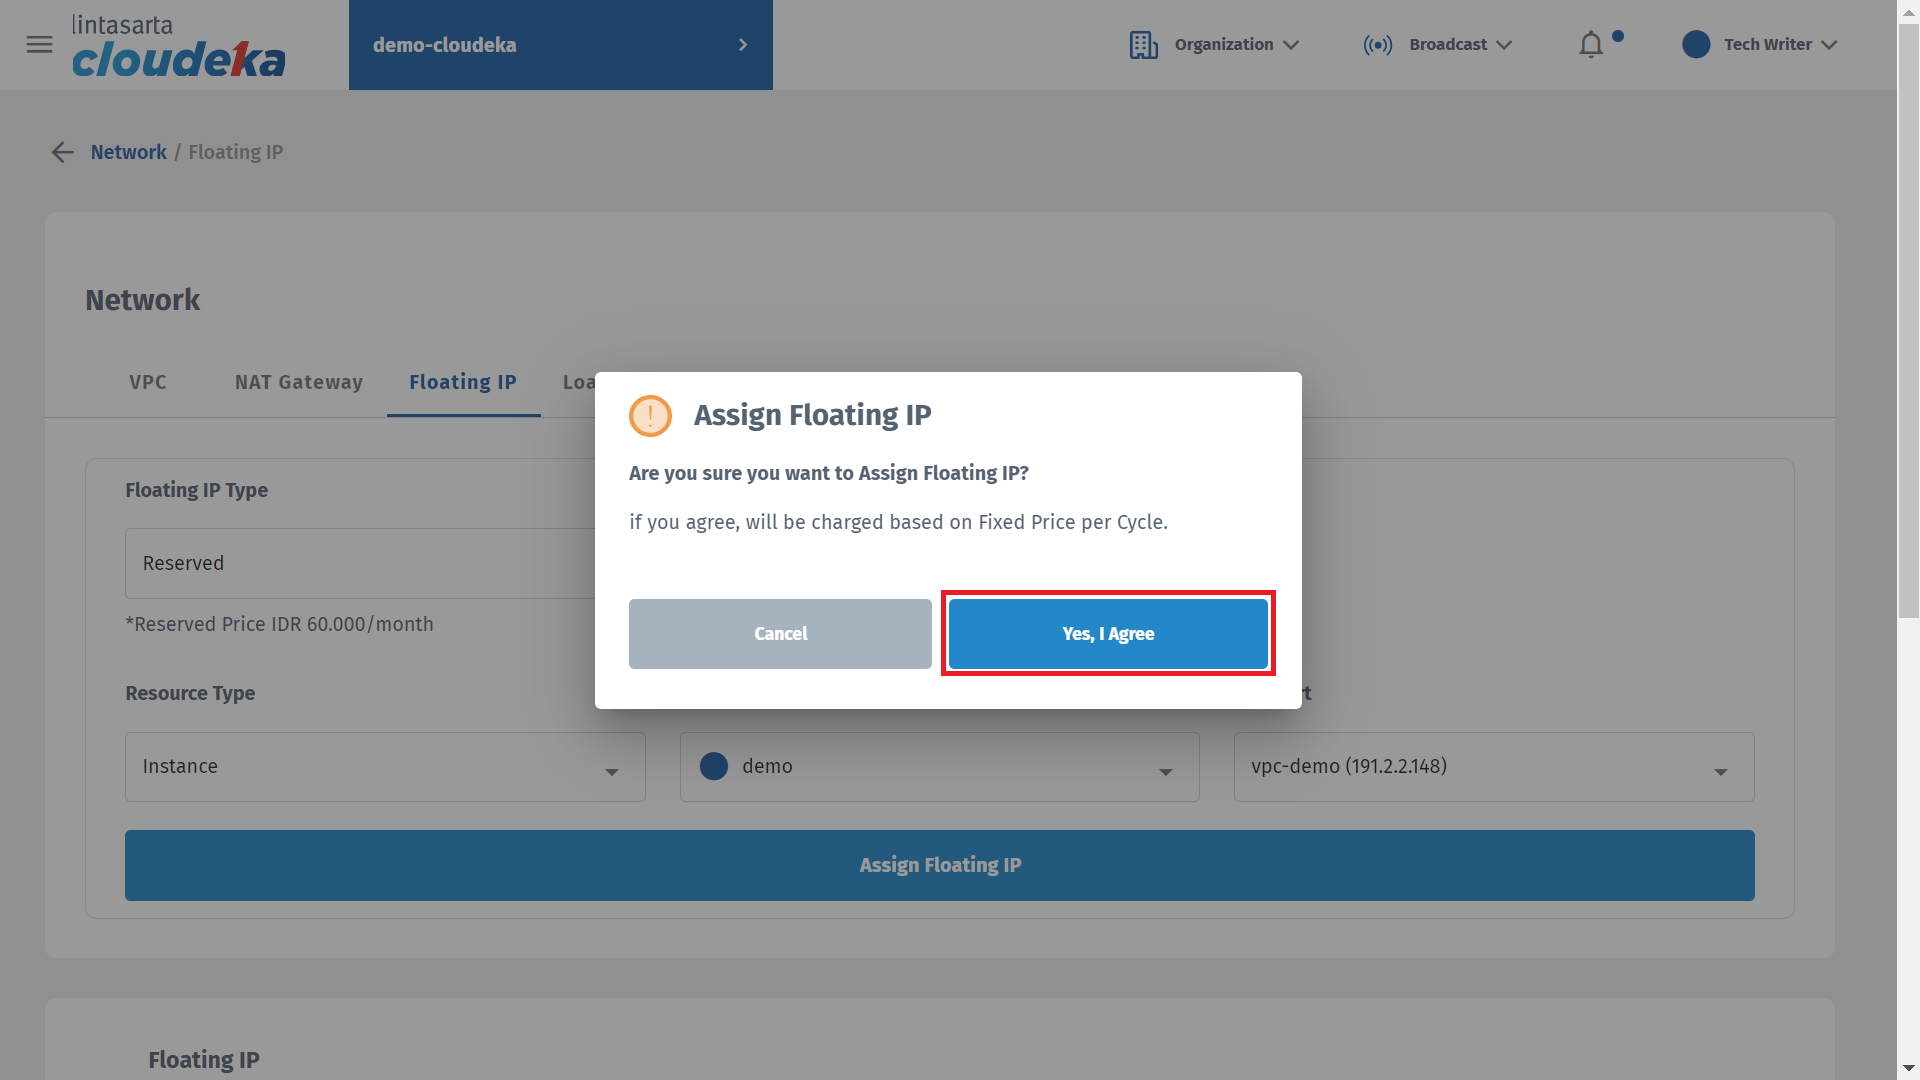
Assign Floating IP
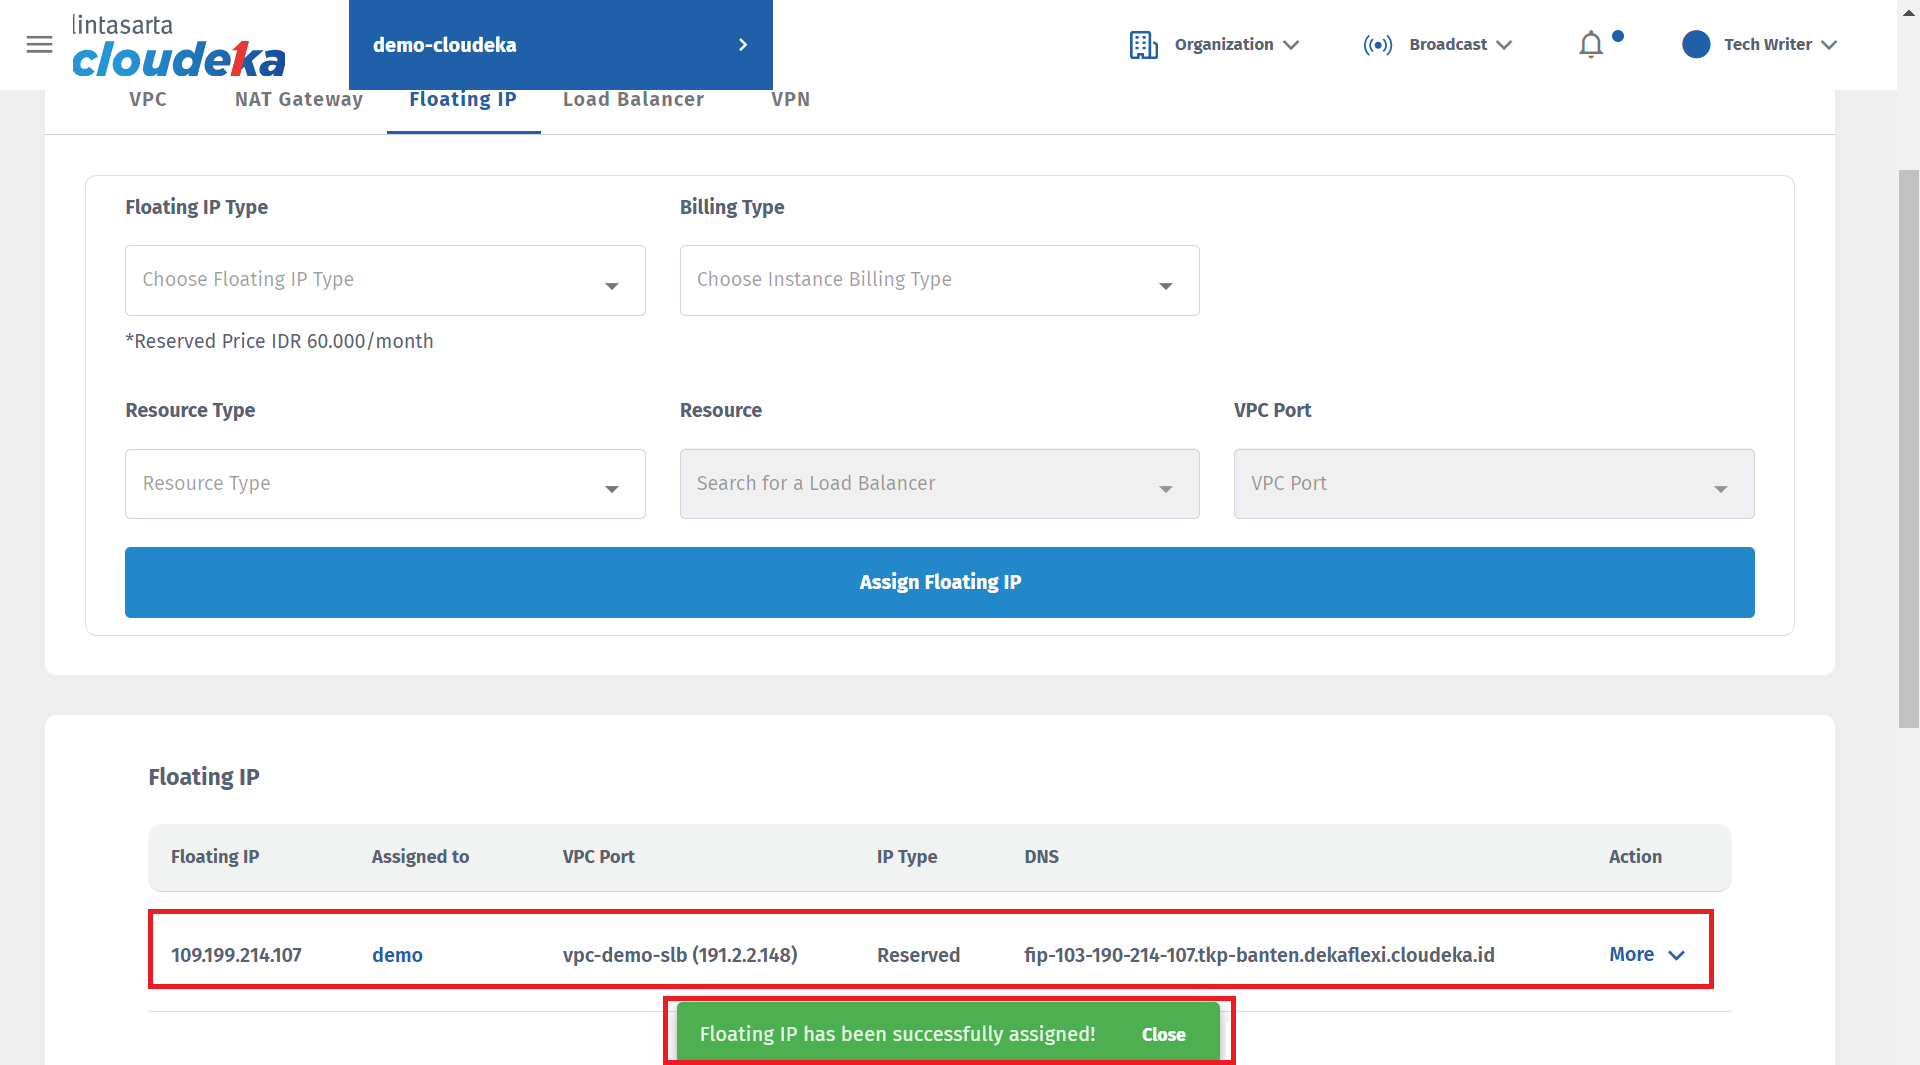
Network Page - Floating IP List