Connect IPsec
Here are the steps to create IPsec:
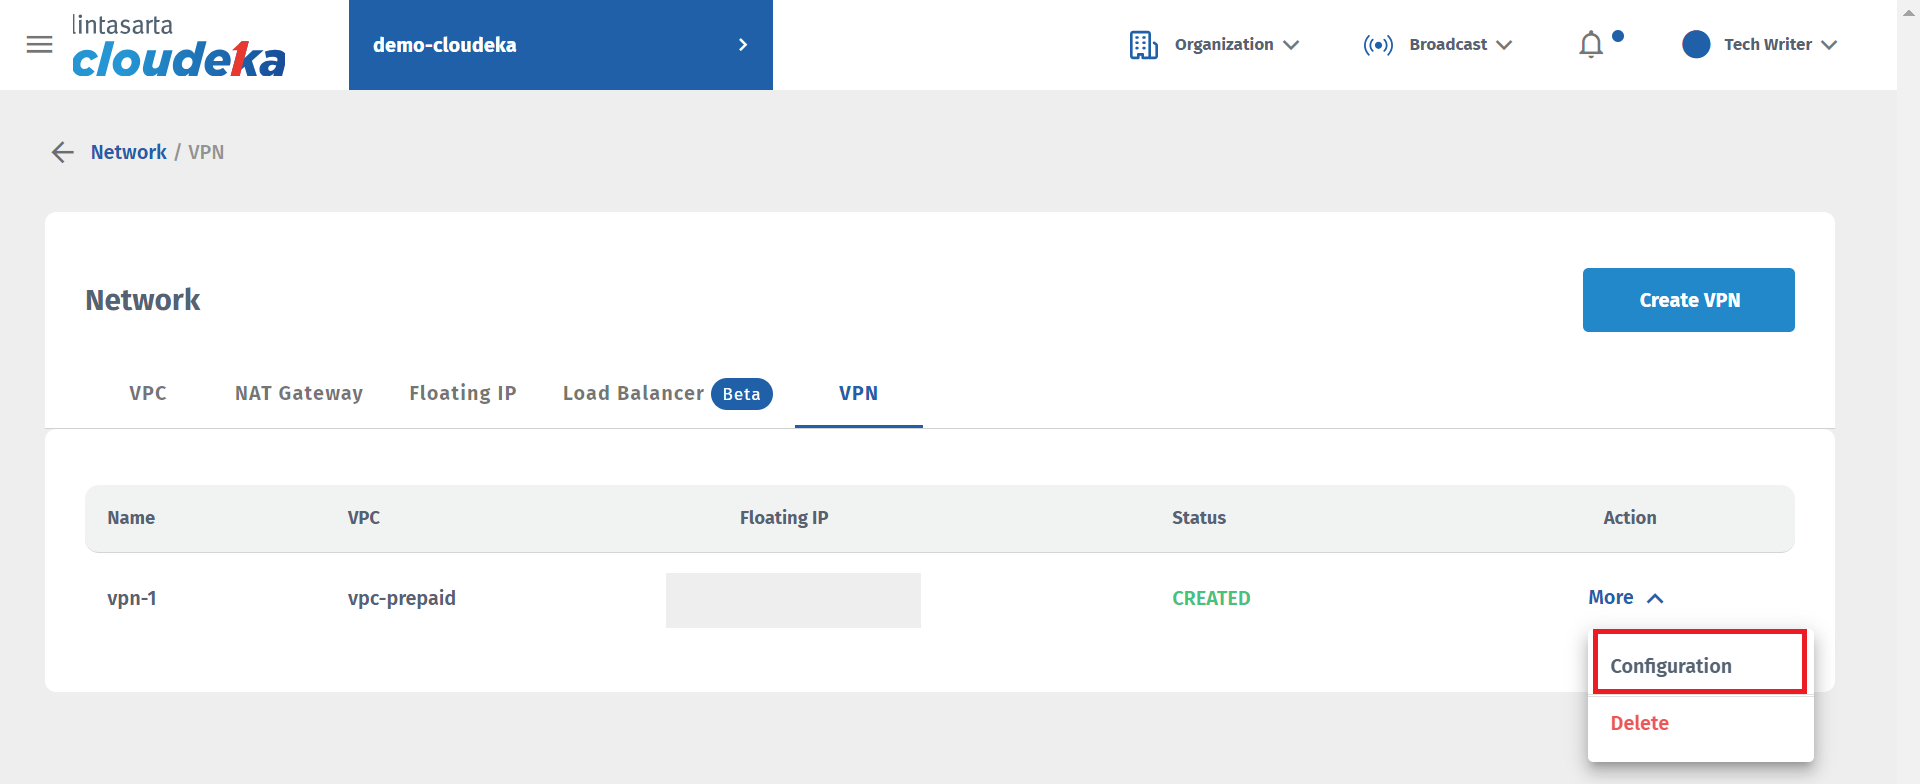
On the Network page, select the VPN tab, select Configuration in the More column.

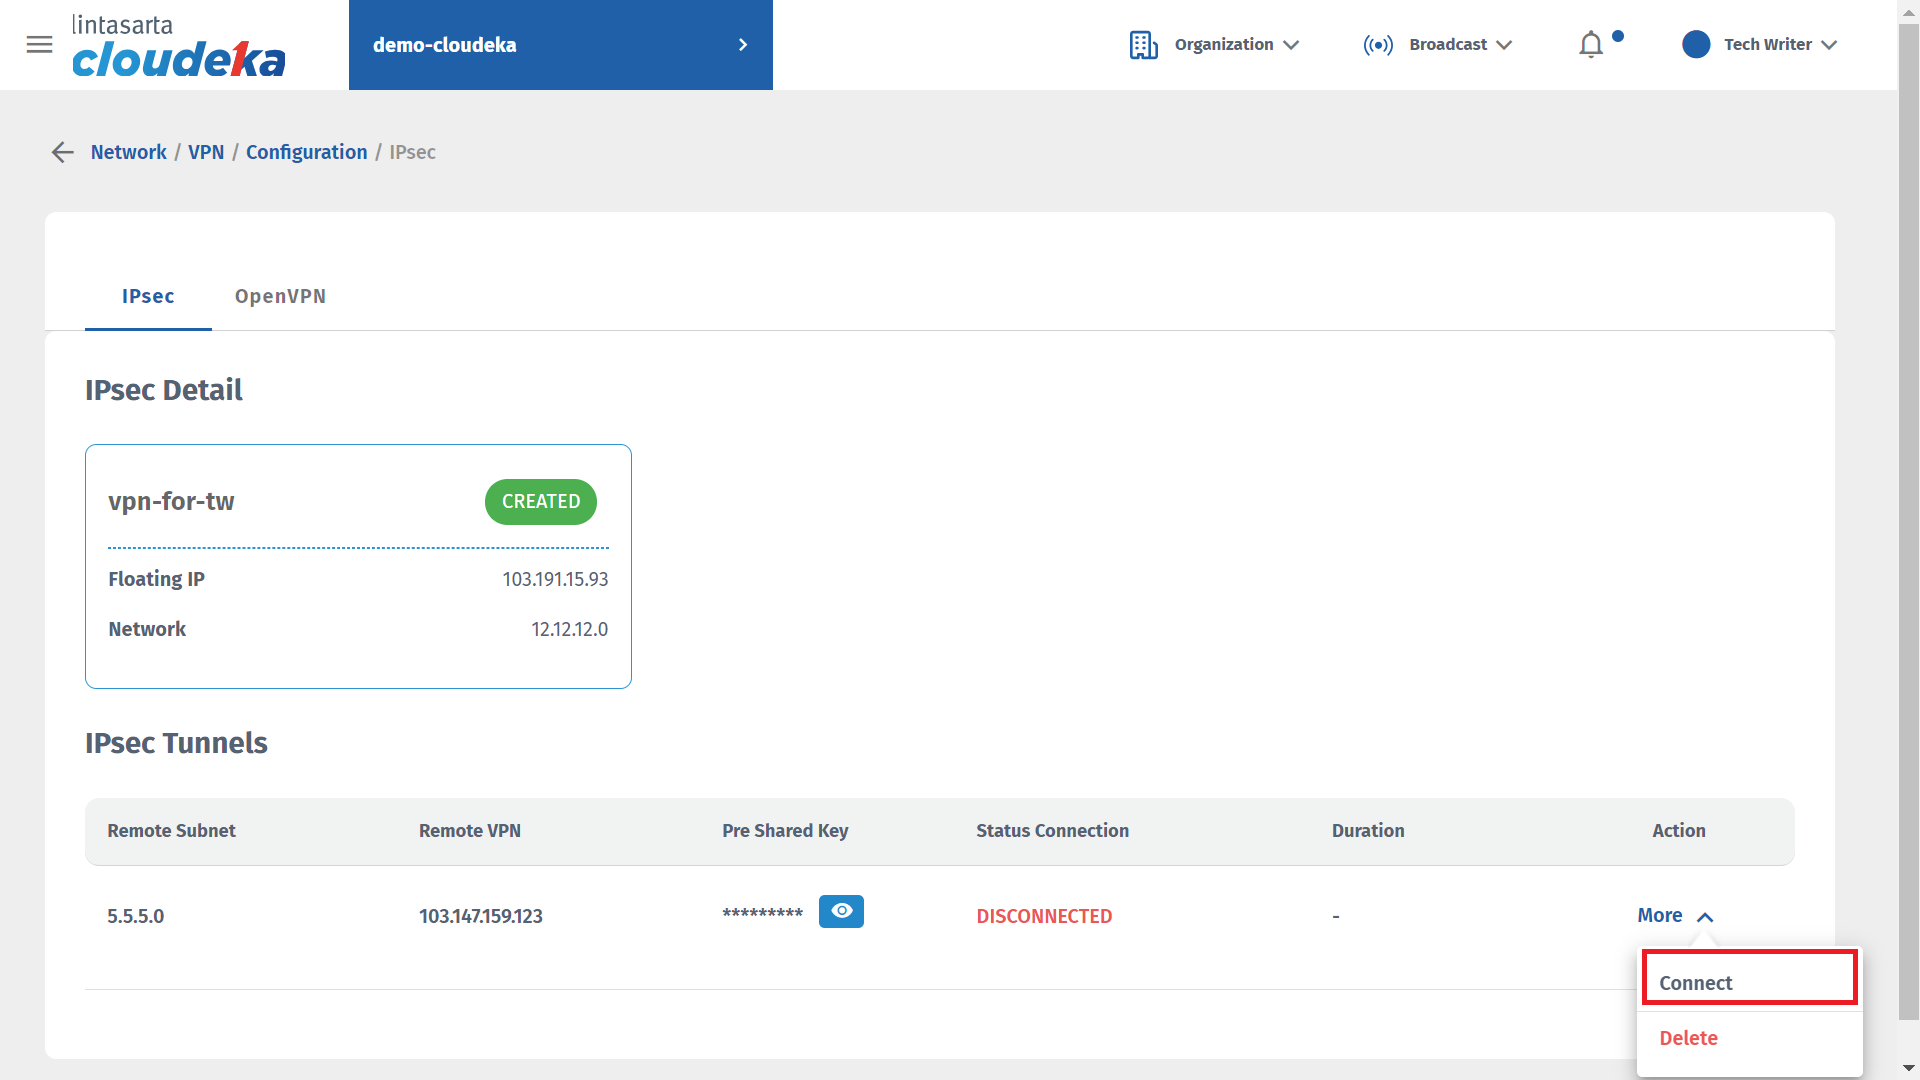
In the IPsec Tunnels section on the IPsec page, click the More button, and select Connect.

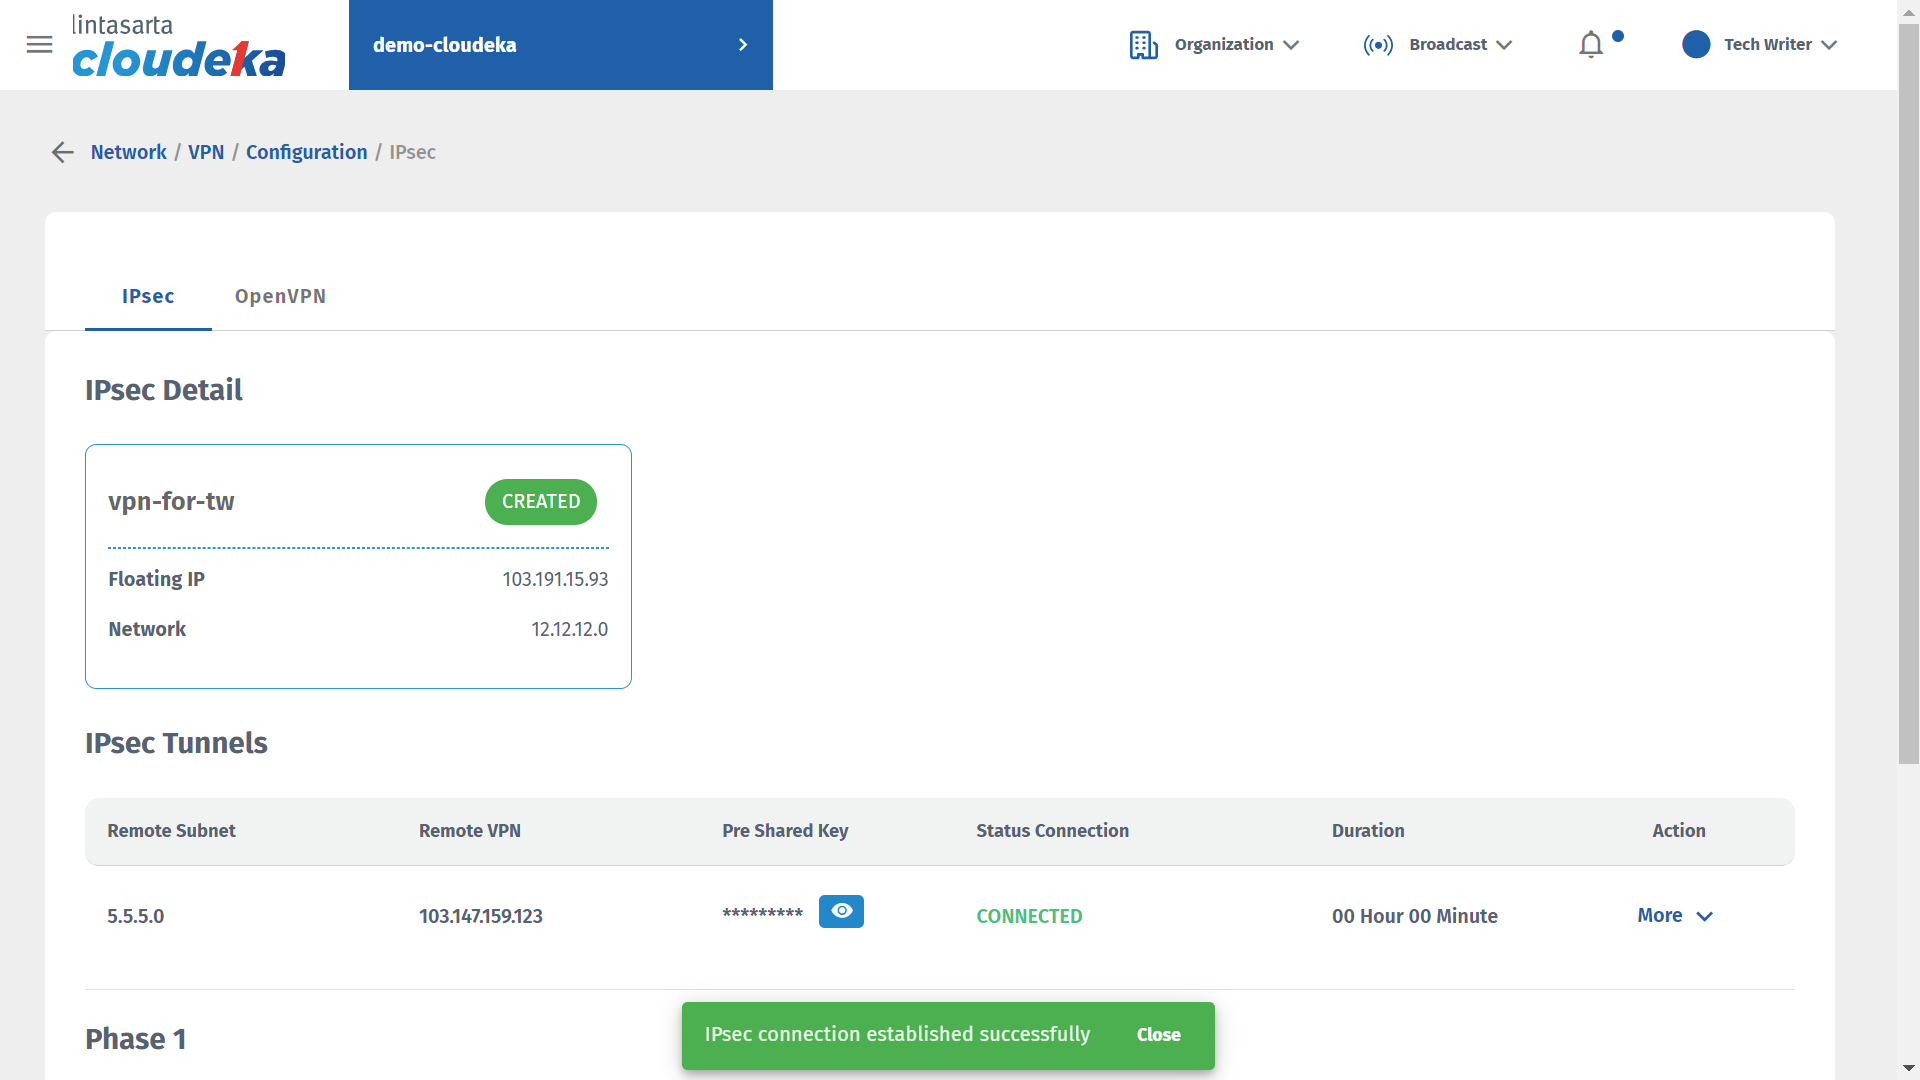
The notification "IPsec connection established successfully" appears and the Phase 1 and Phase 2 tables appear.


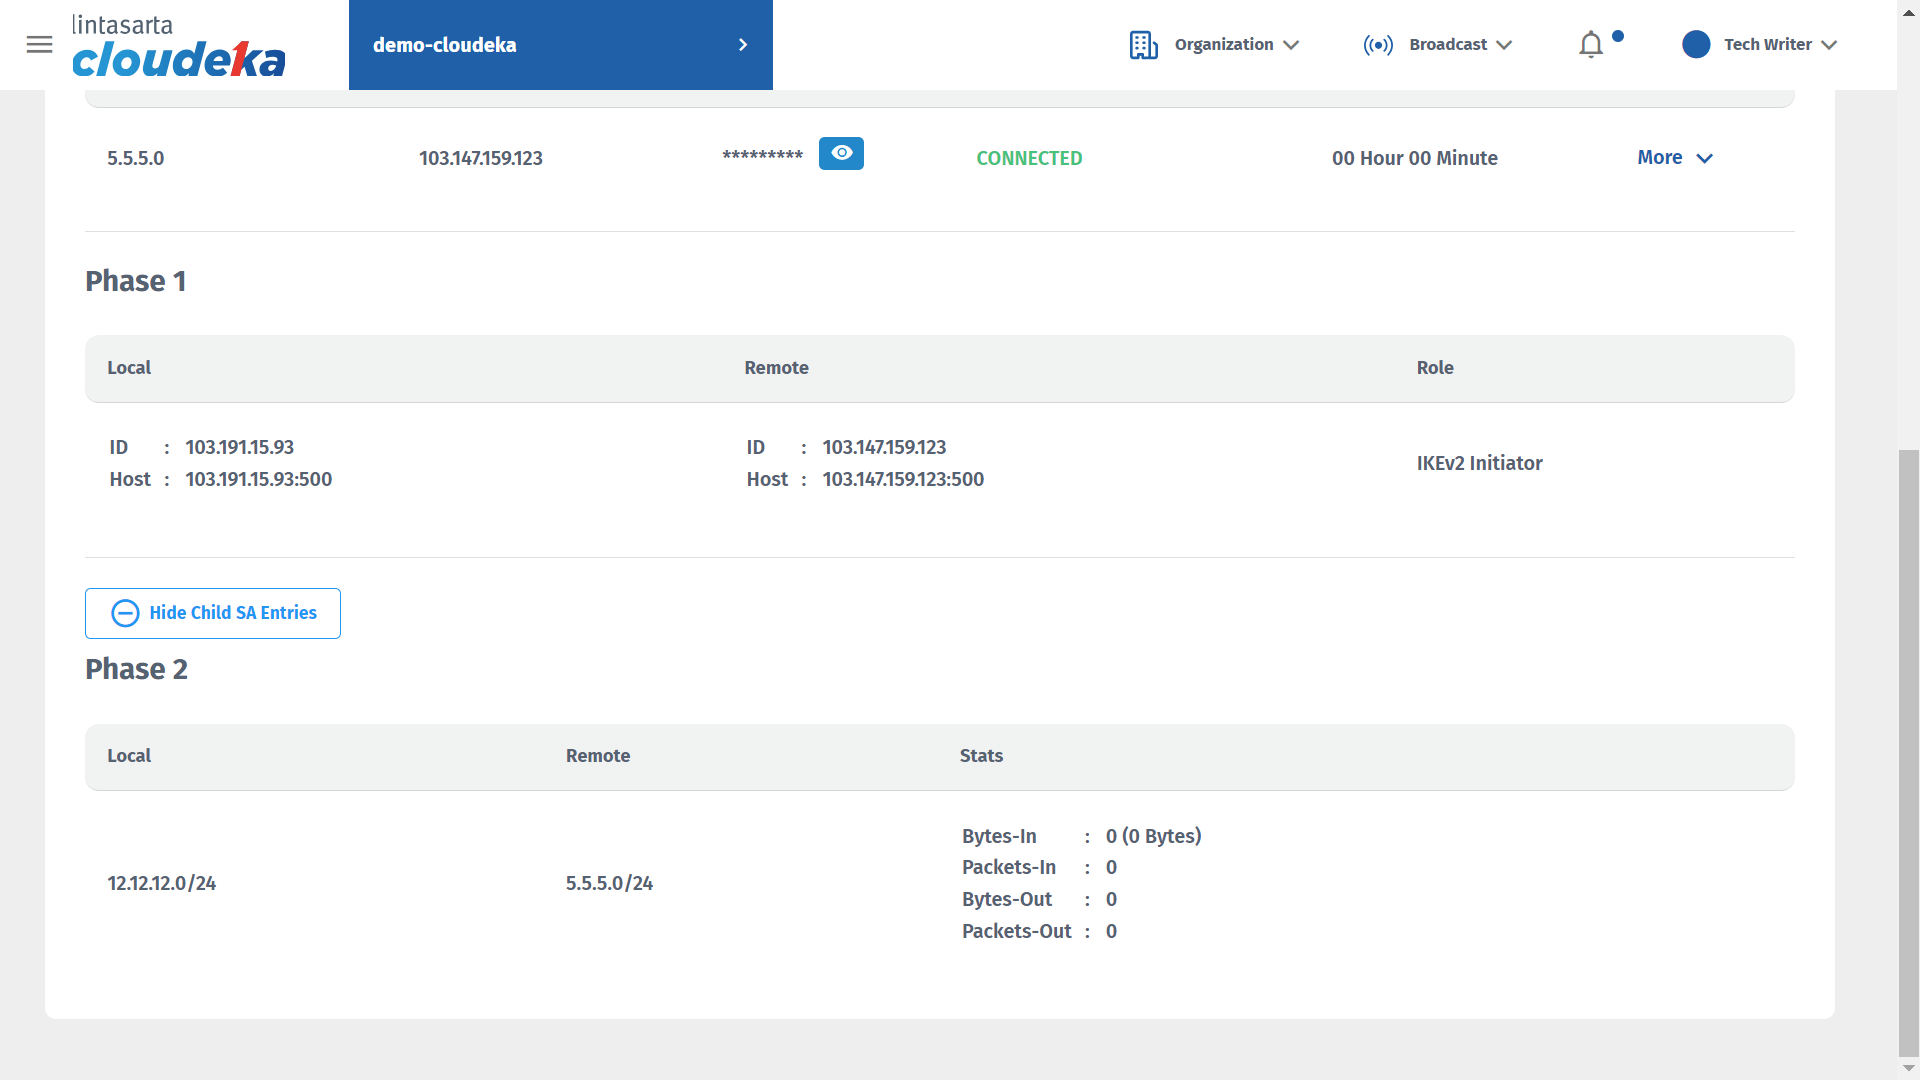
The following is an explanation of the tables in Phase 1 and Phase 2 in IPsec
Connect IPsec - Phase 1
Local - ID
The sending VPN's floating IP address.
Local - Host
The sending VPN's floating IP address and the port used.
Remote - ID
The recipient's VPN floating IP address.
Remote - Host
The recipient's VPN floating IP address and port used.
Roles
The protocol is used to regulate the establishment of a VPN connection and exchange encryption keys in it.
Connect IPsec - Phase 2
Local
The sender's IPsec subnet address.
Remote
The IPsec network device the recipient is using
Stats - Bytes-in
To measure the total number of bytes of data received.
Stats - Packets-in
To measure the total number of data packets received.
Stats - Bytes-out
To measure the total number of bytes of data that comes out.
Stats - Packets-out
To measure the total number of outgoing data packets.
Last updated
