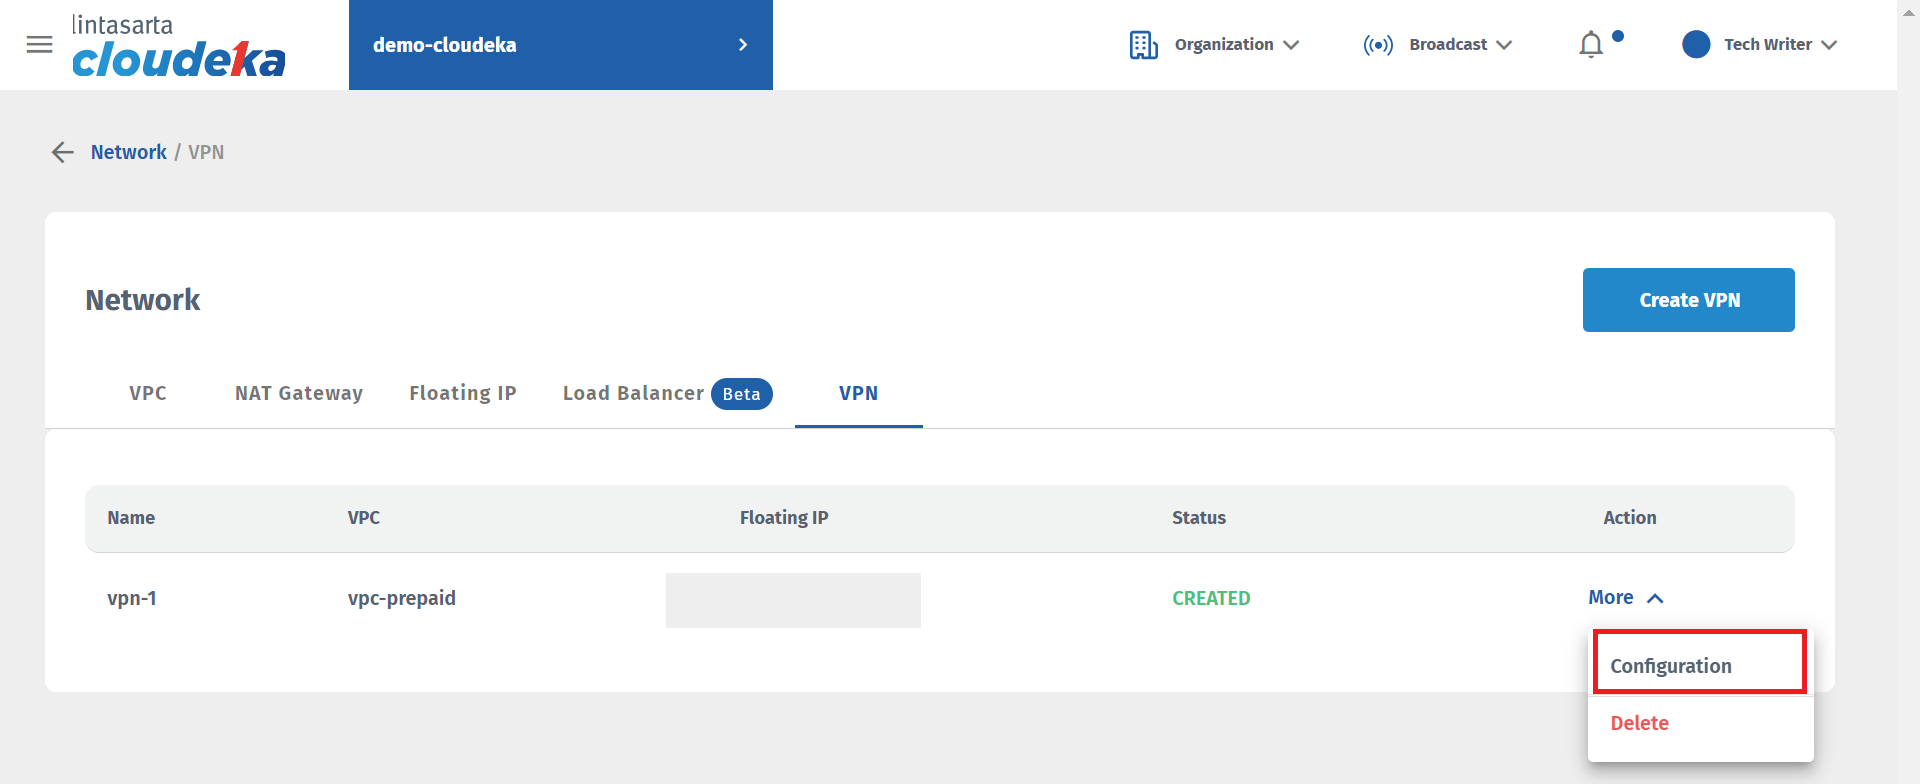
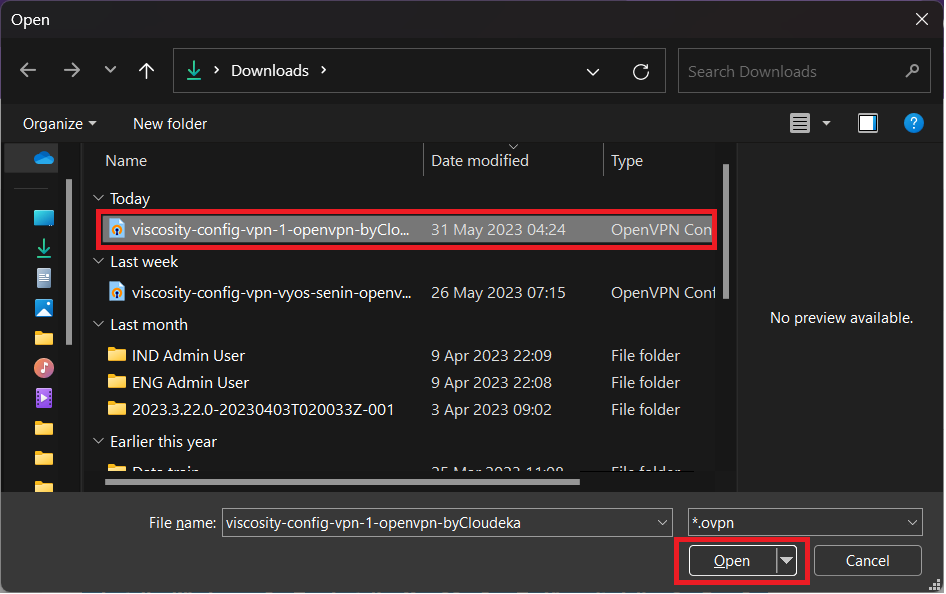
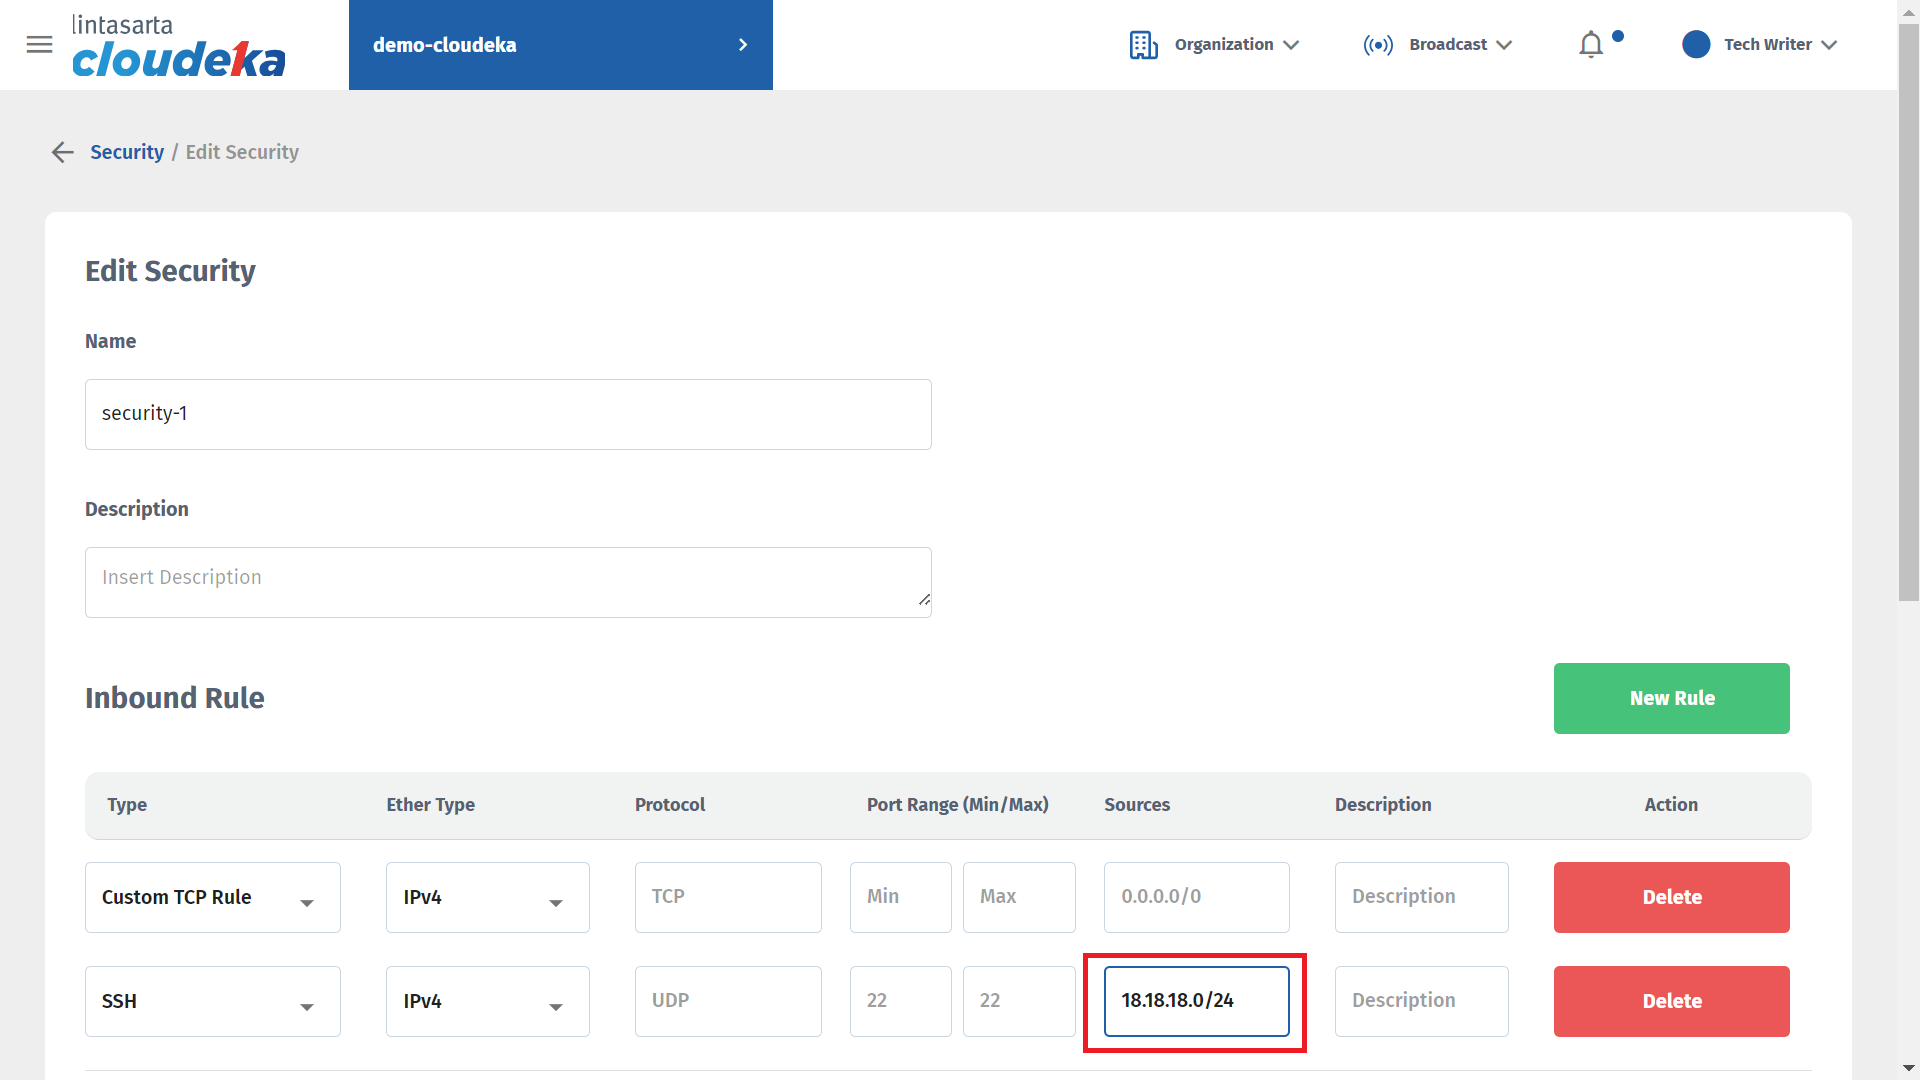
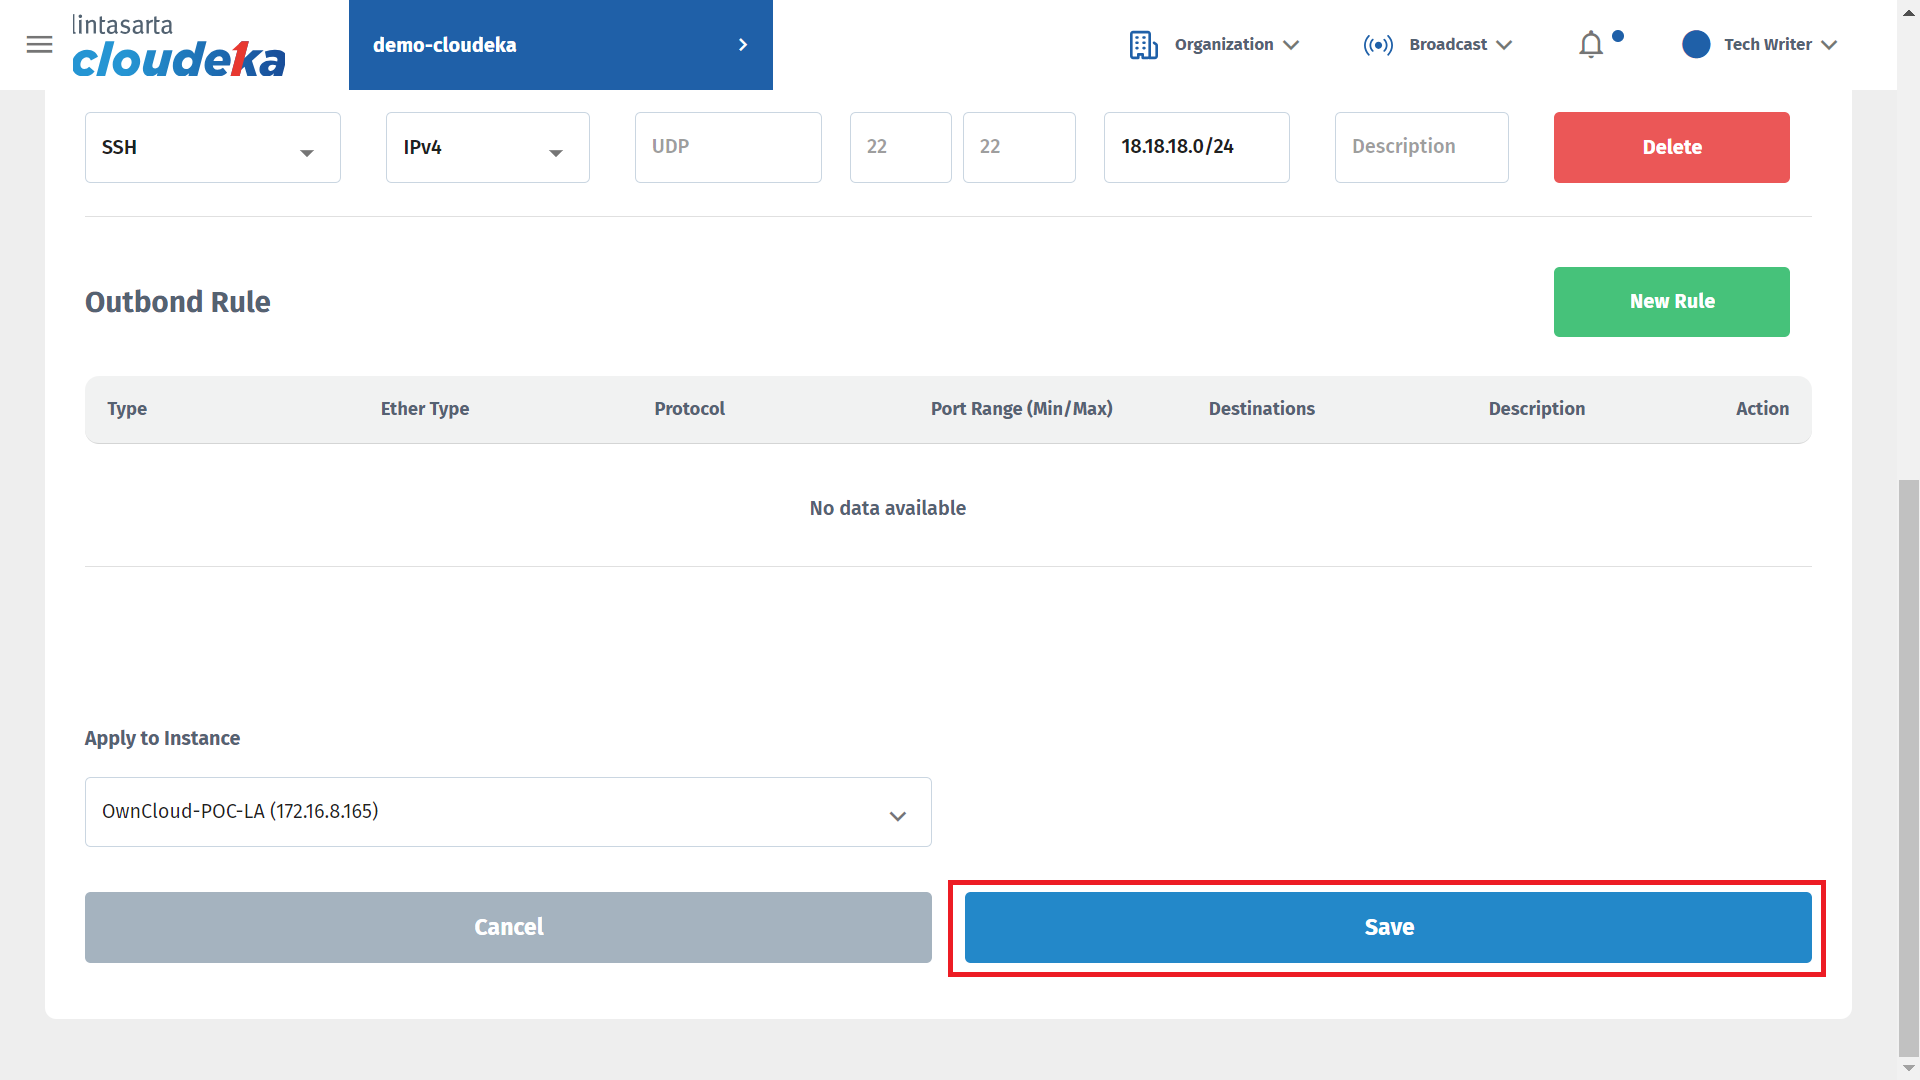
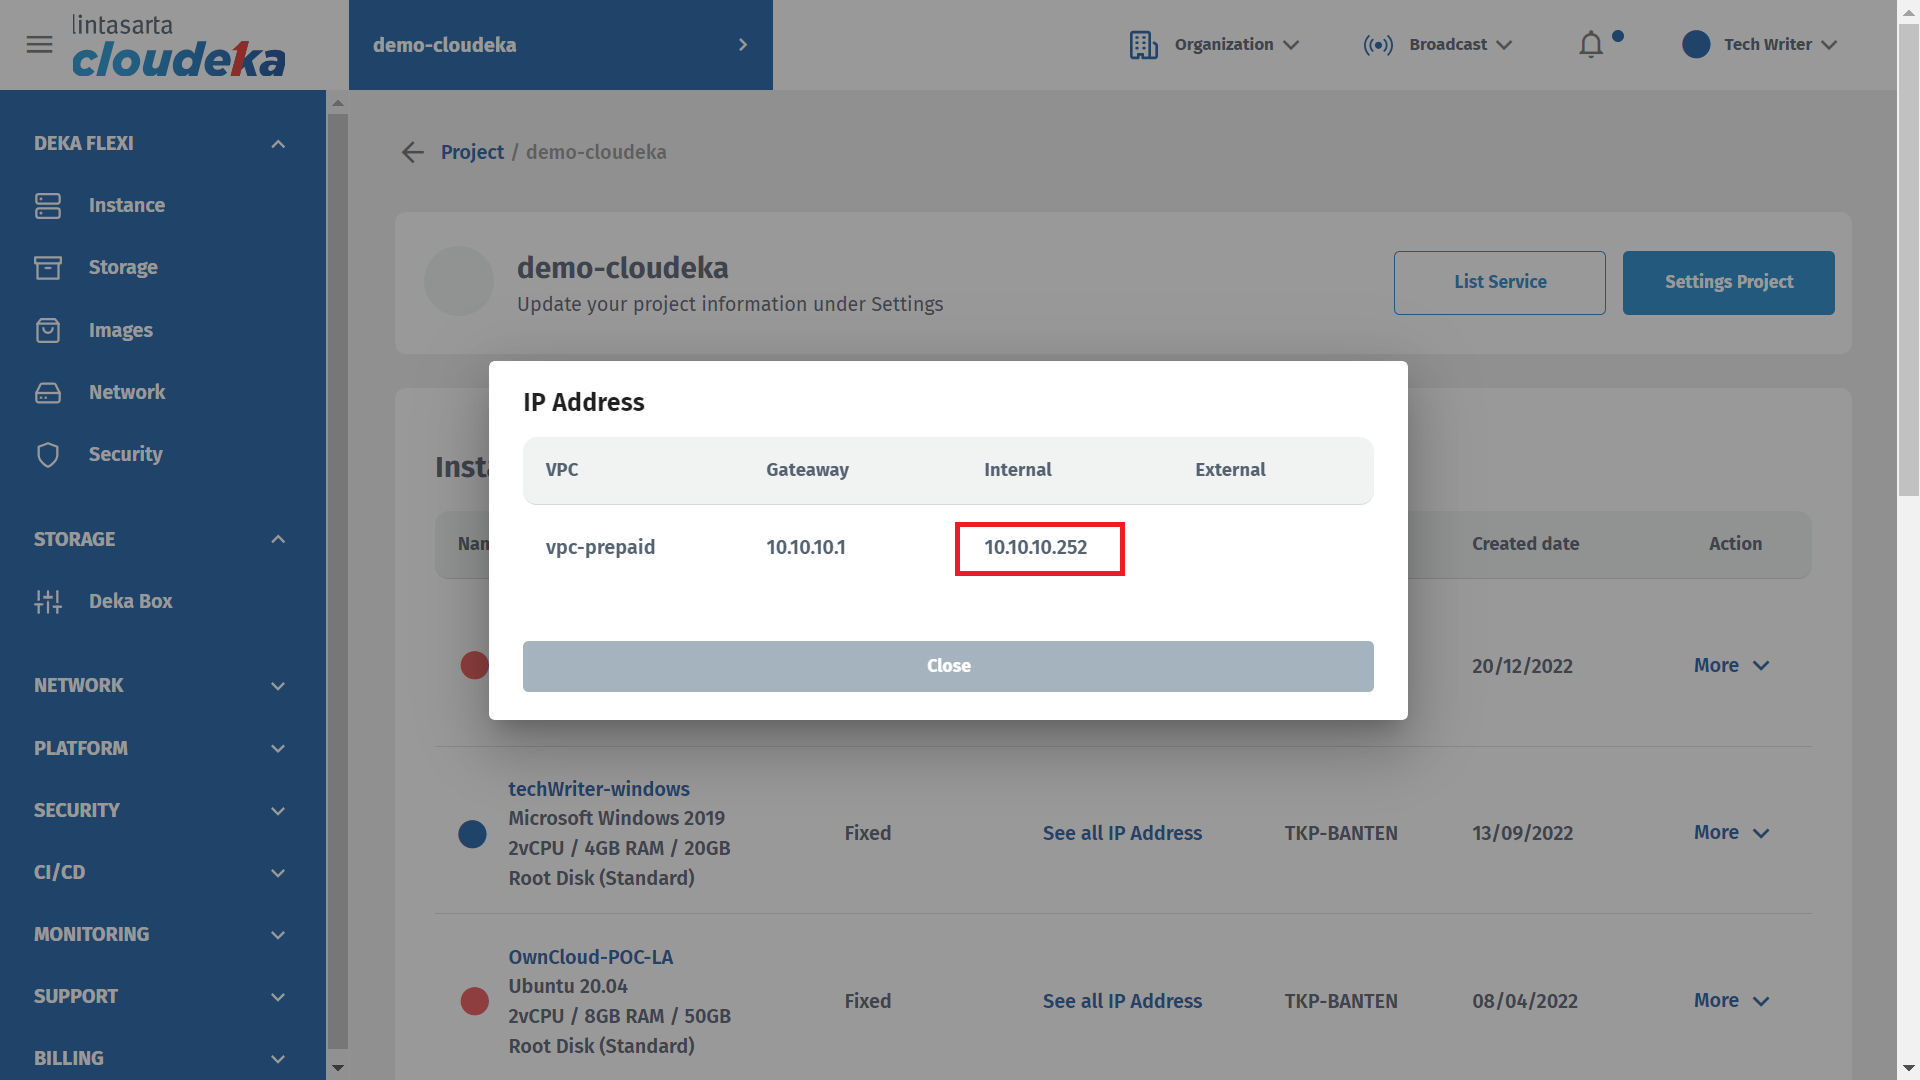
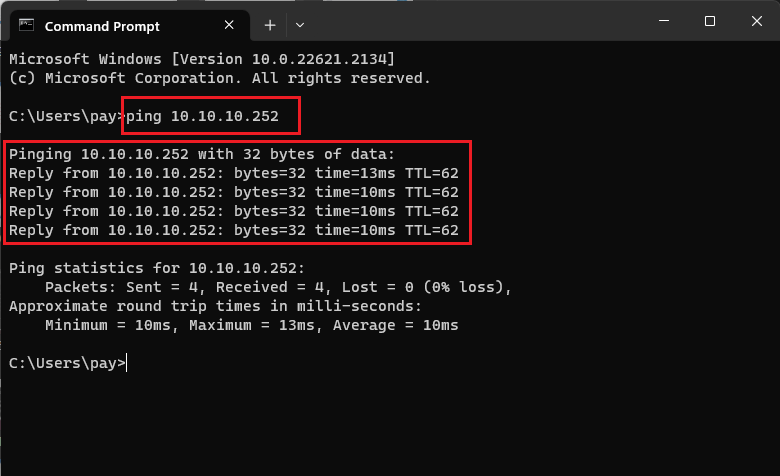
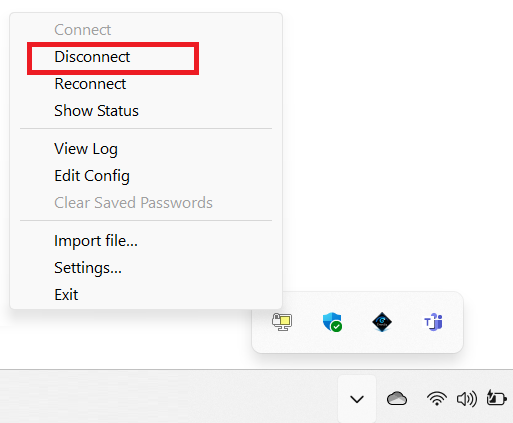
Connection with OpenVPN
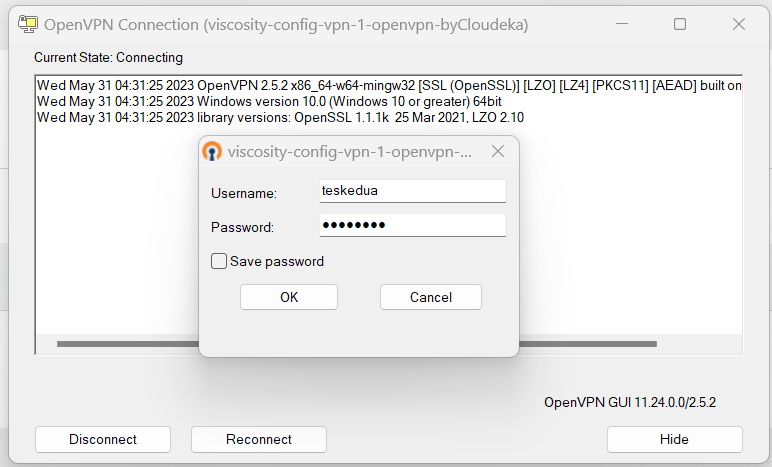
Connection with OpenVPN
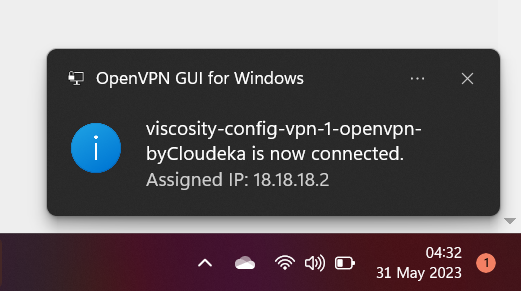
Connection with OpenVPN
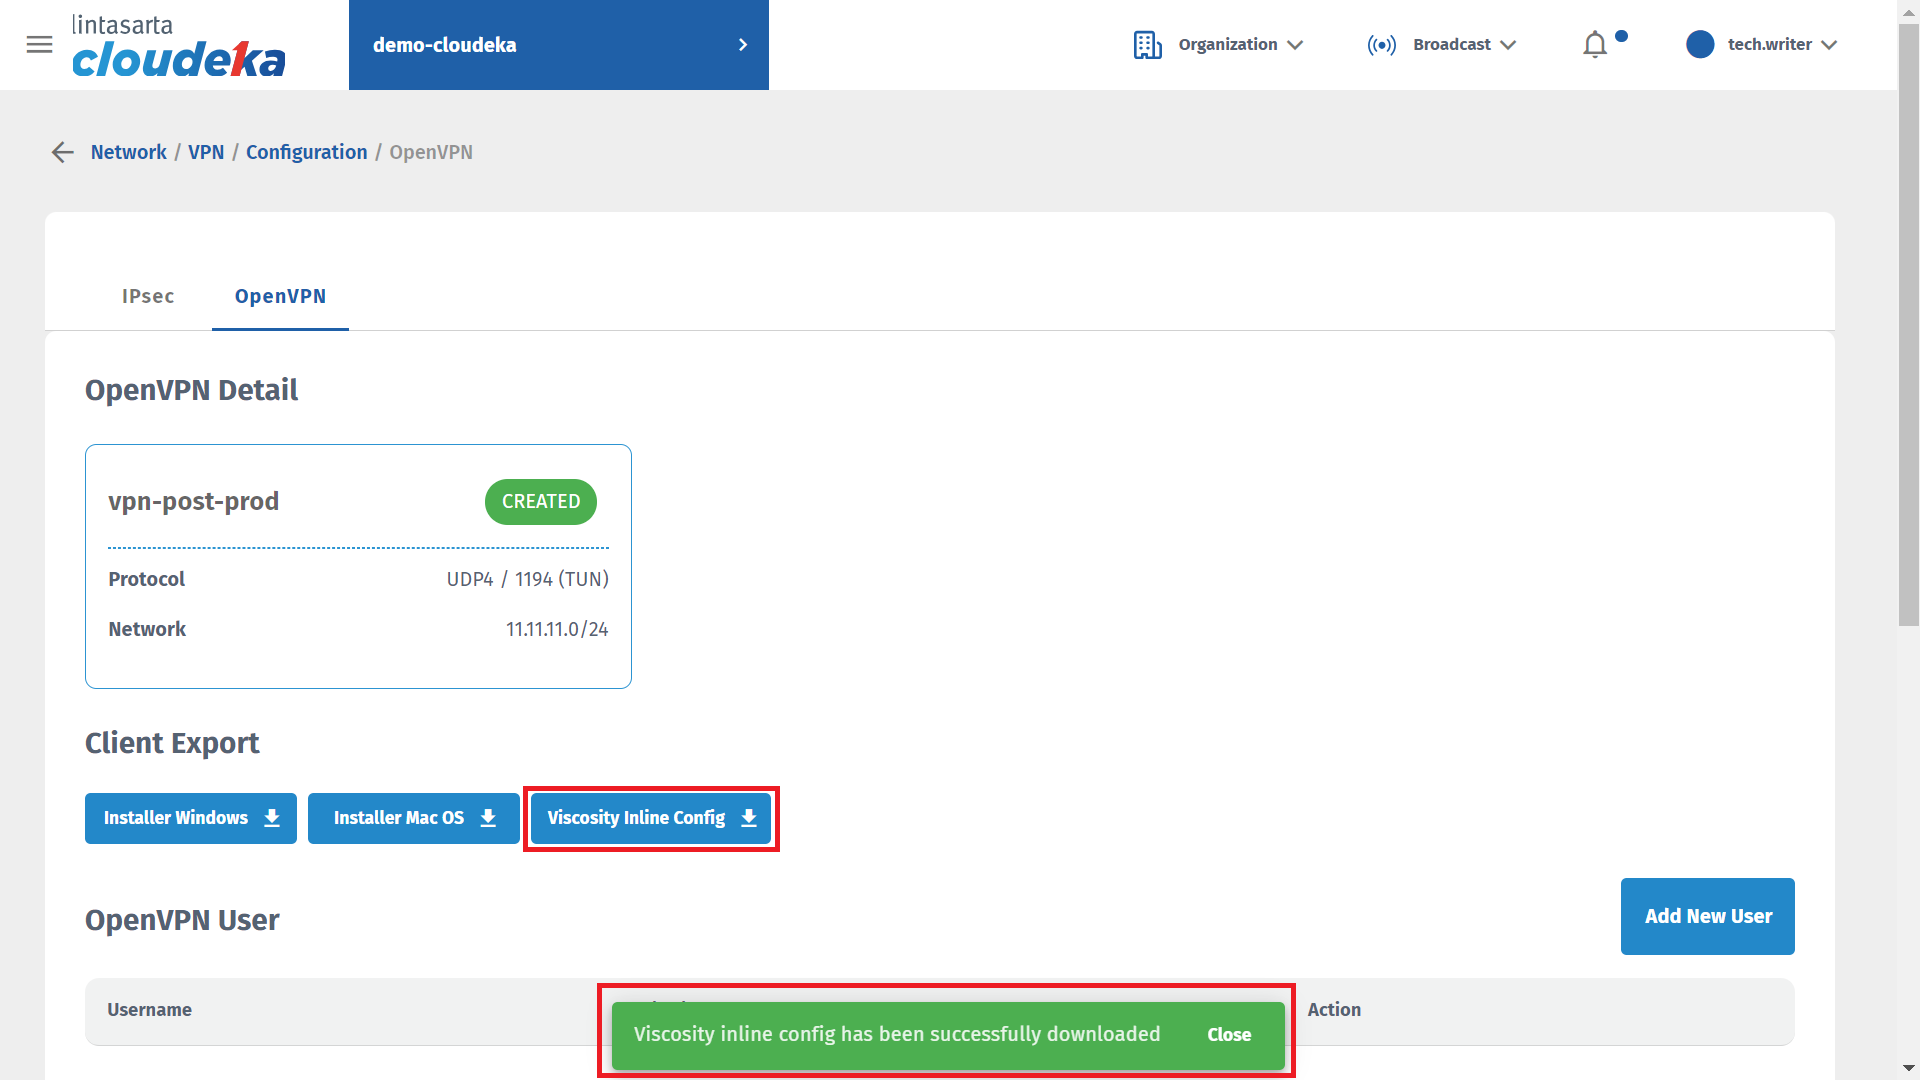
Connection with OpenVPN
Connection with OpenVPN
Connection with OpenVPN

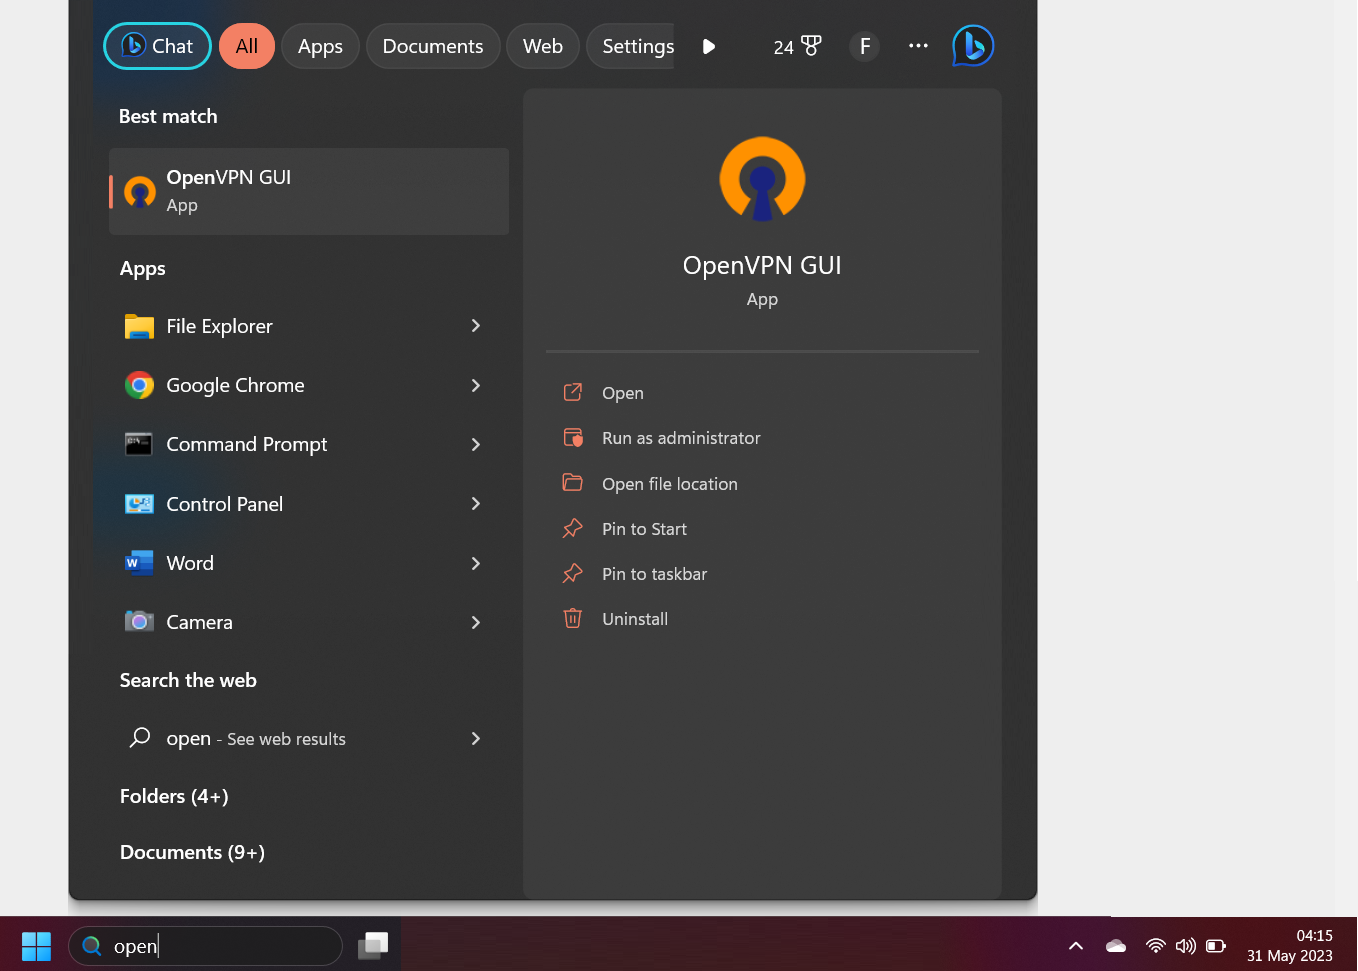
Connection with OpenVPN
Connection with OpenVPN
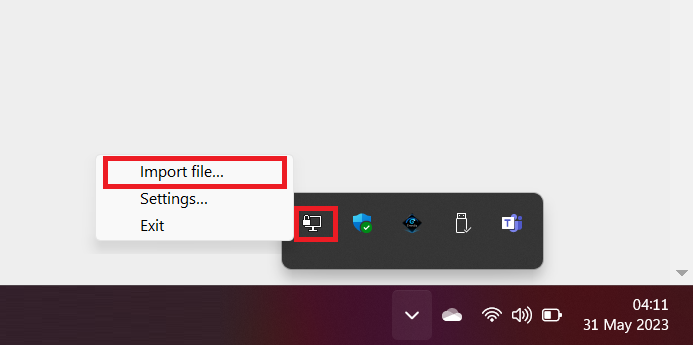
Connection with OpenVPN
Connection with OpenVPN
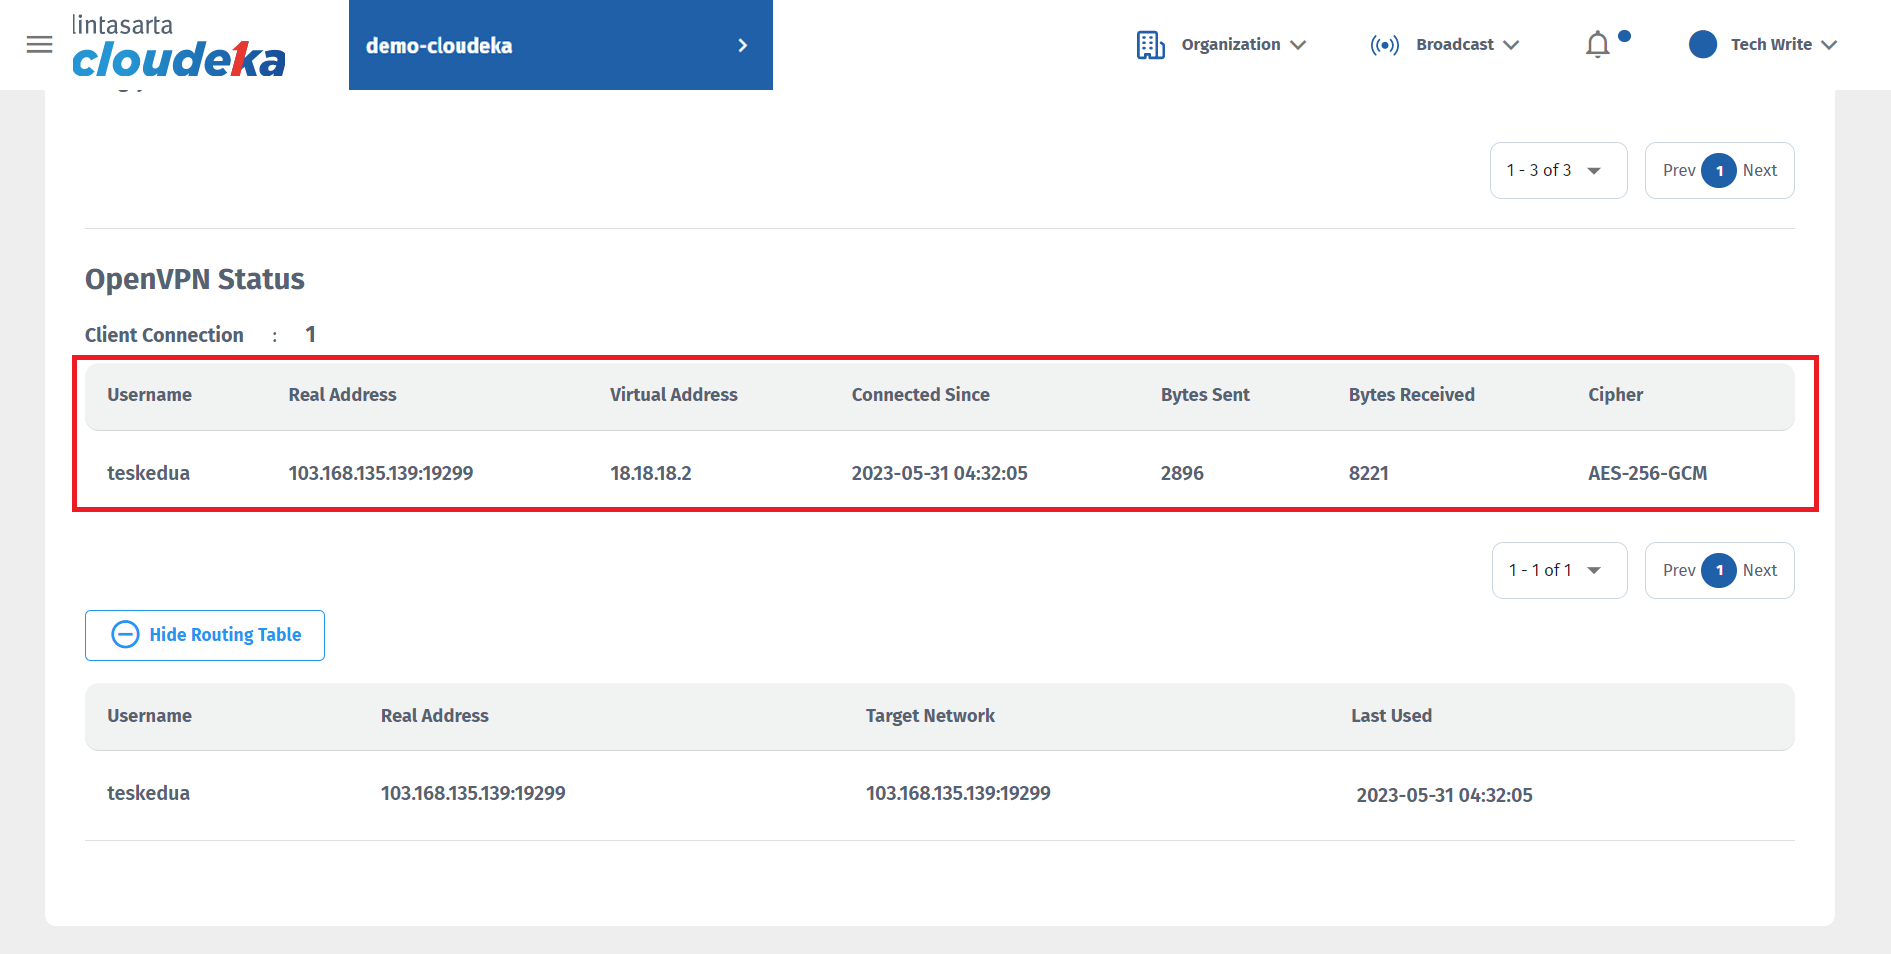
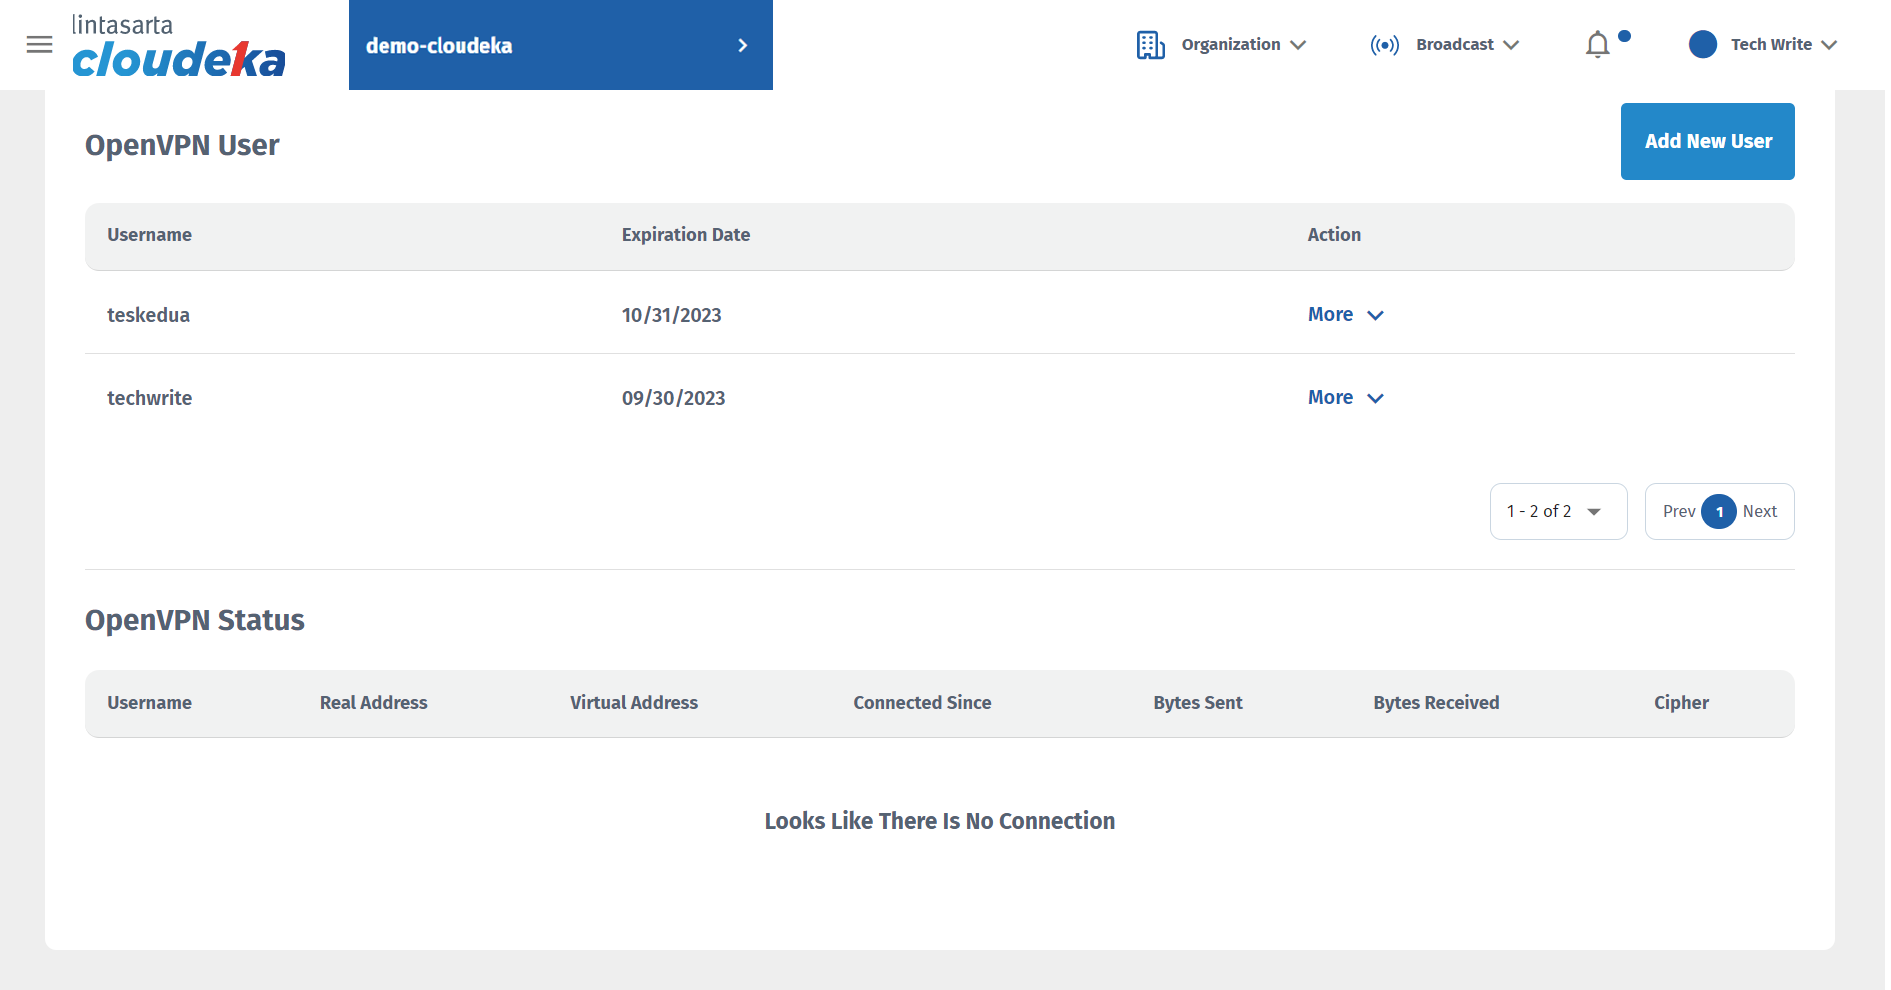
| Column | Description |
|---|---|
| Username | Username used to identify the connection to the OpenVPN server. |
| Real Address | The physical IP address that is connected to the OpenVPN server. |
| Virtual Address | A virtual IP address is used to communicate with other networks. |
| Connected Since | Displays the date and time when the user connected to the OpenVPN server. |
| Bytes Sent | Displays the total number of bytes a user has sent through an OpenVPN connection since connecting. |
| Bytes Received | Displays the total number of bytes that have been received by the user via the OpenVPN connection since connecting. |
| Ciphers | Displays the encryption algorithm used to protect data sent over an OpenVPN connection. |
Connection with OpenVPN
Connection with OpenVPN
Connection with OpenVPN
Connection with OpenVPN
Connection with OpenVPN
Connection with OpenVPN
Connection with OpenVPN

Connection with OpenVPN
Connection with OpenVPN
Connection with OpenVPN
Connection with OpenVPN
Connection with OpenVPN