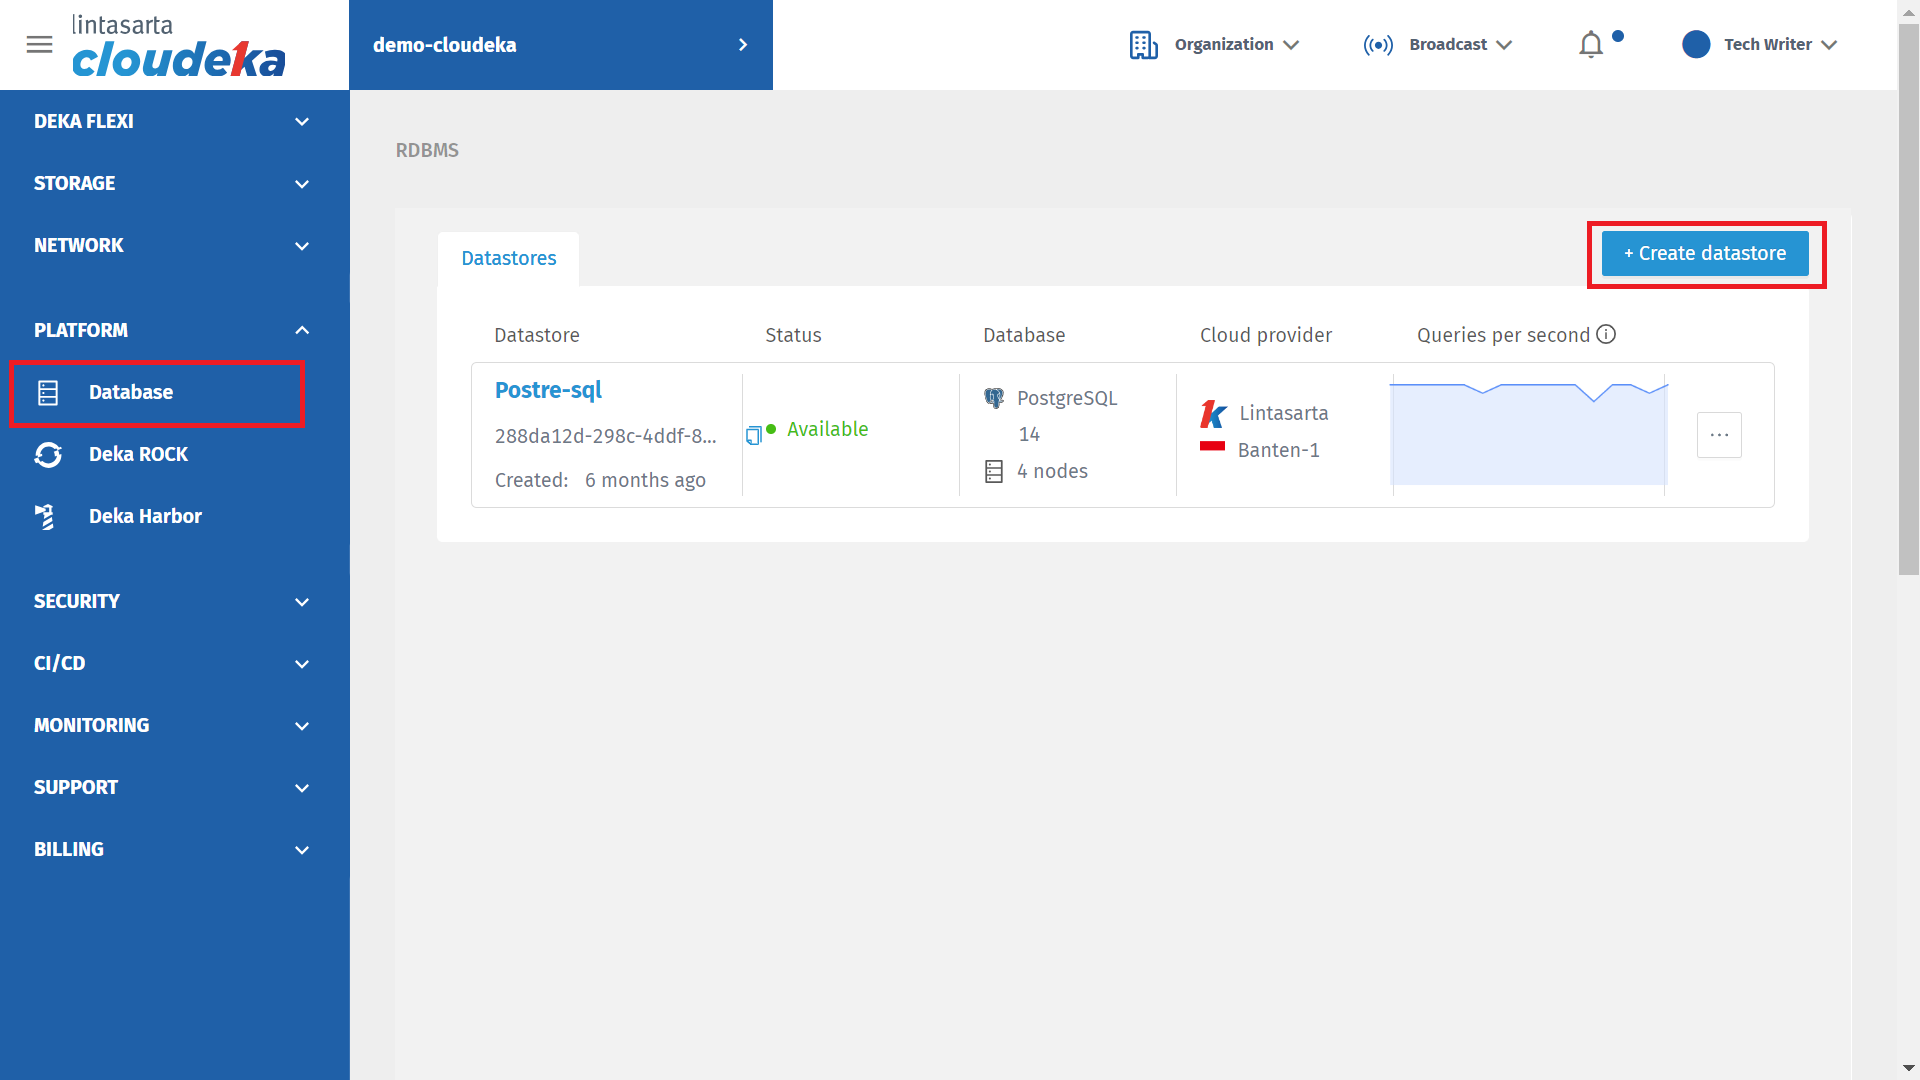
RDBMS Page
RDBMS Page
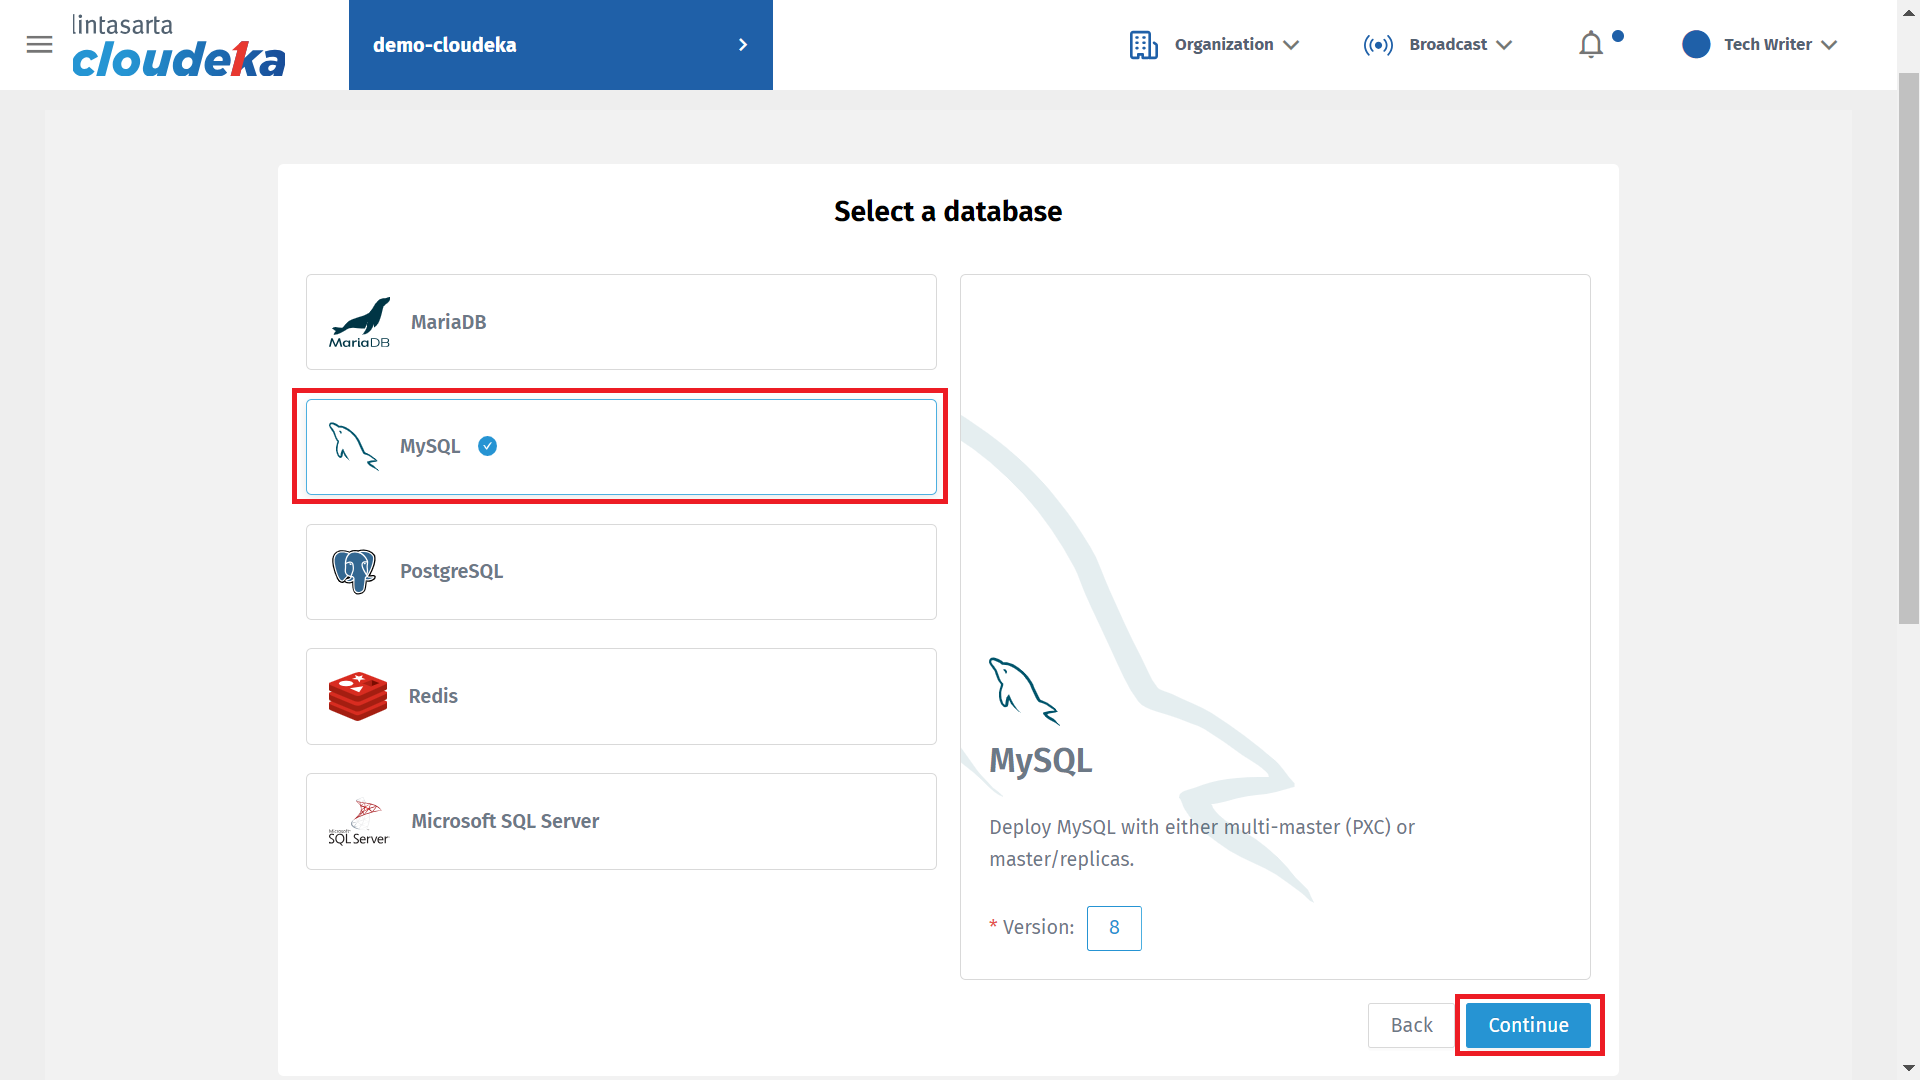
Create Data Store Form - Select a database

Create Data Store Form
| Column | Description |
|---|---|
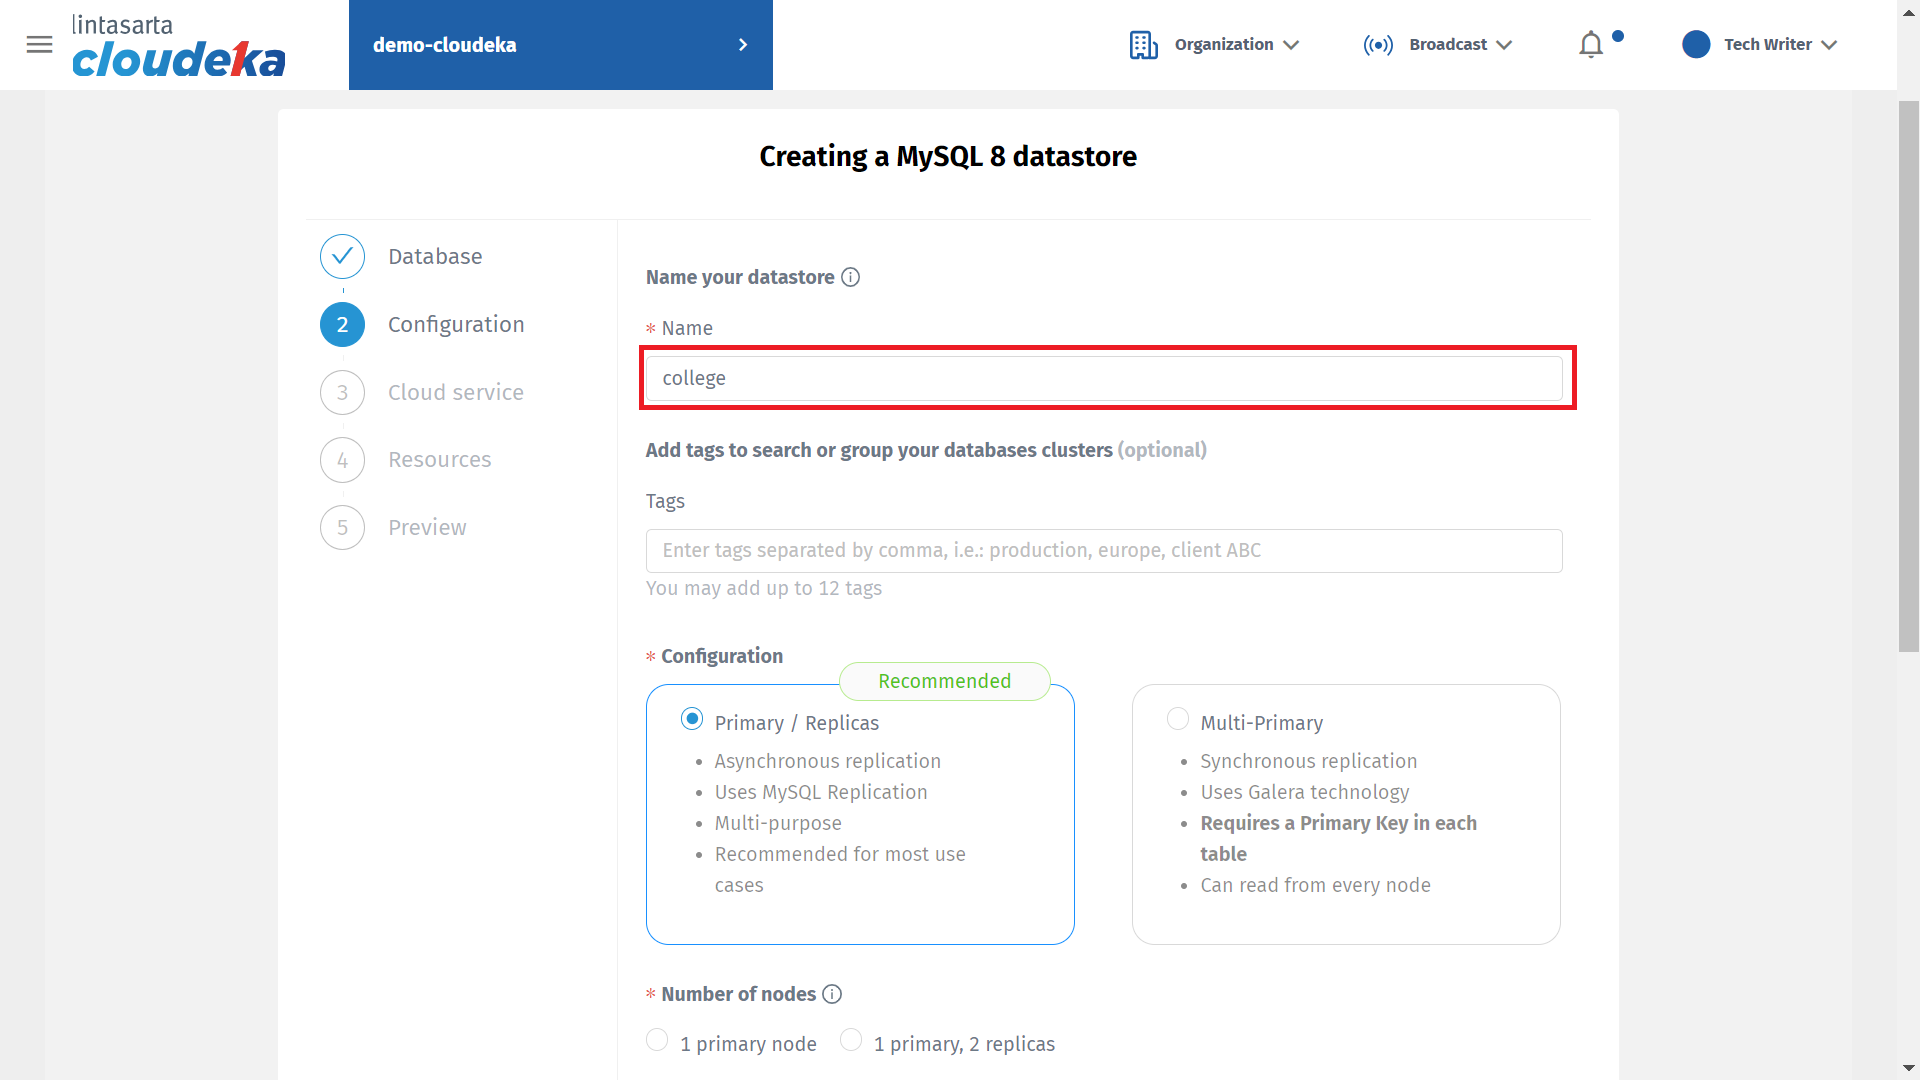
| Name | Data Store Name |
| Tags | Tags make it easier for users to find the related data store they want to search for. Tags are optional to fill so users can leave the field blank. |
| Configuration | To define the configuration for the data store. In Master, users are allowed to read and write including deleting database contents, while Replicas users are only allowed to read database contents. The configurations that can be selected are as follows: - Multi-Master - Master/Replicas |
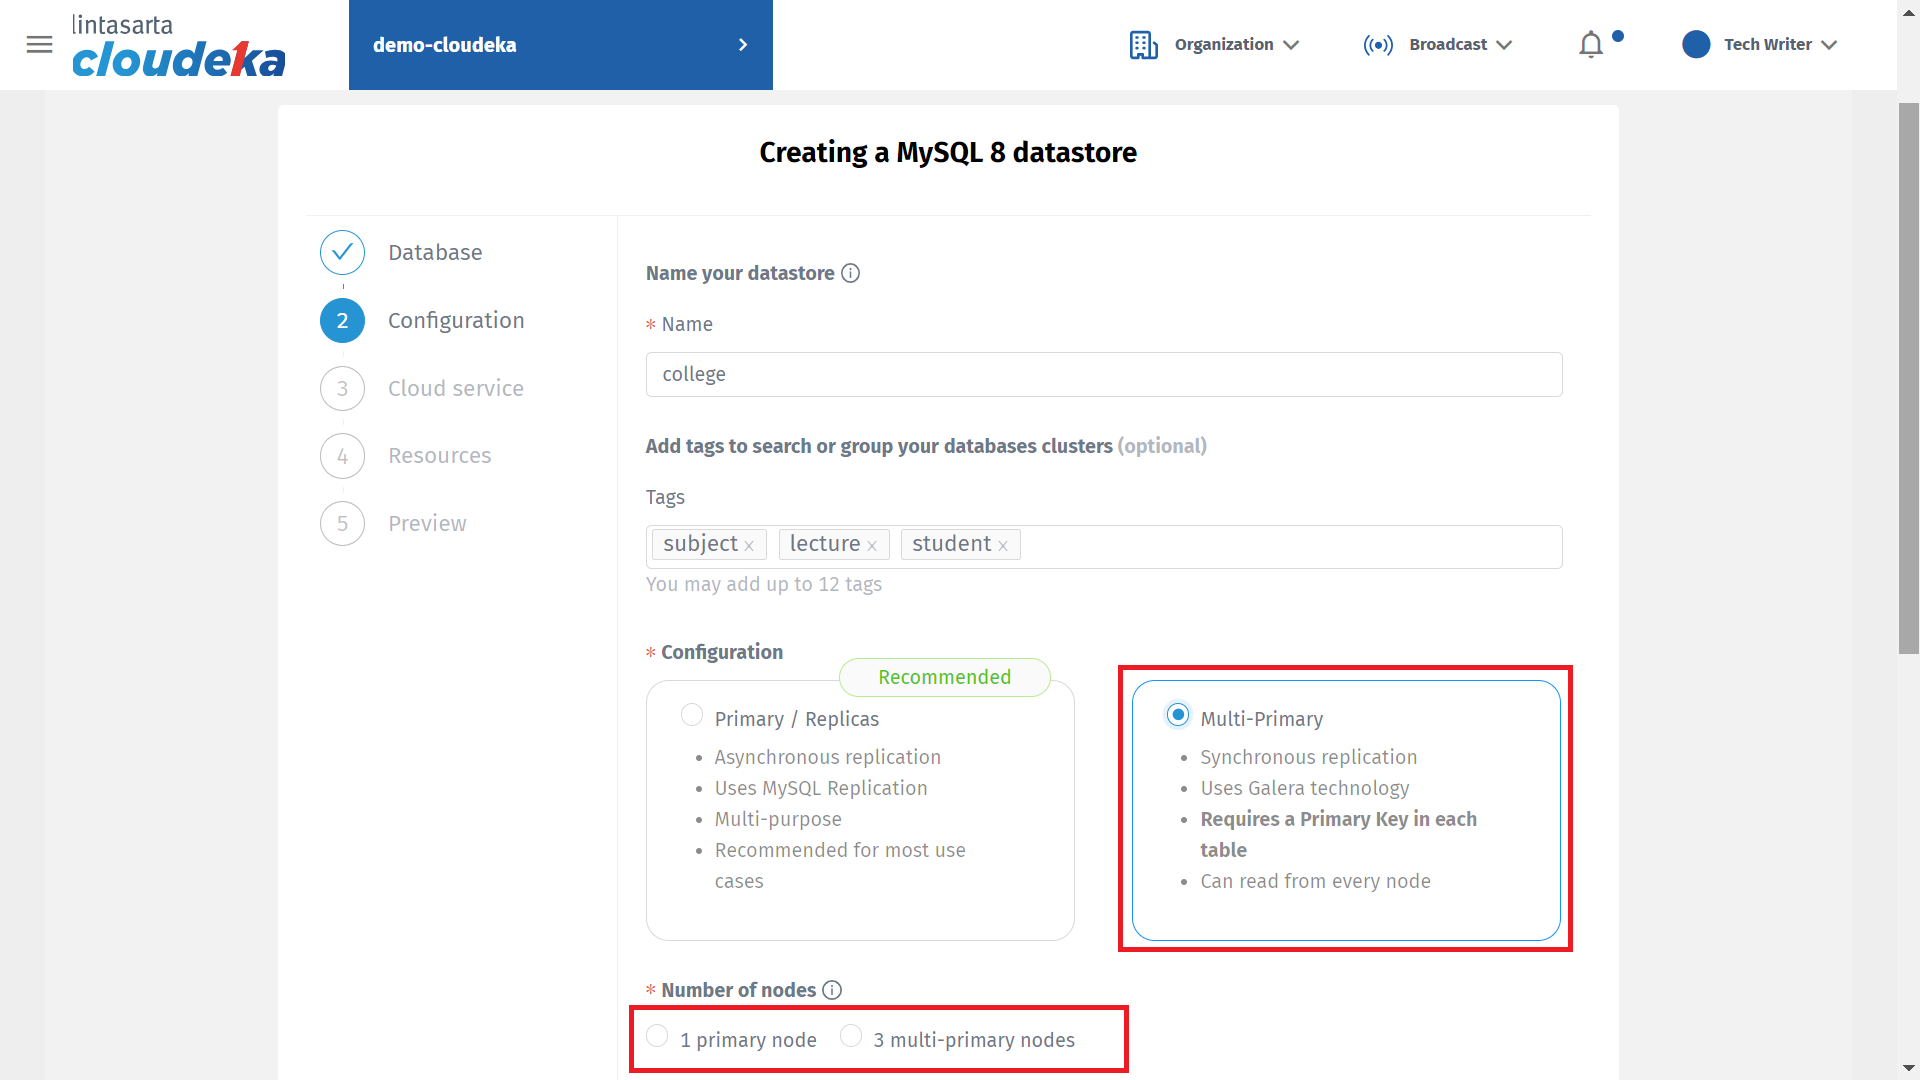
| Number of Nodes | Select nodes for the data store, the selected nodes can be one or three nodes. If the user select Multi Master in Configuration then there are two options in the Number of Nodes that is - 1 master node - 3 multi-masters node. If the user select Master/Replicas in Configuration then there are two options in the Number of Nodes that is - 1 master node - 1 master, 2 replicas |
Create Data Store Form - Name your database

Create Data Store Form - Tags

Create Data Store Form- Configuration Multi-Master
| Number of Nodes Multi-Master | Description |
|---|---|
| 1 master node | There is only one node that has read and write permissions on the database |
| 3 multi-masters will be deployed | Three nodes have permissions to read and write to the database |
Create Data Store Form - Configuration - Master/Replicas
| Number of Nodes Master / Replicas | Description |
|---|---|
| 1 master node | There is only one node that has read and write permissions on the database |
| 1 master, 2 replicas | There is one node that has read and write permissions on the database and two nodes only have read permissions on the database |
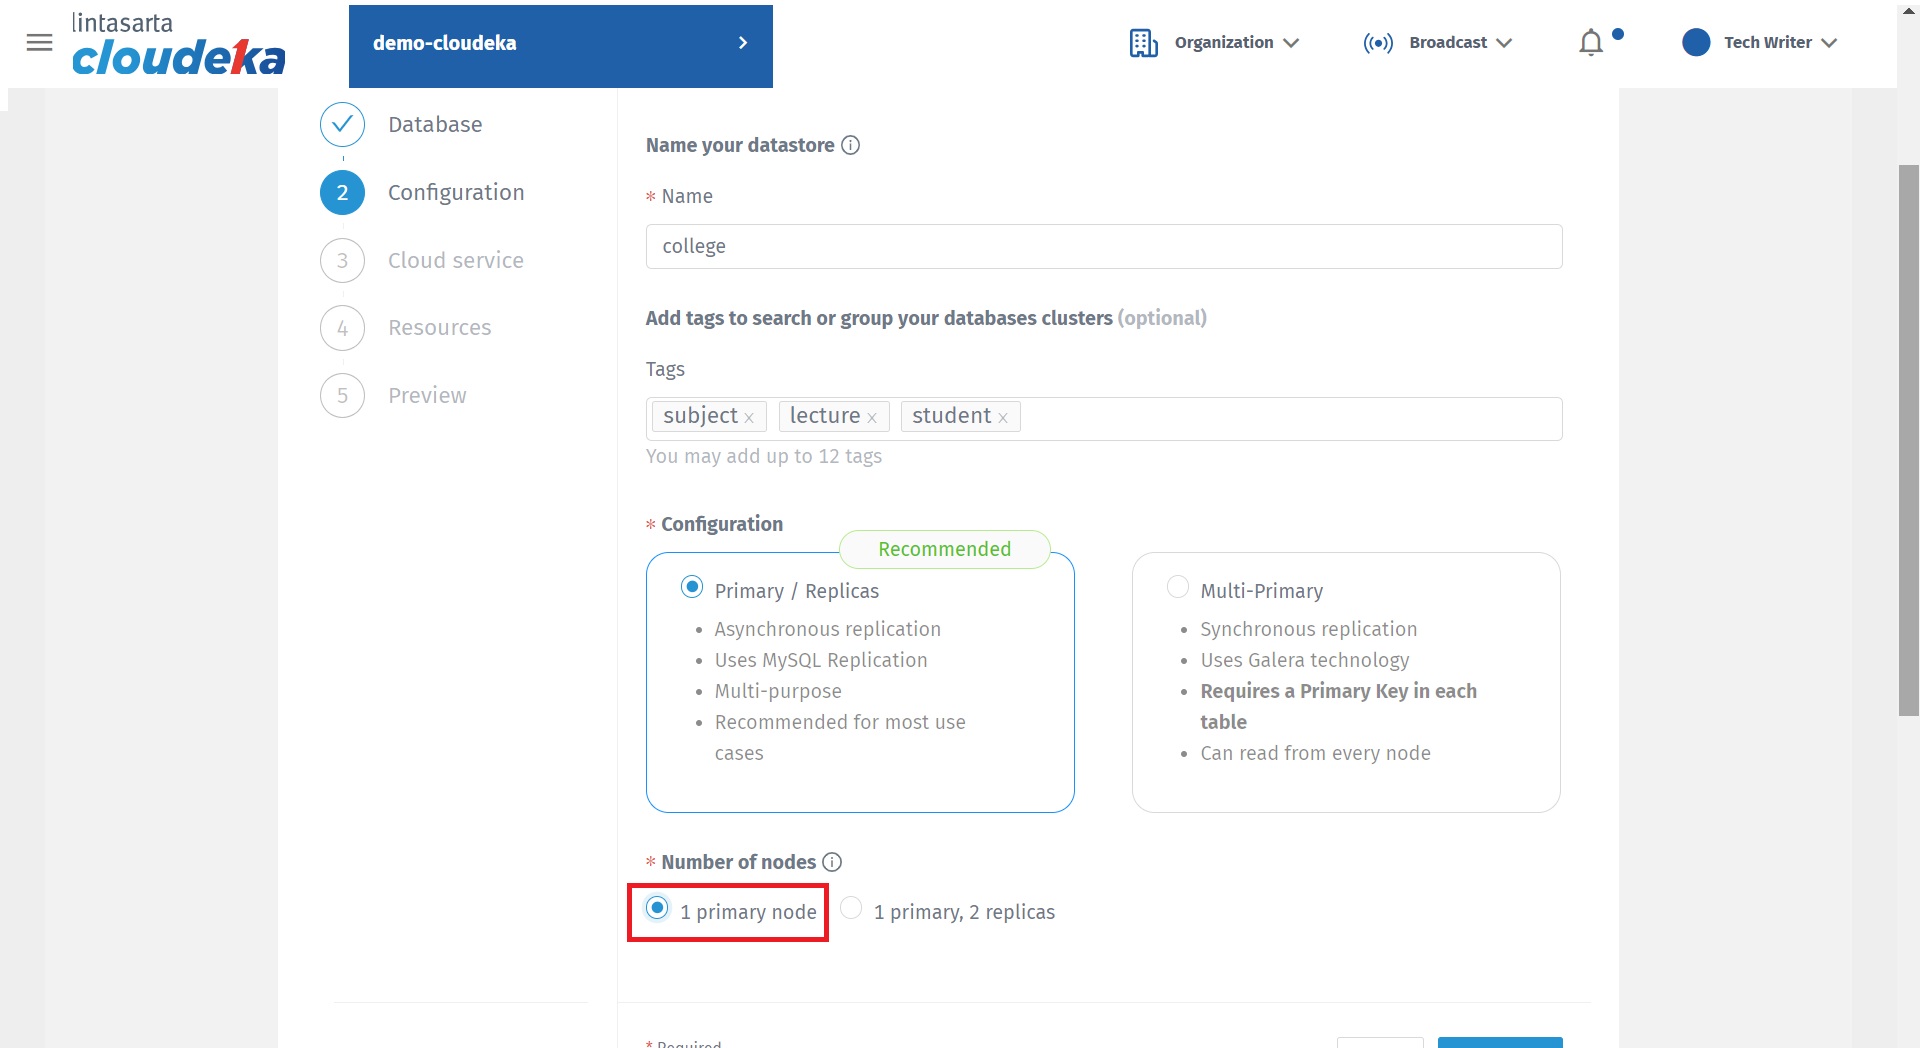
Create Data Store Form - Number of Nodes
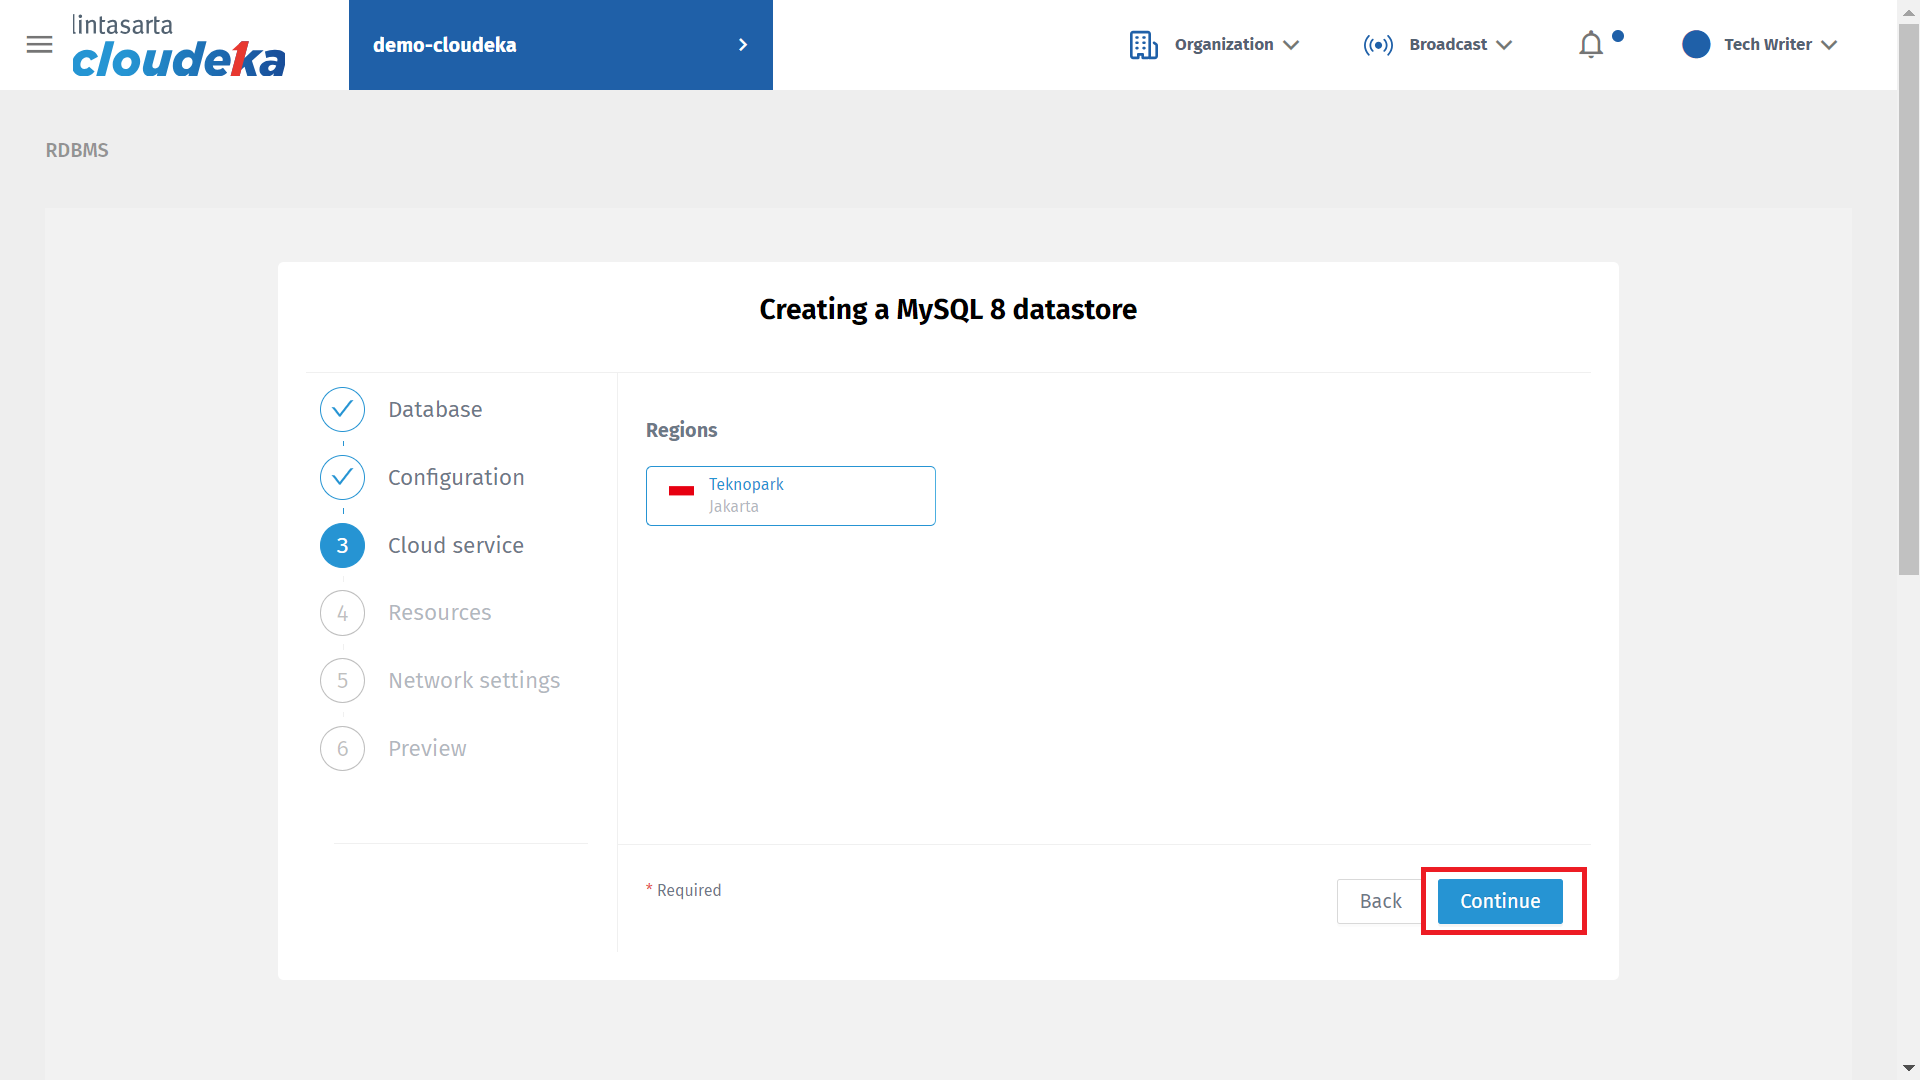
Create Data Store Form - Cloud Service

Create Data Store Form - Instances
| Description | |
|---|---|
| Instances | Select the instance size for the data store. The instance sizes that can be selected according to user requirements are as follows: - 4VCPU, 8GB RAM - 8VCPU, 8GB RAM - 8VCPU, 32GB RAM - 16VCPU, 32GB RAM - 32VCPU, 128GB RAM |
| Storage | Select the volume type, the type that can be selected is Standard or Premium |
| Storage Size | Select the volume size (GiB), the default volume size is 80 GiB |
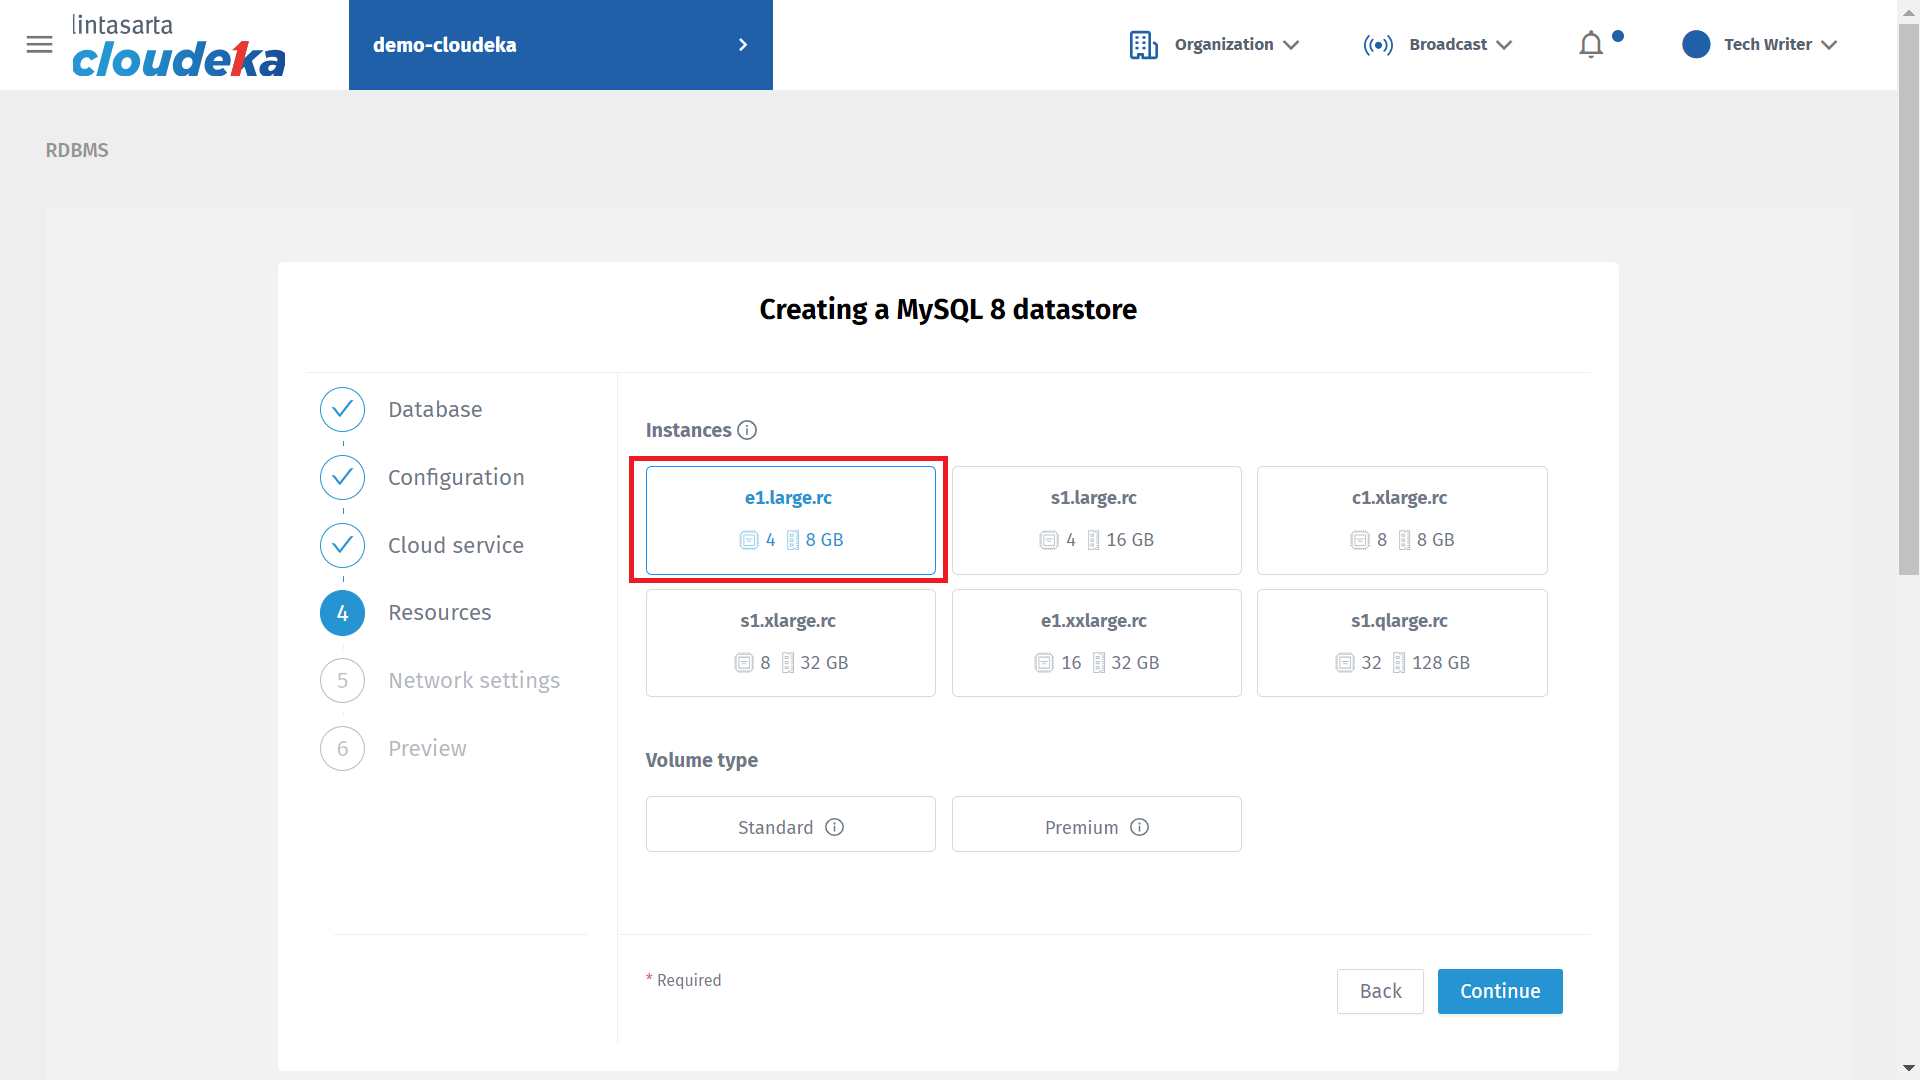
Create Data Store Form - Select Instance Size
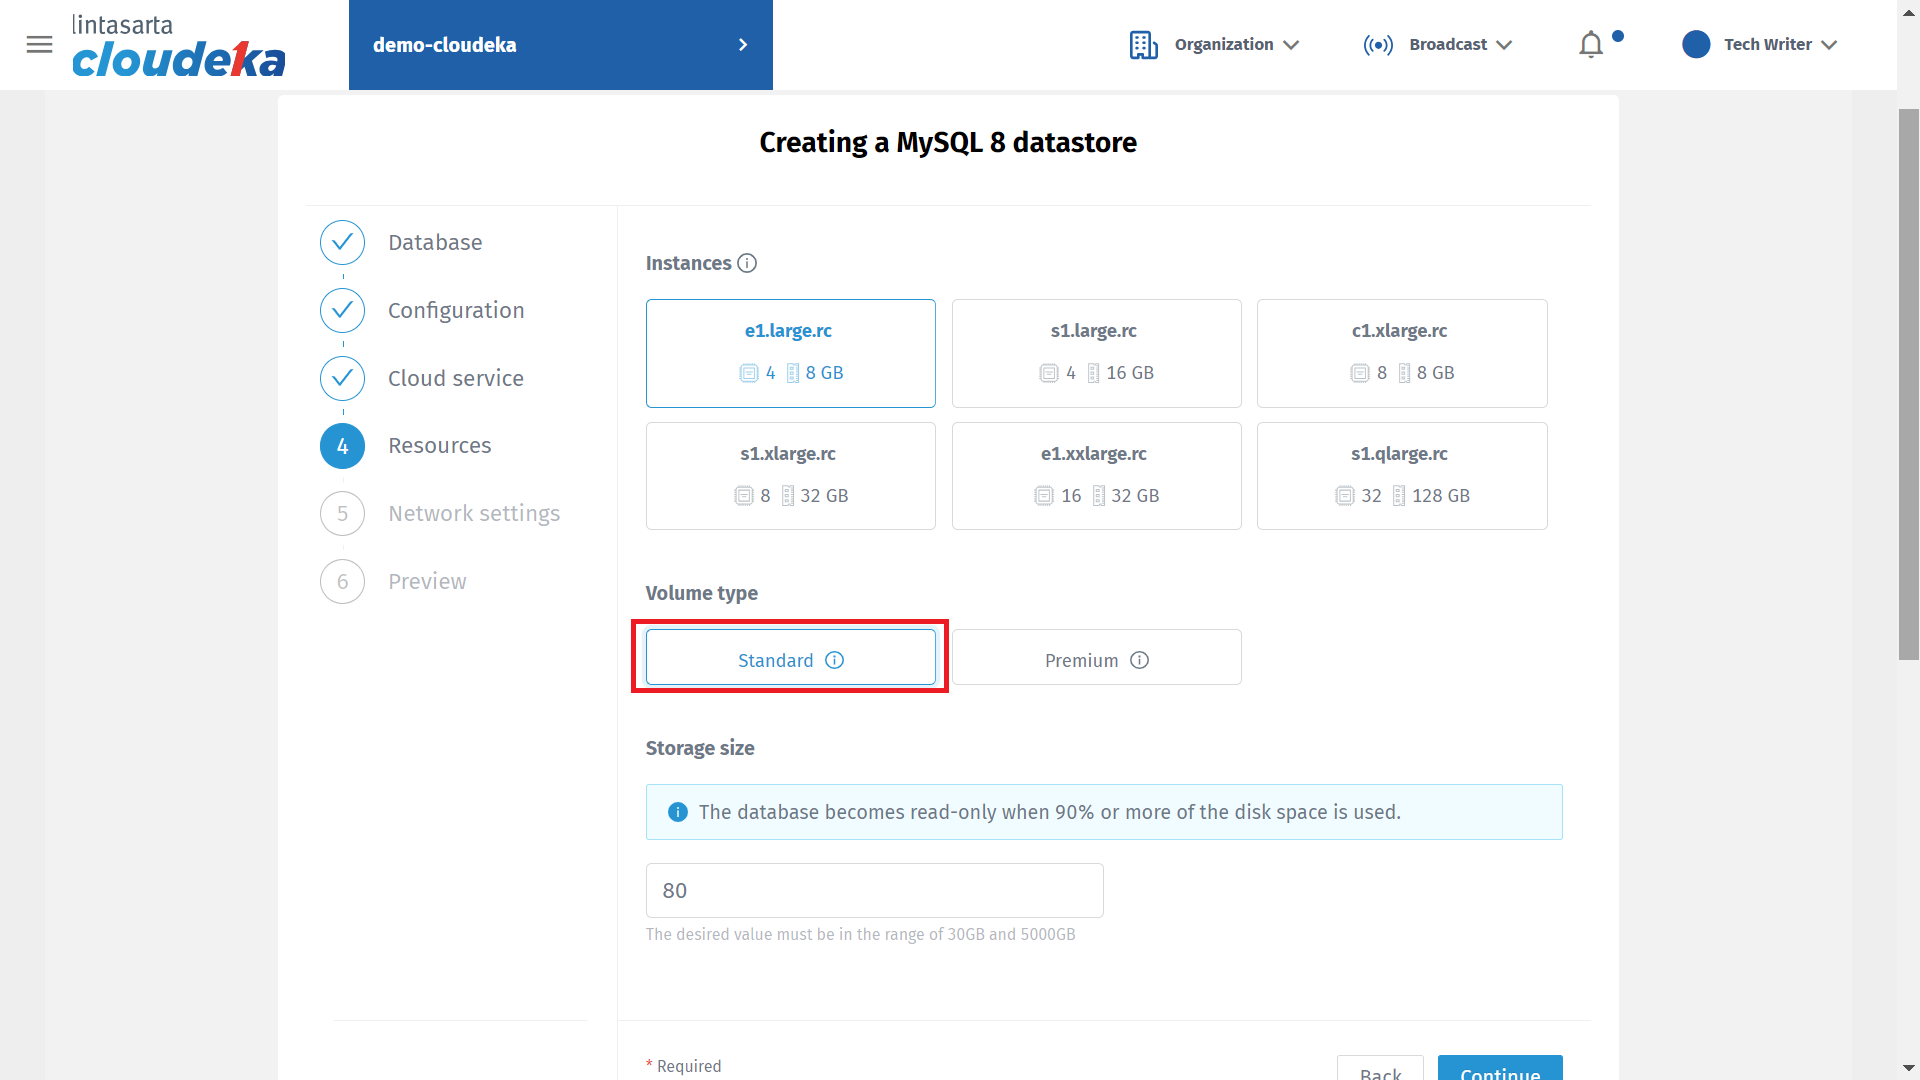
Create Data Store Form - Select Storage
| Storage | Description |
|---|---|
| Standard | Offers standard SSD storage types offered with input/output performance of 750 to 2500 IOPS |
| Premium | Offers premium SSD storage types offered with input/output performance of 2250 up to 4500 IOPS |
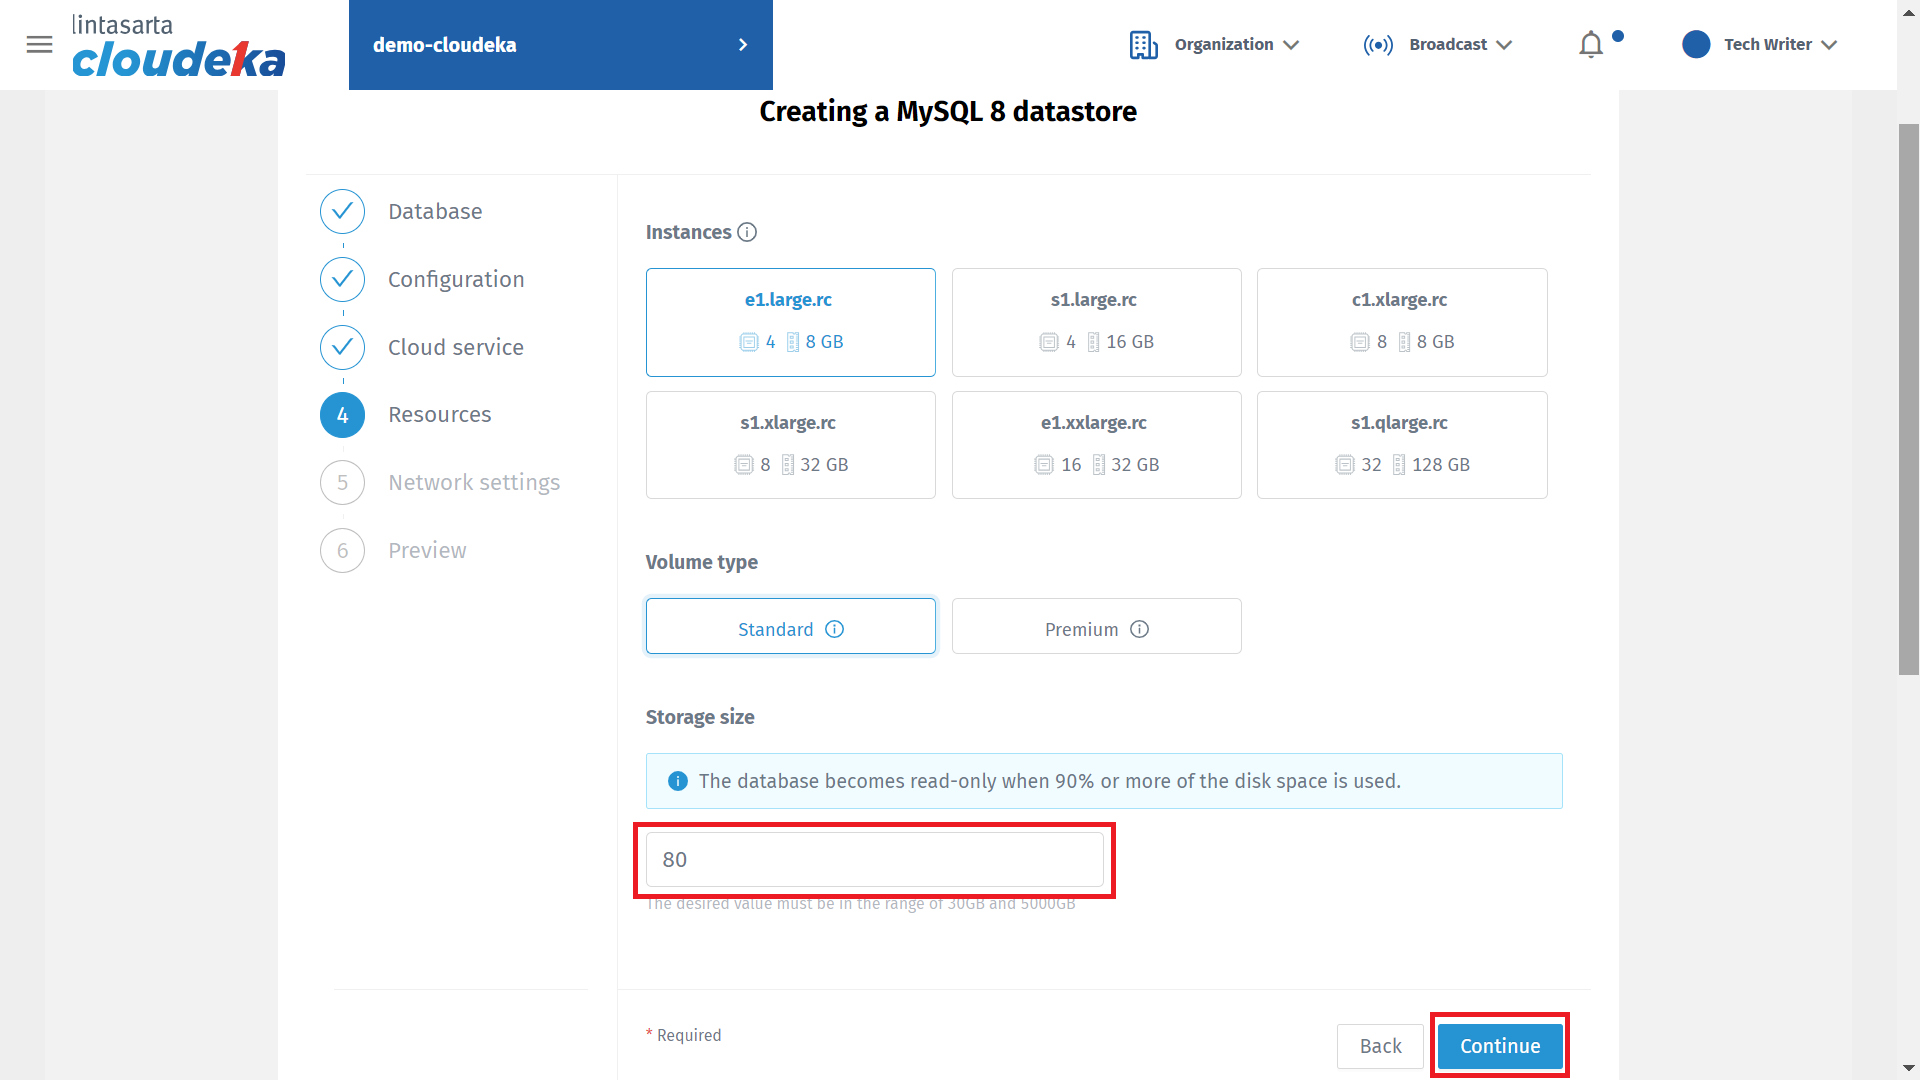
Form Create Data Store - Input Storage Size

Form Create Data Store - Select Network
| Network Type | Description |
|---|---|
| Private | A type of network that can only be accessed by certain people because it has restrictions and rules that limit access. If you select the Private network type, you must select the Availability Zone and VPC to be used. |
| Public | The type of network that anyone can access the network. |

Form Create Data Store - Preview Page (a)
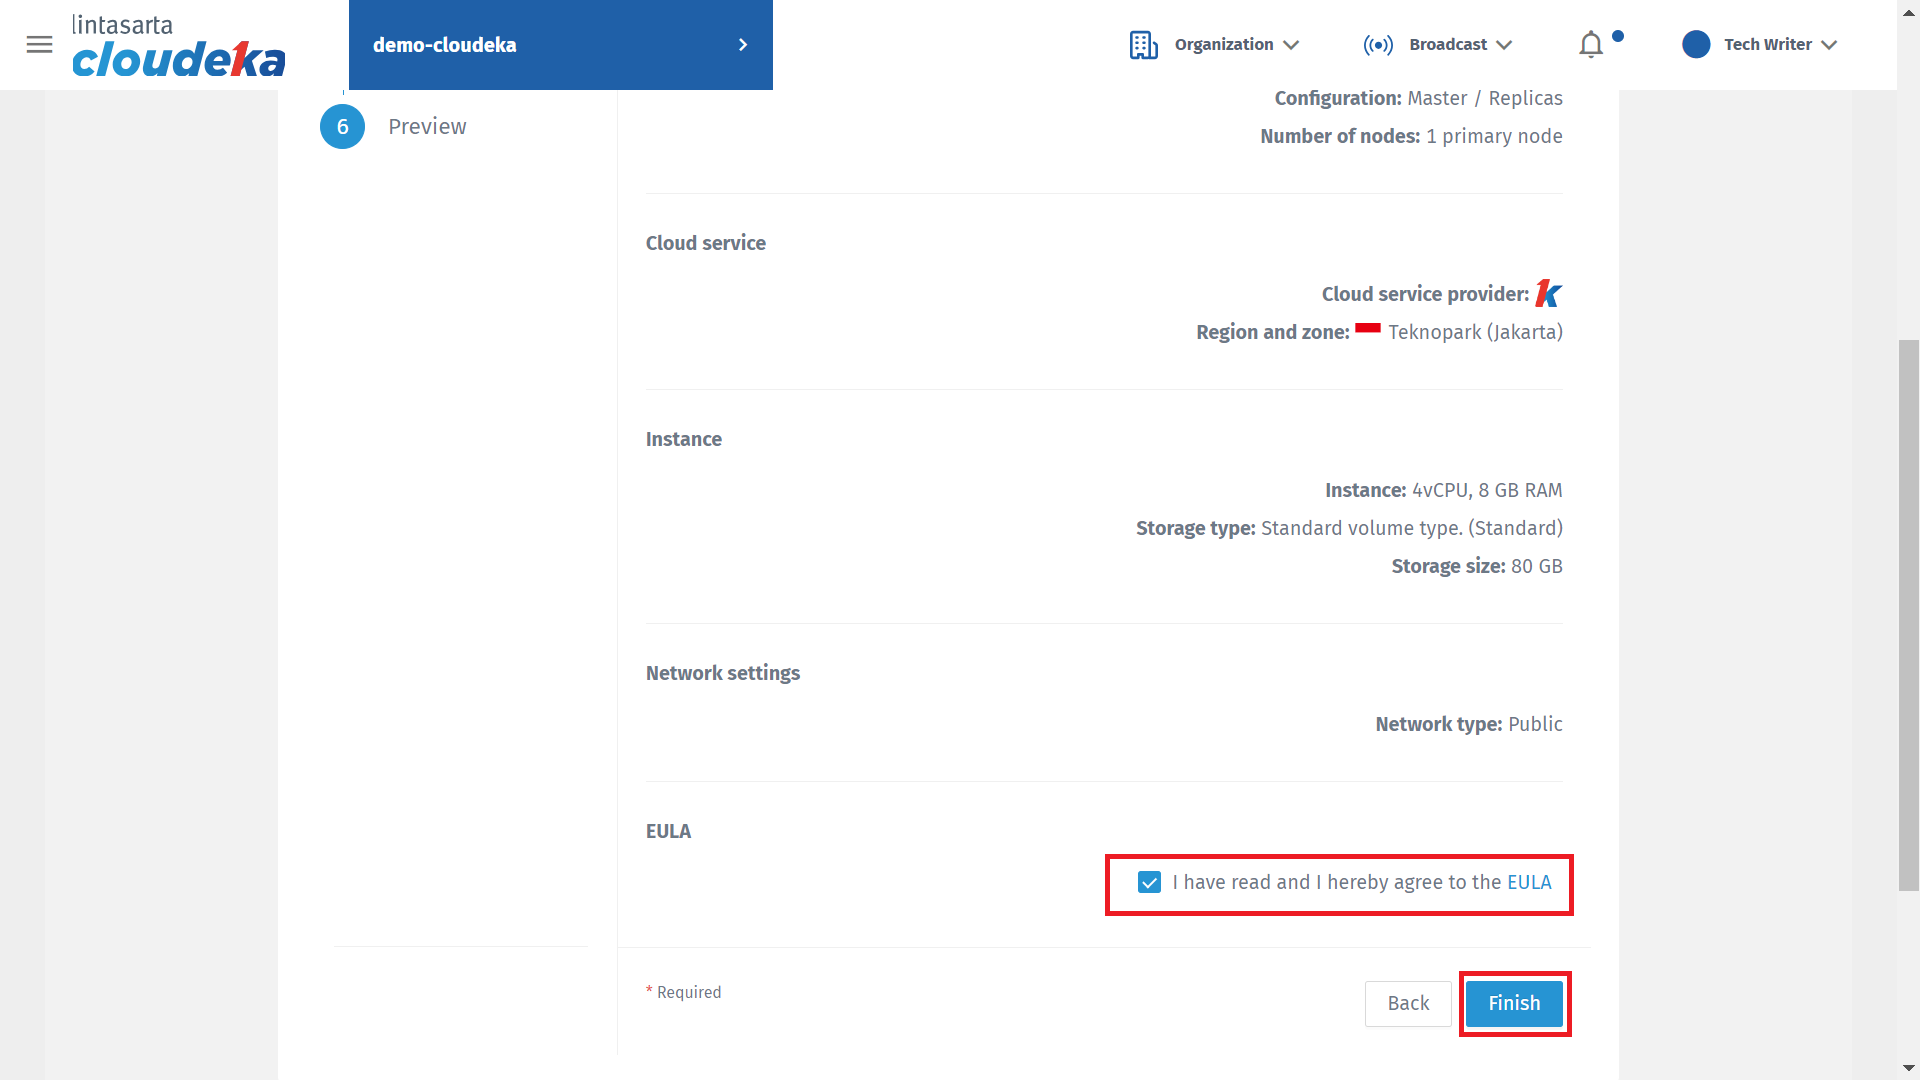
Form Create Data Store - Preview Page (b)

Form Create Data Store - Deploy Data Store
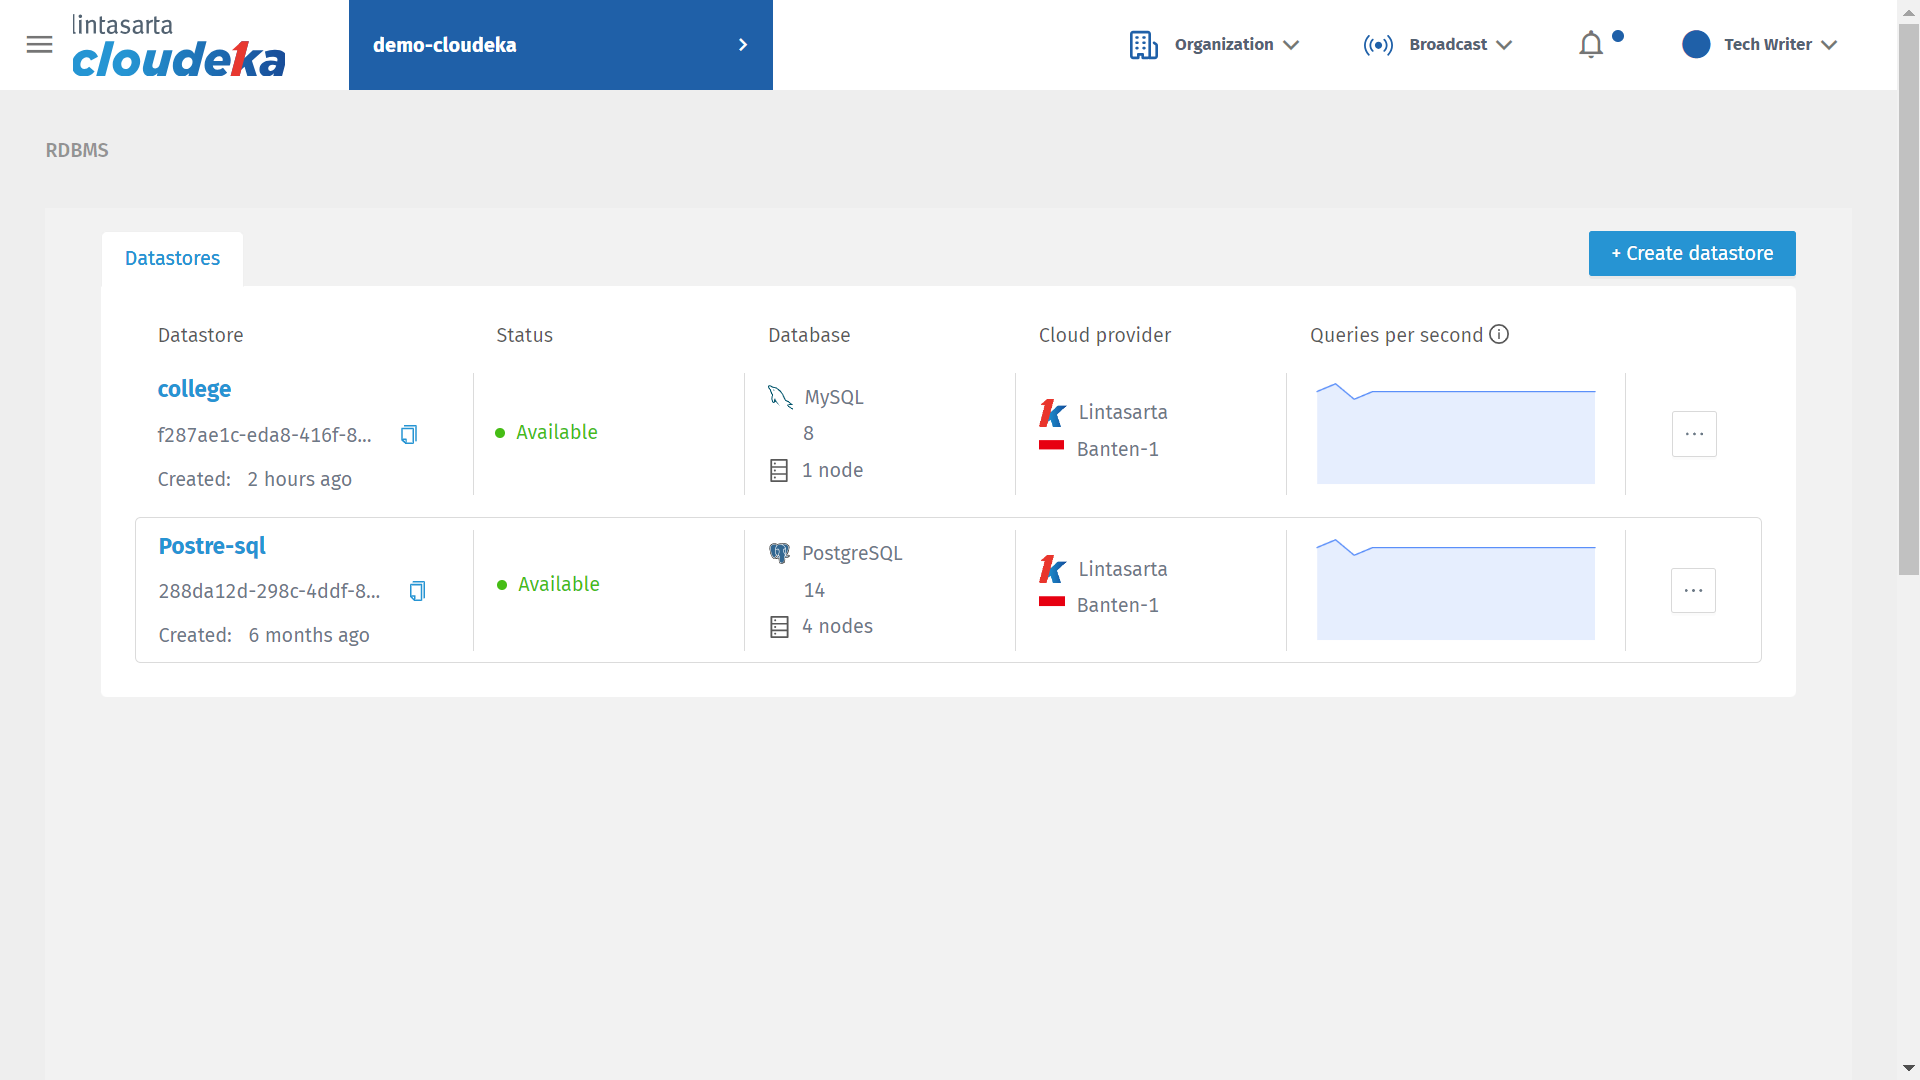
Form Create Data Store - Data Store Successfully Created