> For the complete documentation index, see [llms.txt](https://docs.cloudeka.id/llms.txt). Markdown versions of documentation pages are available by appending `.md` to page URLs; this page is available as [Markdown](https://docs.cloudeka.id/storage/deka-nfs/detail-deka-nfs.md).
# Detail Deka NFS
In the Detail Deka NFS, you can add configuration for the clients that will be used by the Virtual Machine (VM) in the Instance, and update the size of Deka NFS. In the client configuration, you can add and remove network subnets that your VM will use.
## Add Client
Here are steps to add a client configuration to the Deka NFS configuration:
* On the Deka NFS page click the More button and select Detail button.
Add Client (a)
* On the Detail Deka NFS page, click the Add Client button.
Add Client (b)
* In the Add Instance Client window, fill in the Client Name, and Network Subnet used. Click the Save button to save the configuration.
Add Client (c)
* Wait until the process is complete, and the notification “Deka NFS Client \[client-name] has been successfully created” appears.
Add Client (d)
## Delete Client
Here are the steps to delete a client configuration in the Deka NFS configuration:
* On the Deka NFS page, click the More button and select Detail.
Delete Client (a)
* On the Detail Deka NFS page, click the Delete button in the Action column next to the client you want to remove.
Delete Client (b)
* In the Delete \[Client Name Deka NFS Configuration] window, click the "Yes" button to proceed with the deletion process.
Delete Client (c)
* Wait for the process to complete until the status changes to On Delete, and a notification will appear stating "Deka NFS Client \[Client Name Deka NFS]" has been successfully deleted.
Delete Client (d)
## Increase Size
Here are the steps to increase the size of the Deka NFS configuration:
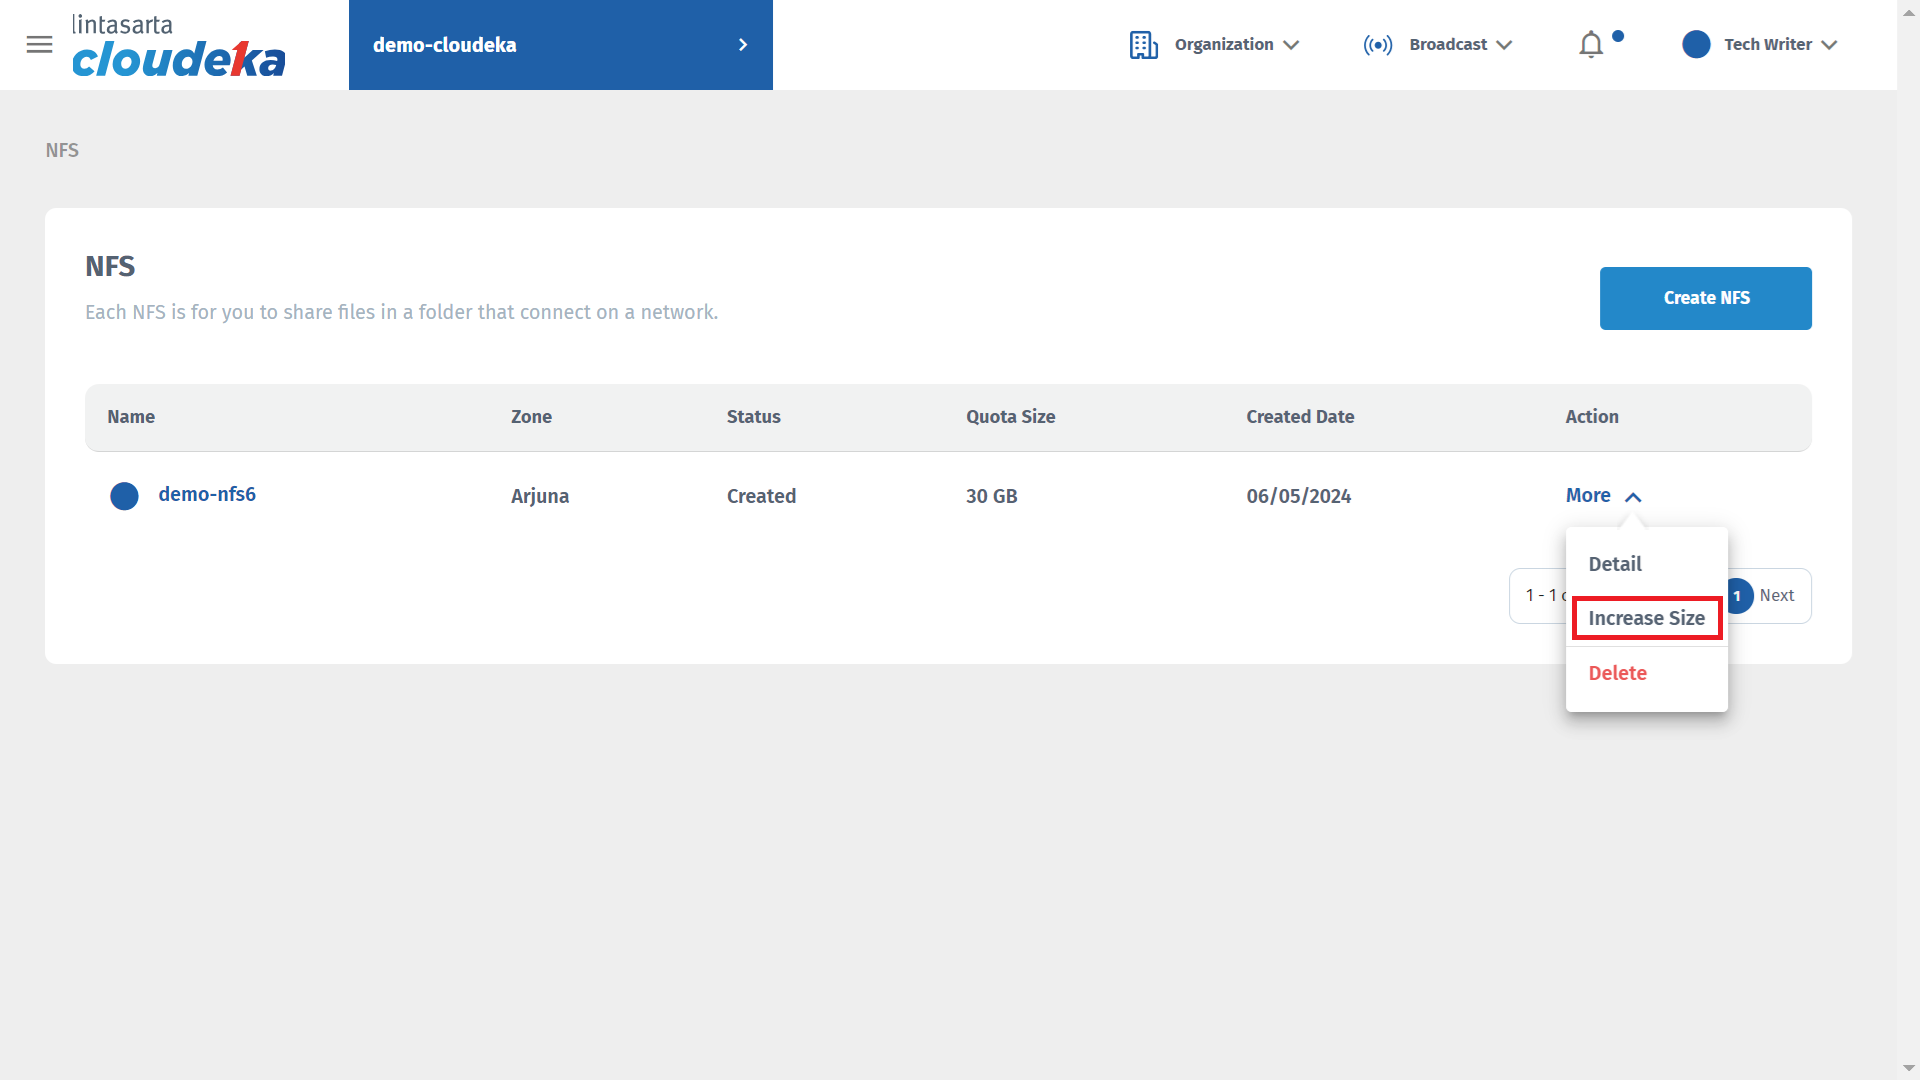
* On the Deka NFS page, click the More button and select Detail.
Increase Size (a)
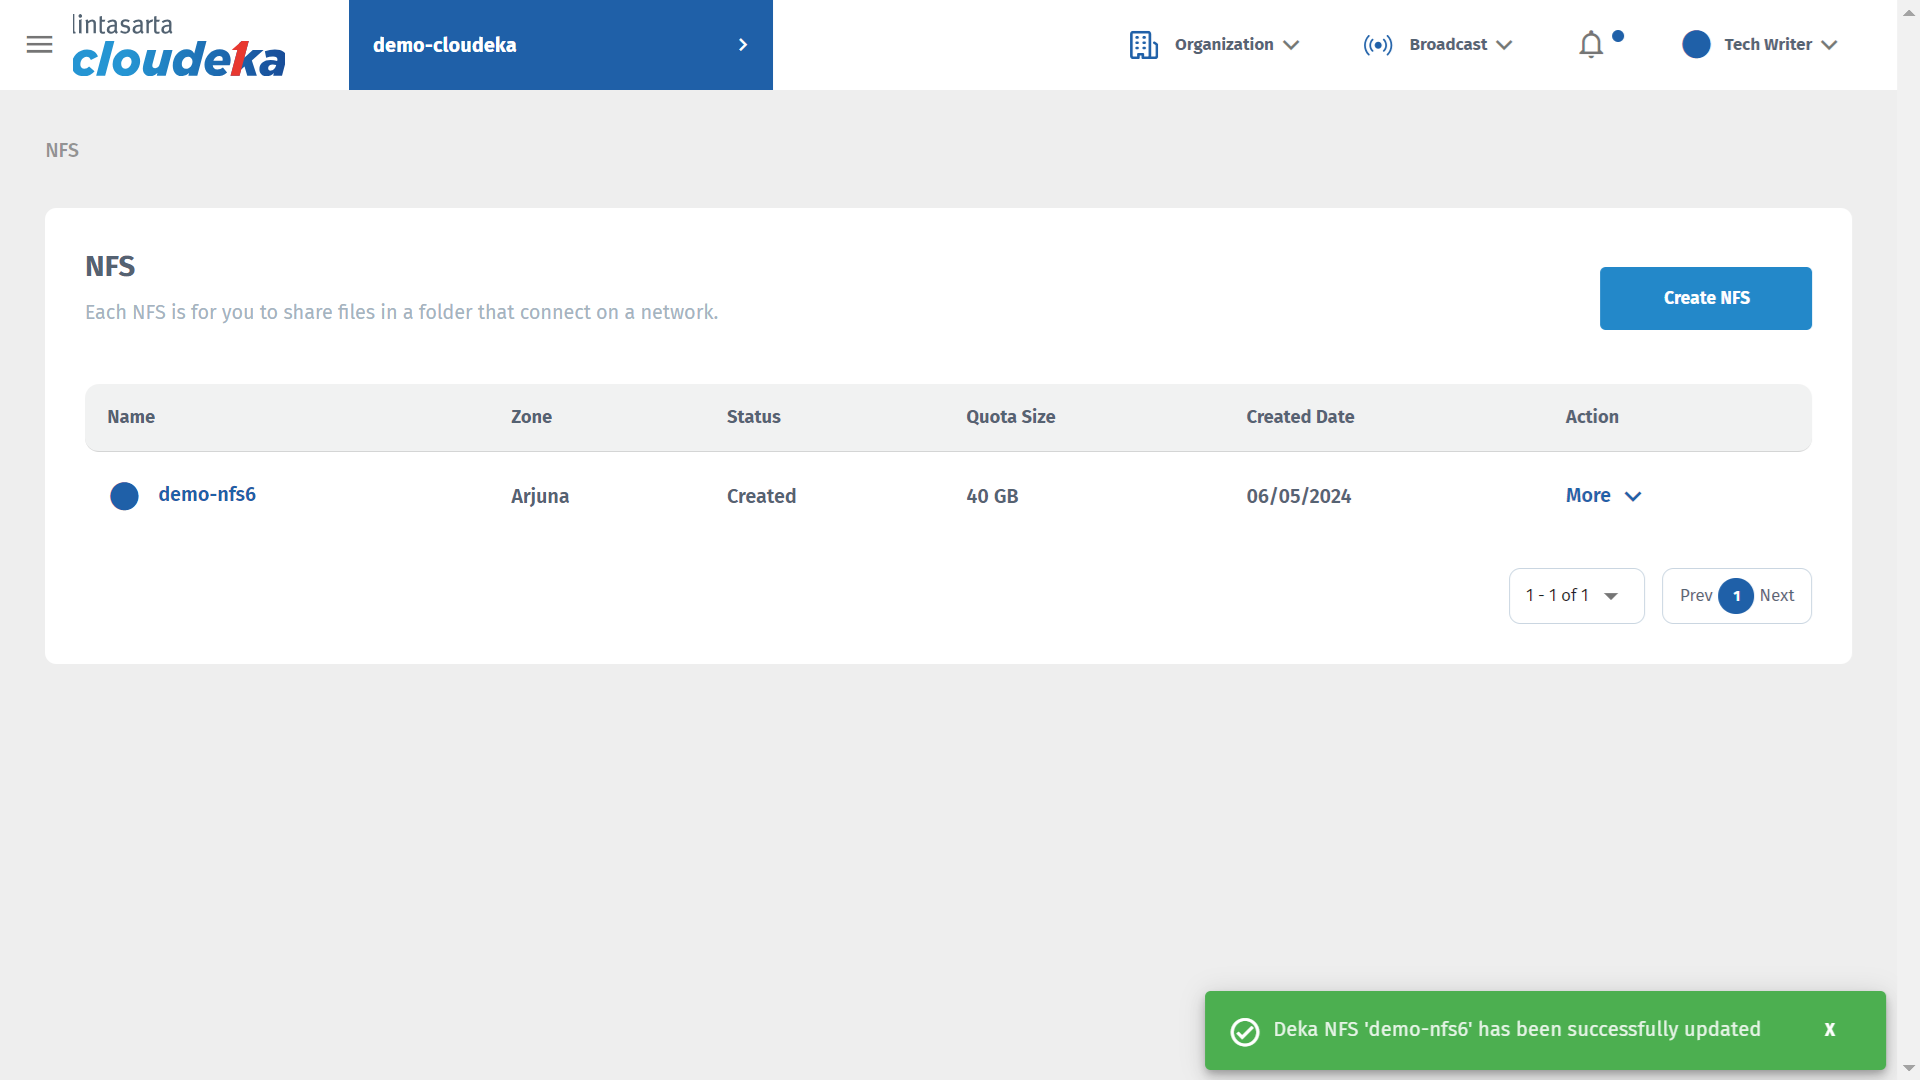
* The Increase NFS Size window appears, enter the size and press the Save button. The minimum NFS size is 30GB.
Increase Size (b)
* Wait for the process to complete, and a notification will appear confirming the successful resizing of the Deka NFS configuration.