Configuration NAT Gateway
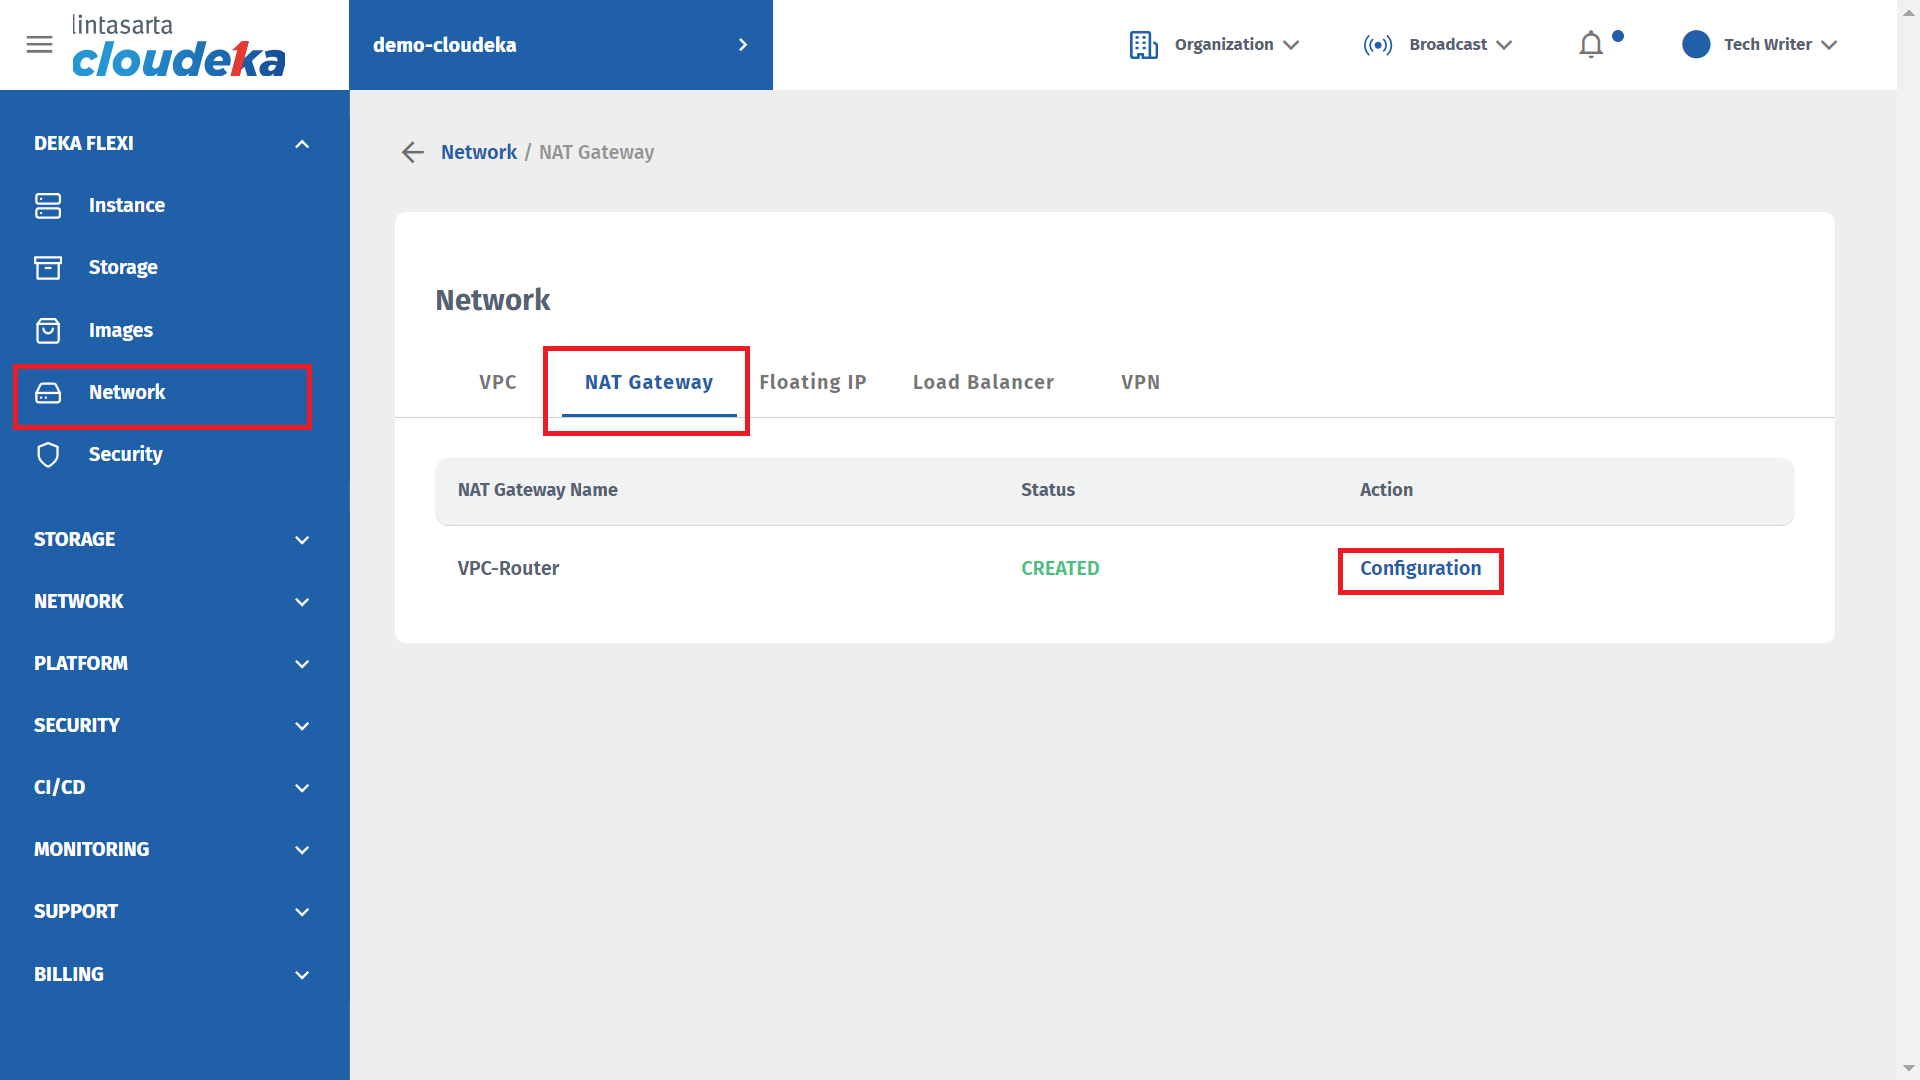
After configuring the interface used by each virtual machine, the next step is to configure the NAT Gateway to get a public IP address to be used, and add SNAT and DNAT configurations. On the Cloudeka portal service page, select the Network menu, select the NAT Gateway tab, and press the Configuration button.
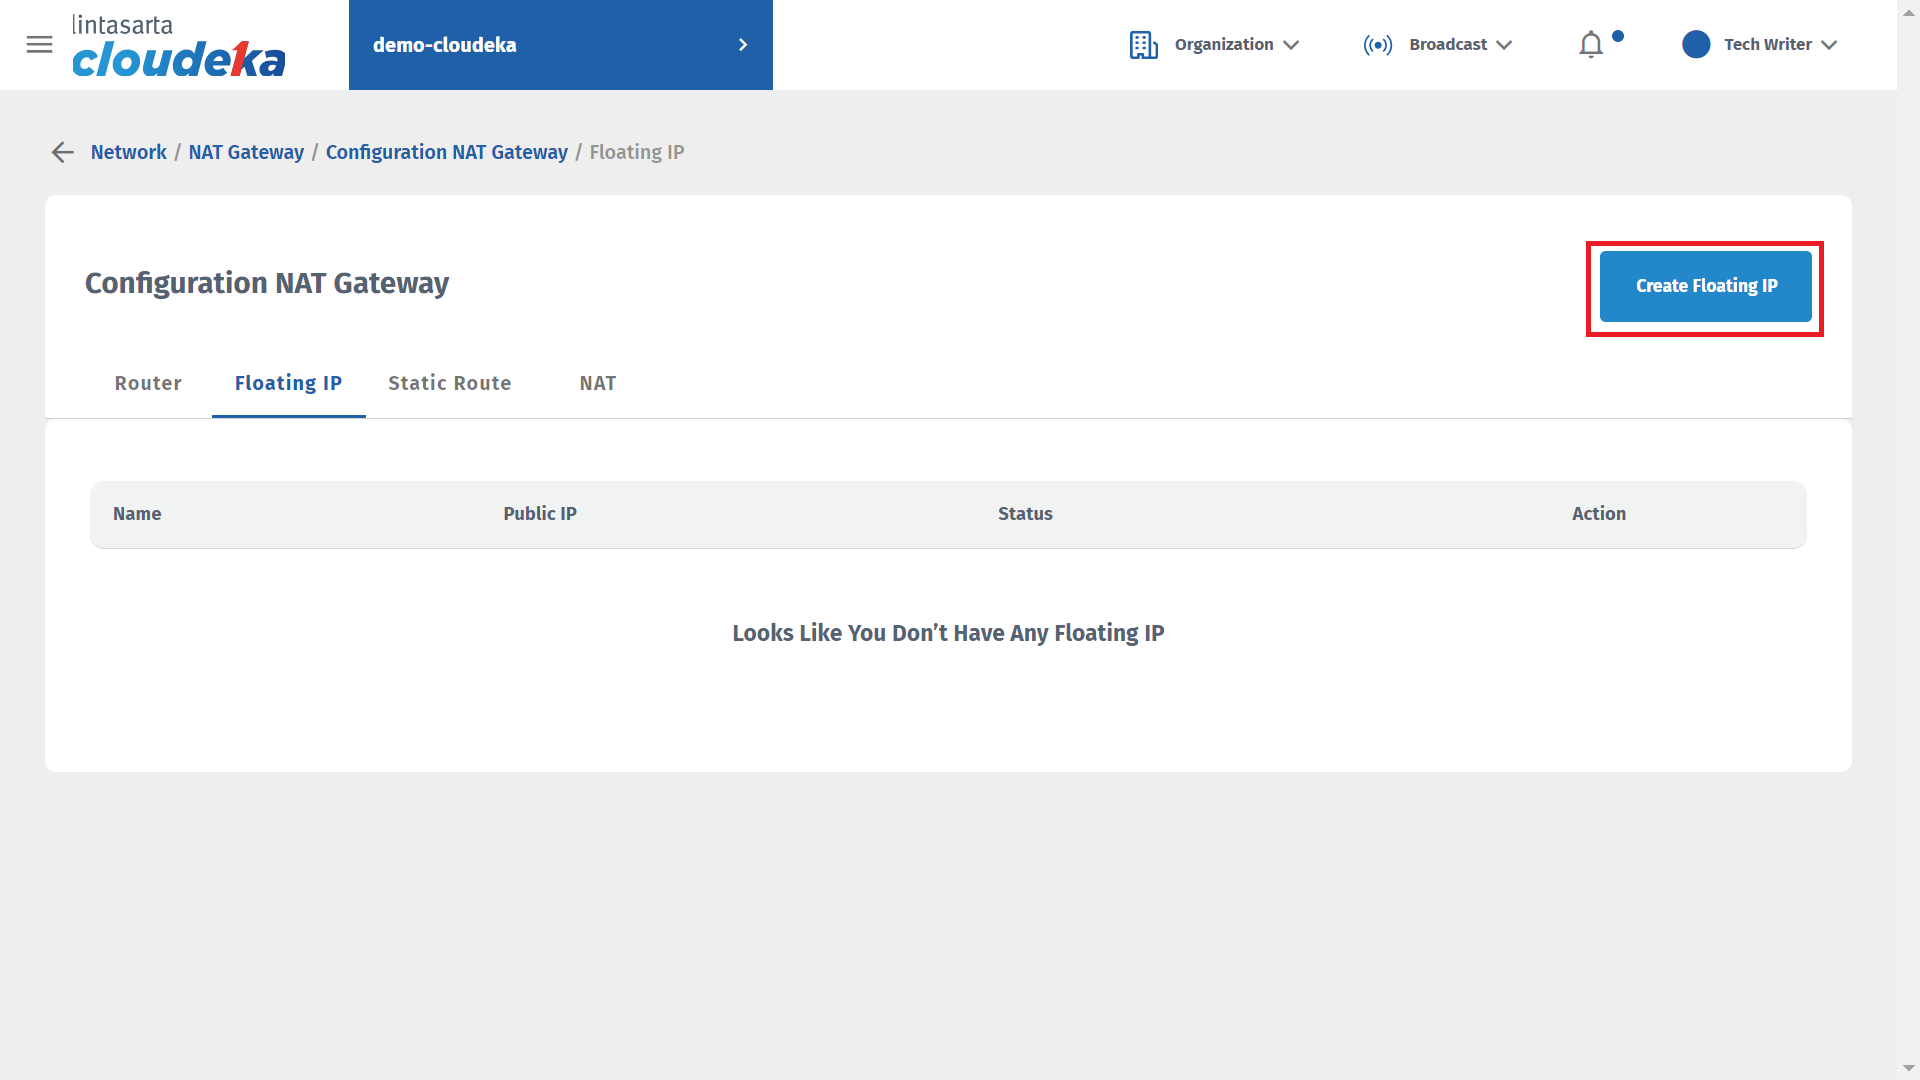
On the NAT Gateway Configuration page, select the Floating IP tab, and press the Create Floating IP button.
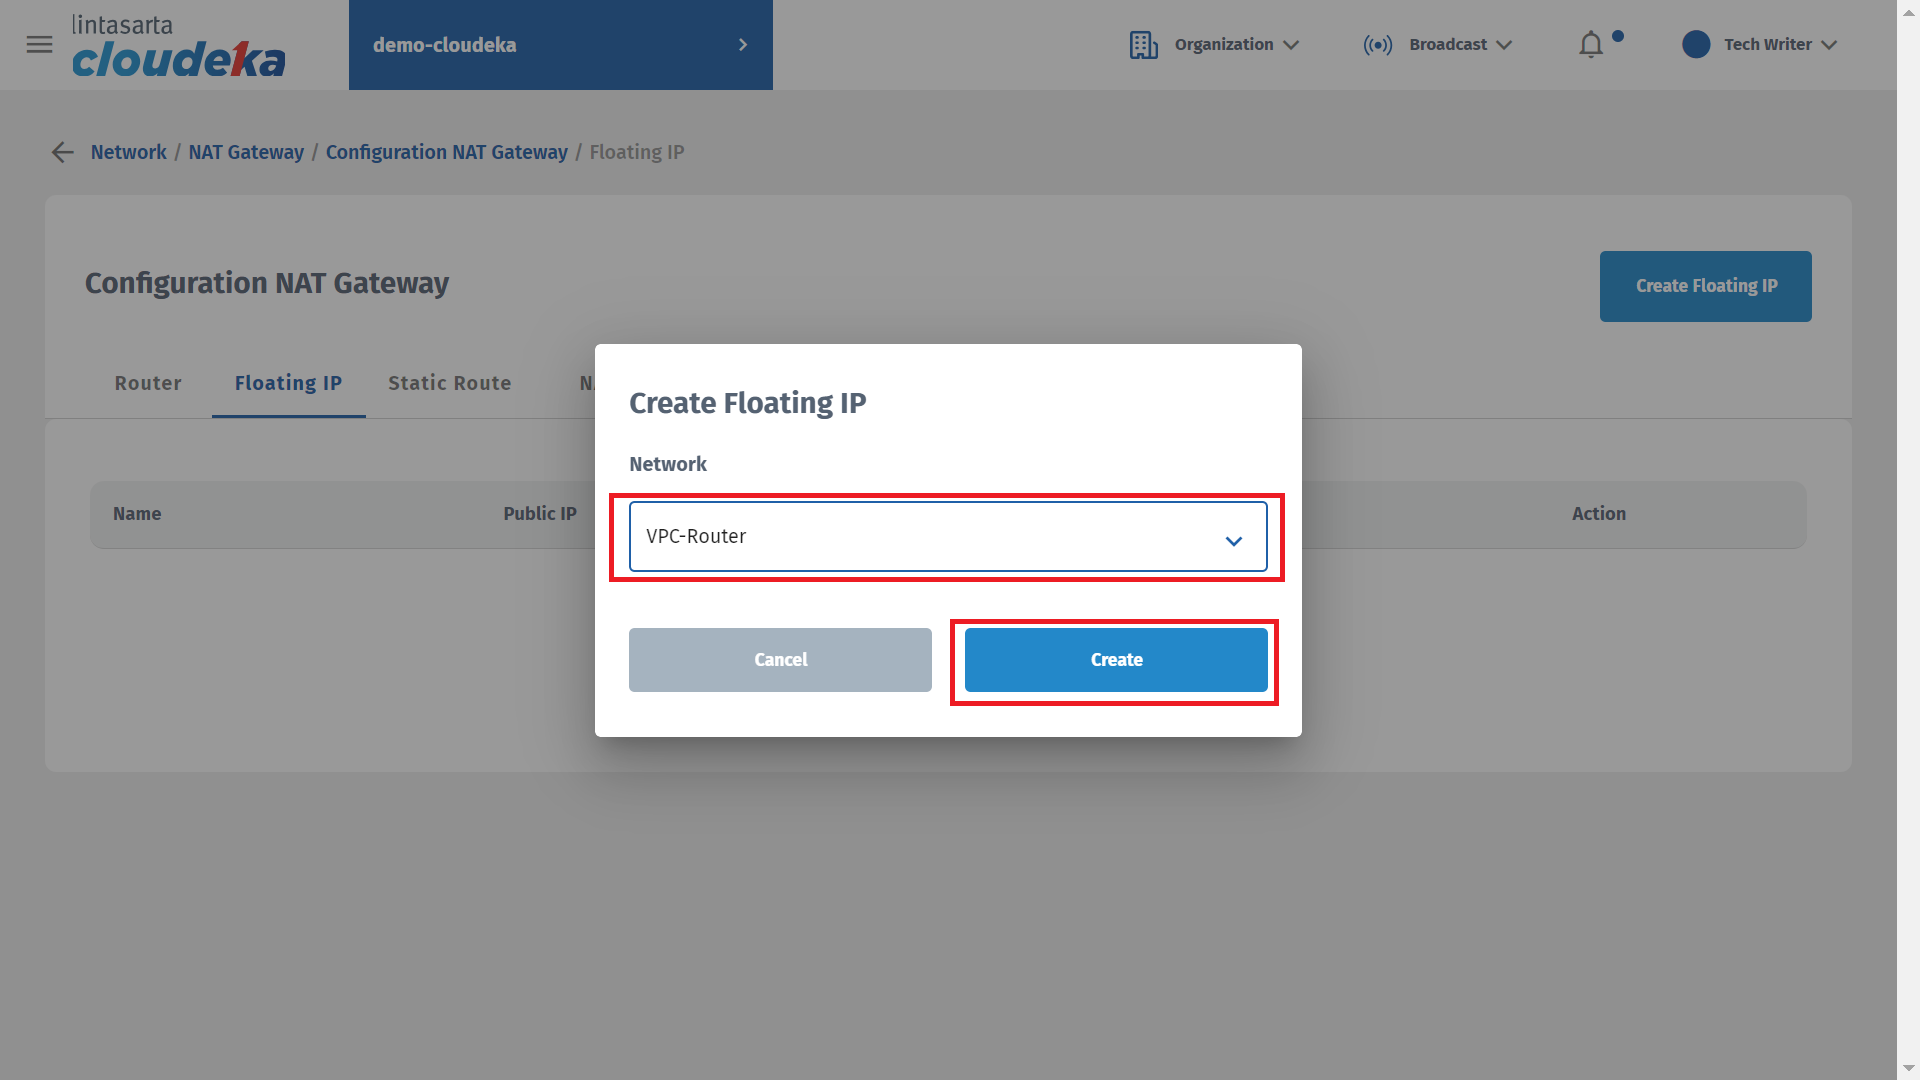
The Creating Floating IP window appears, fill in the Network column with VPC, and press the Create button to continue the process.
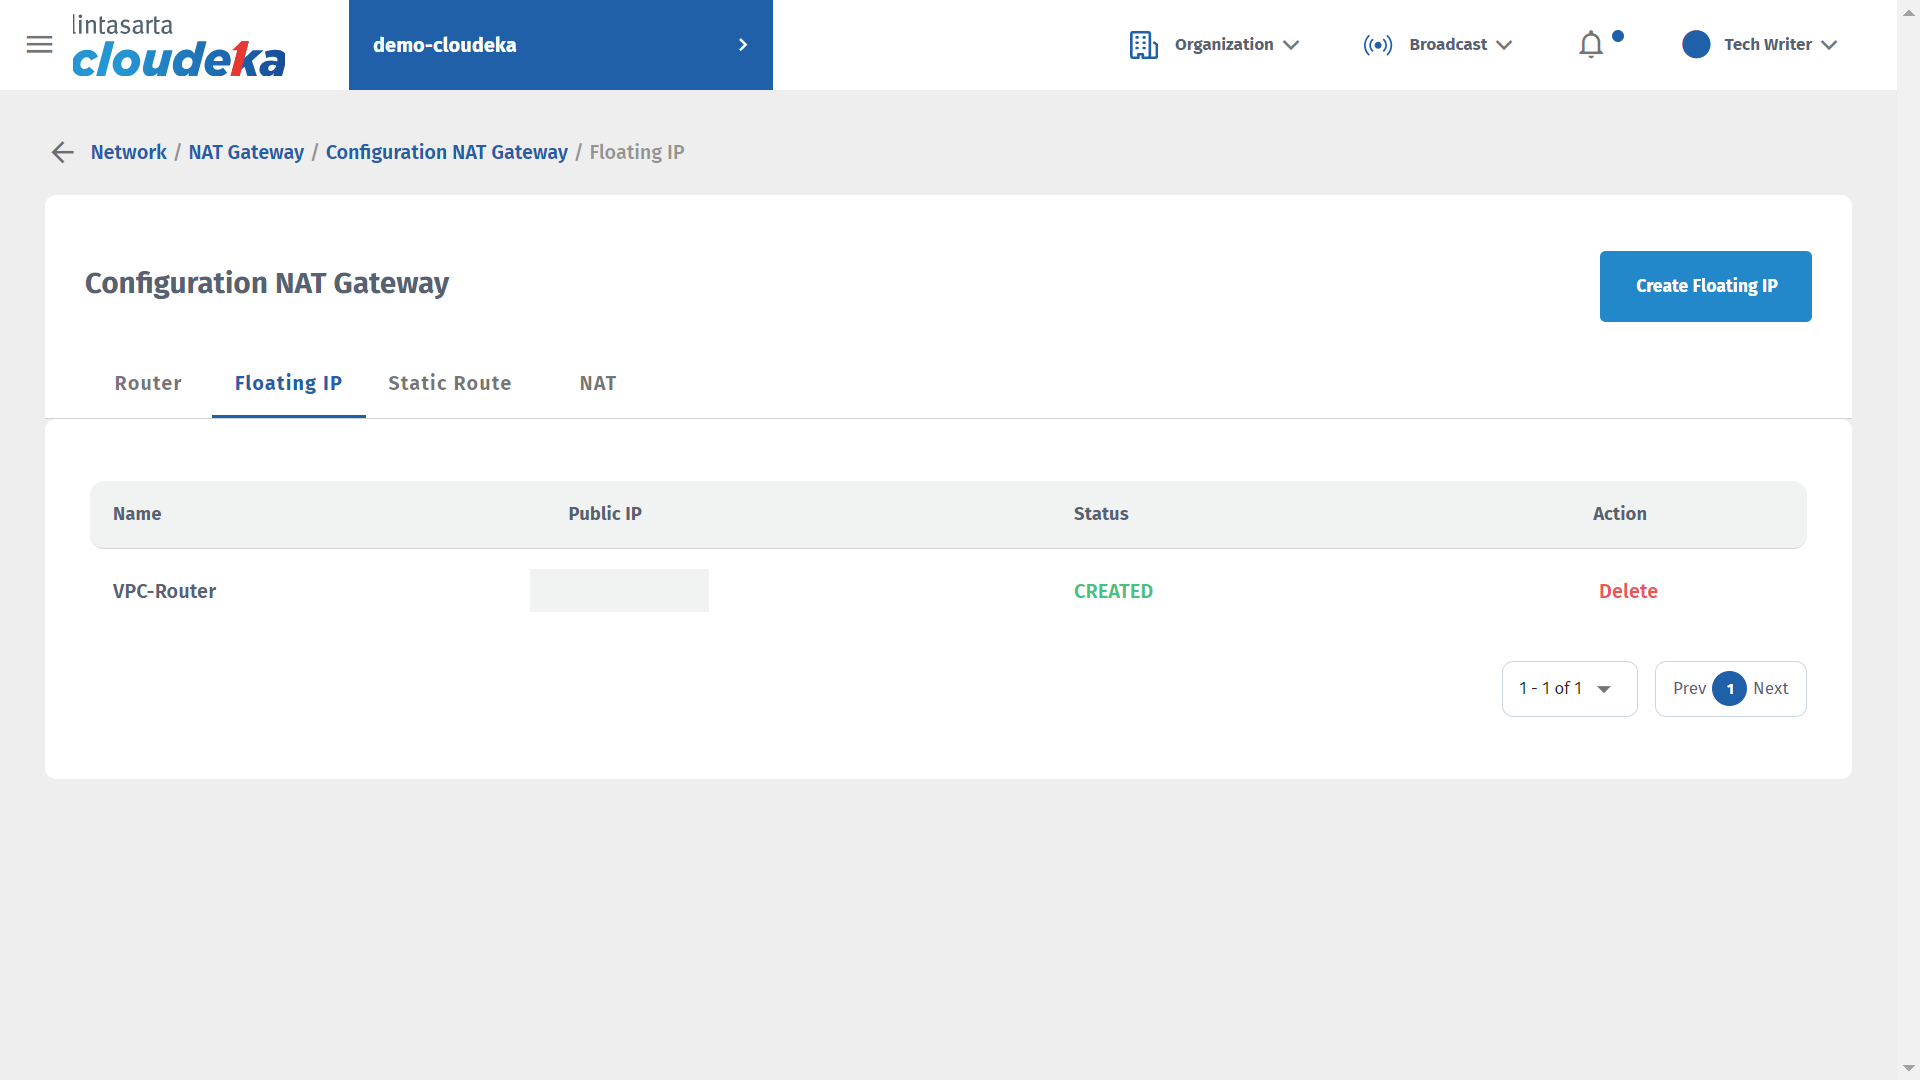
Wait until the status becomes Created, and in the Public IP column the public IP address used is available.
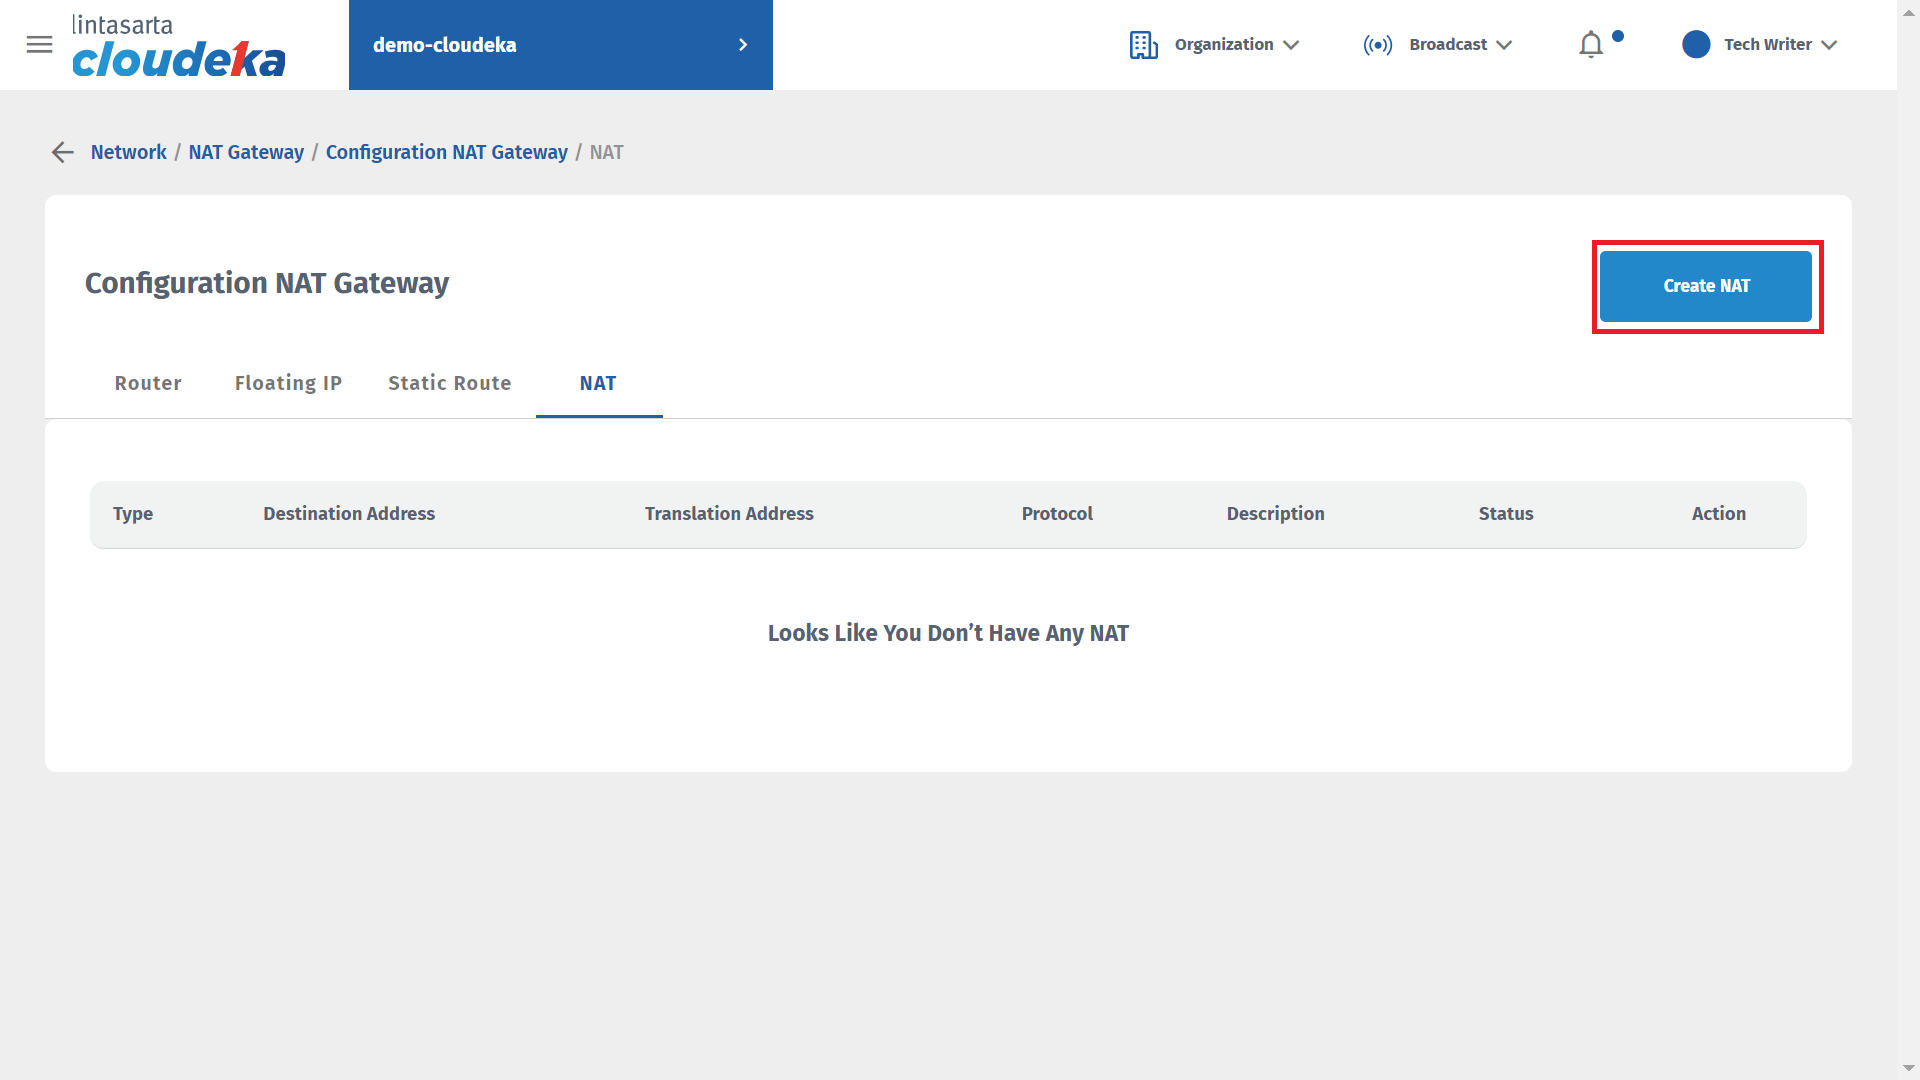
The next step is to create a SNAT configuration so that virtual machines can connect to each other. On the NAT Gateway Configuration page, select the NAT tab, and press the Create NAT button.
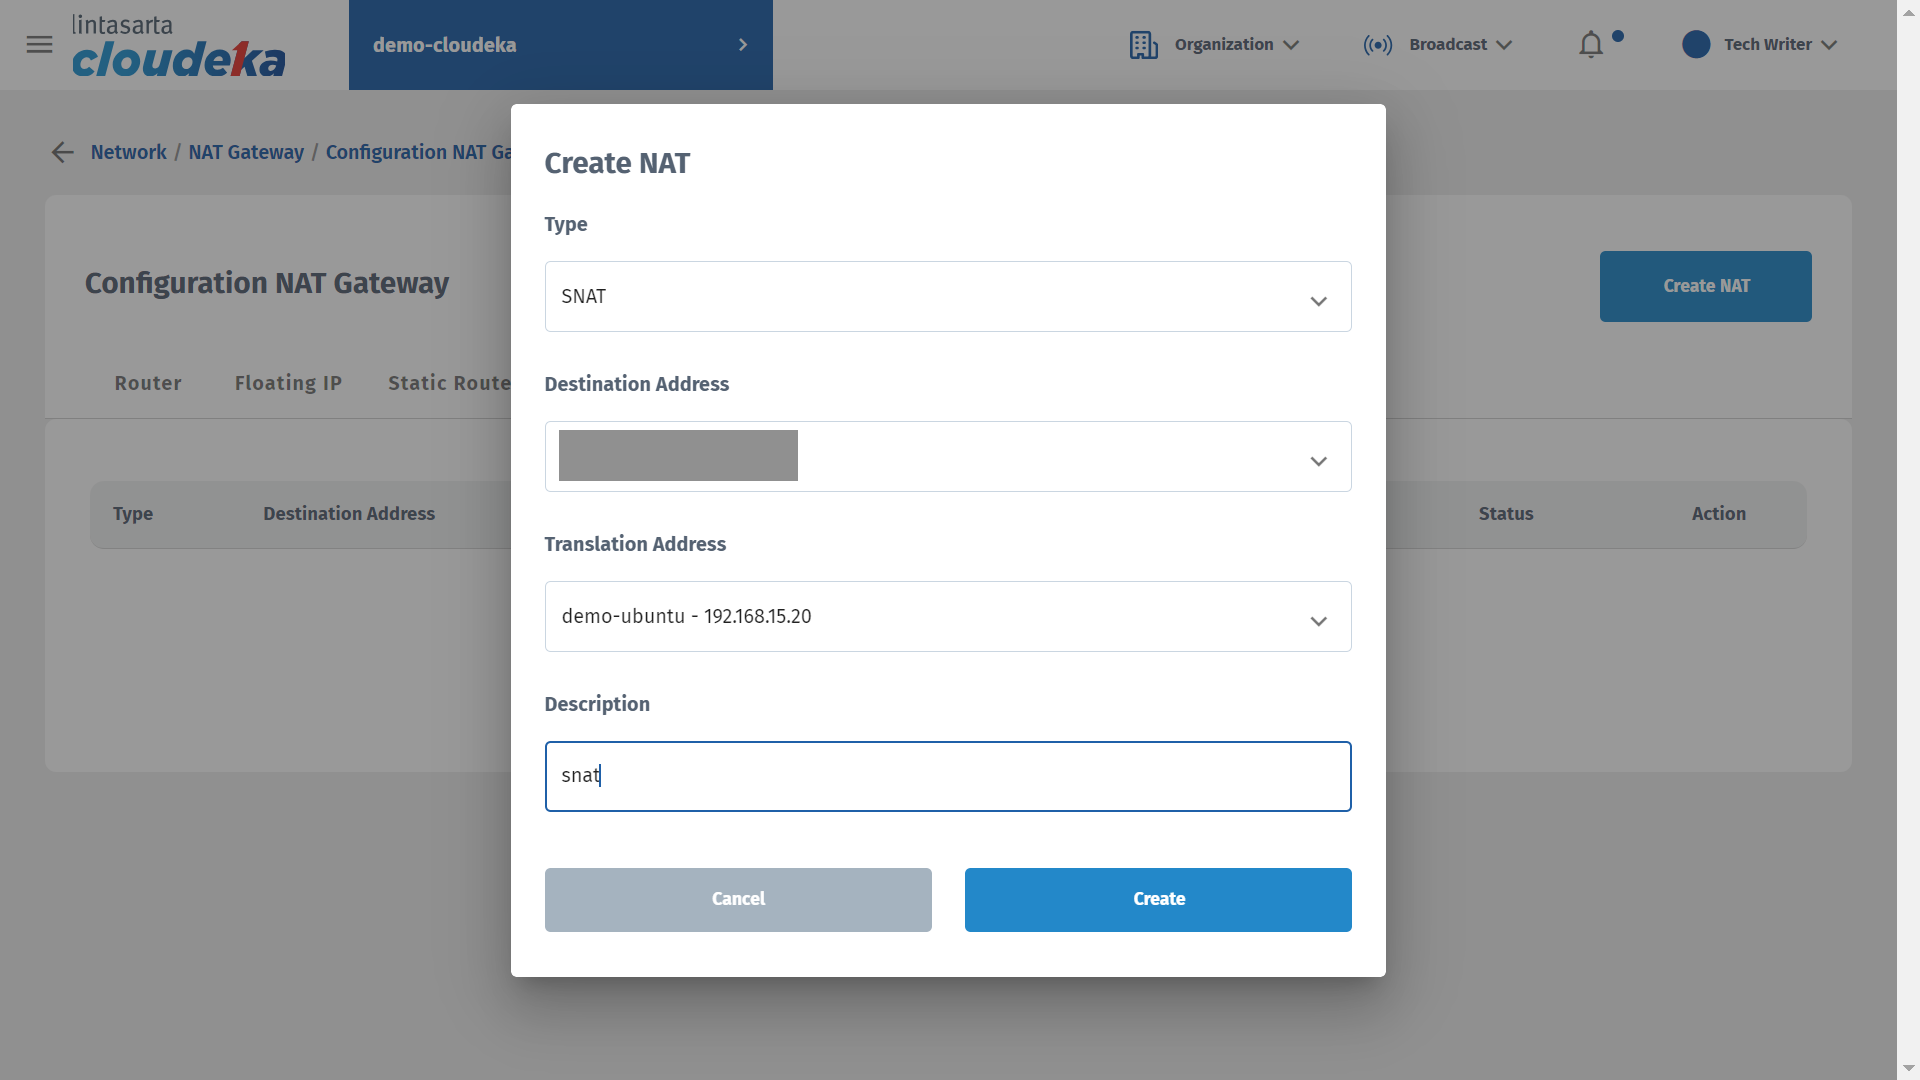
The Create SNAT window appears, fill in the Type column with SNAT. In the Destination Address column, select the IP obtained from Floating IP, and in the Translation Address column, select the IP used in the instance that uses the Simple type VPC. Fill in the Description column and press the Create button.
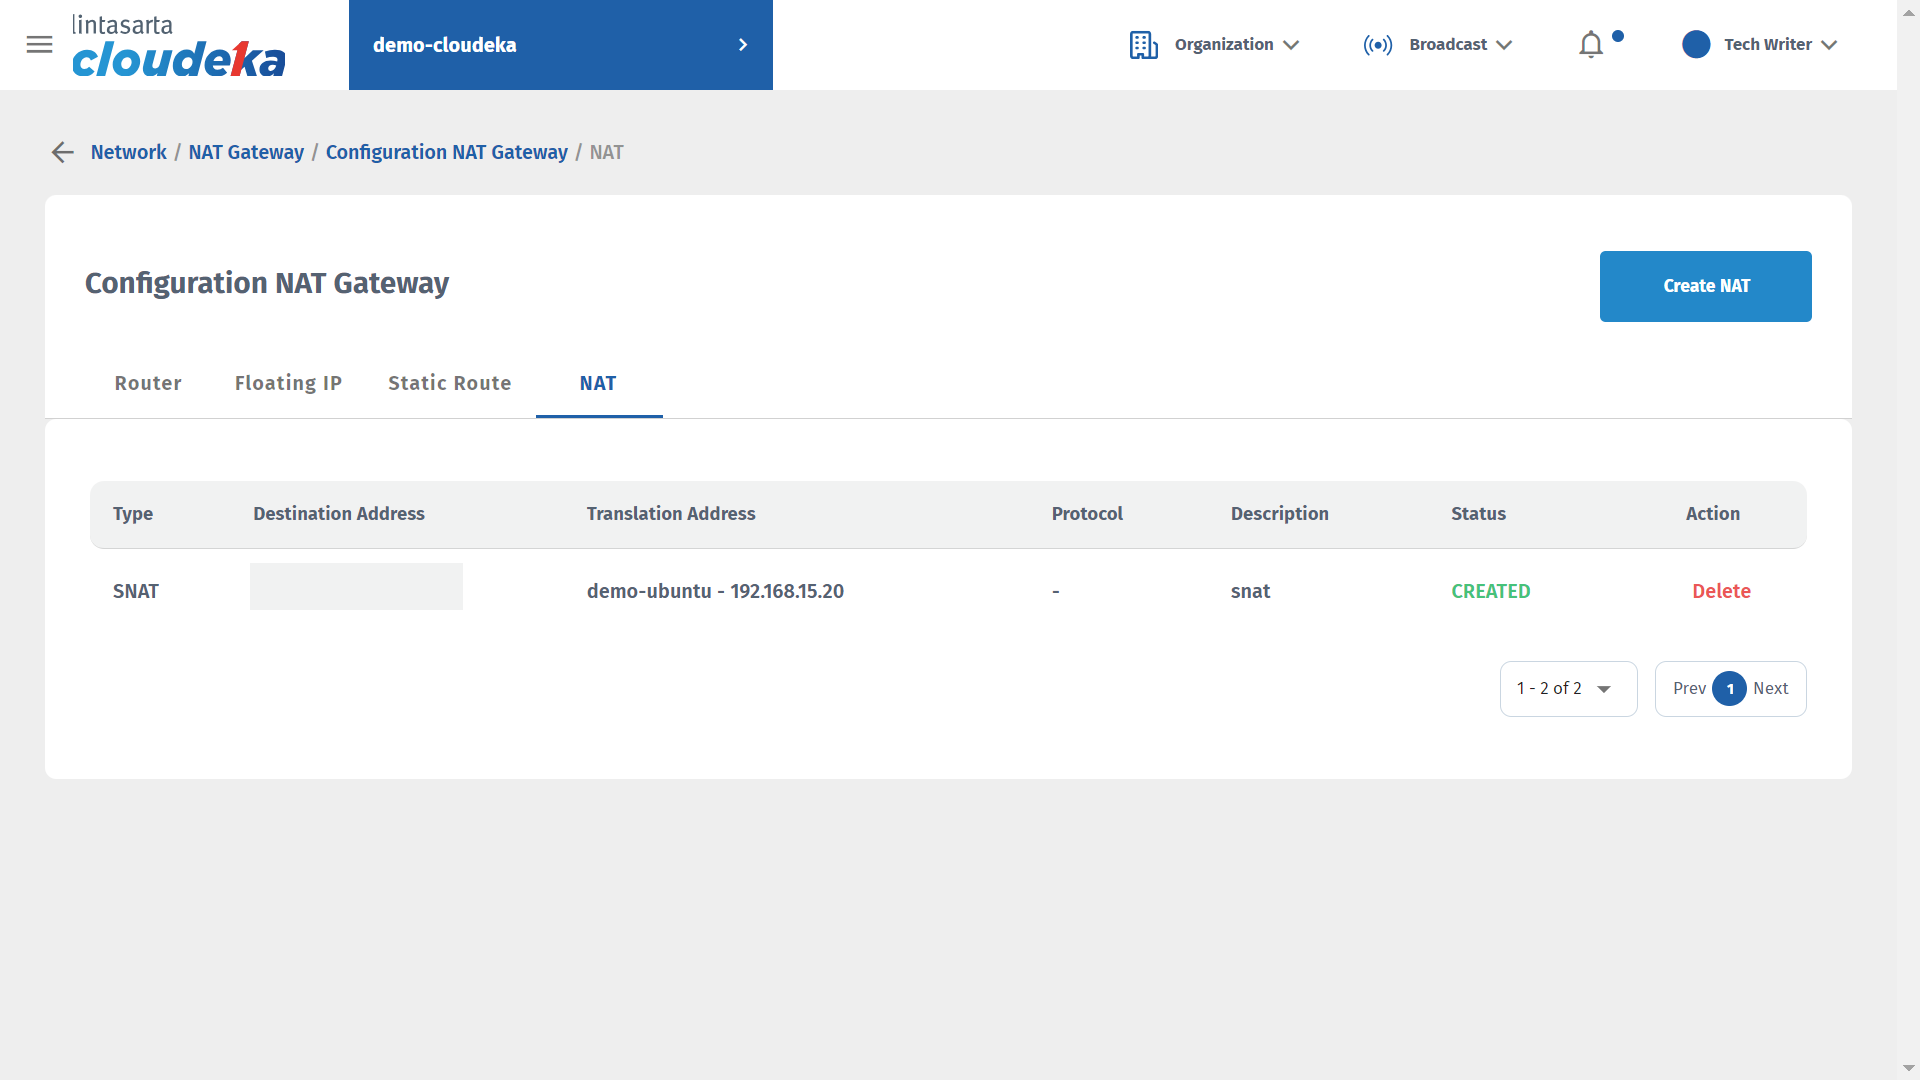
Wait until the SNAT creation process is complete until the status changes to Created.
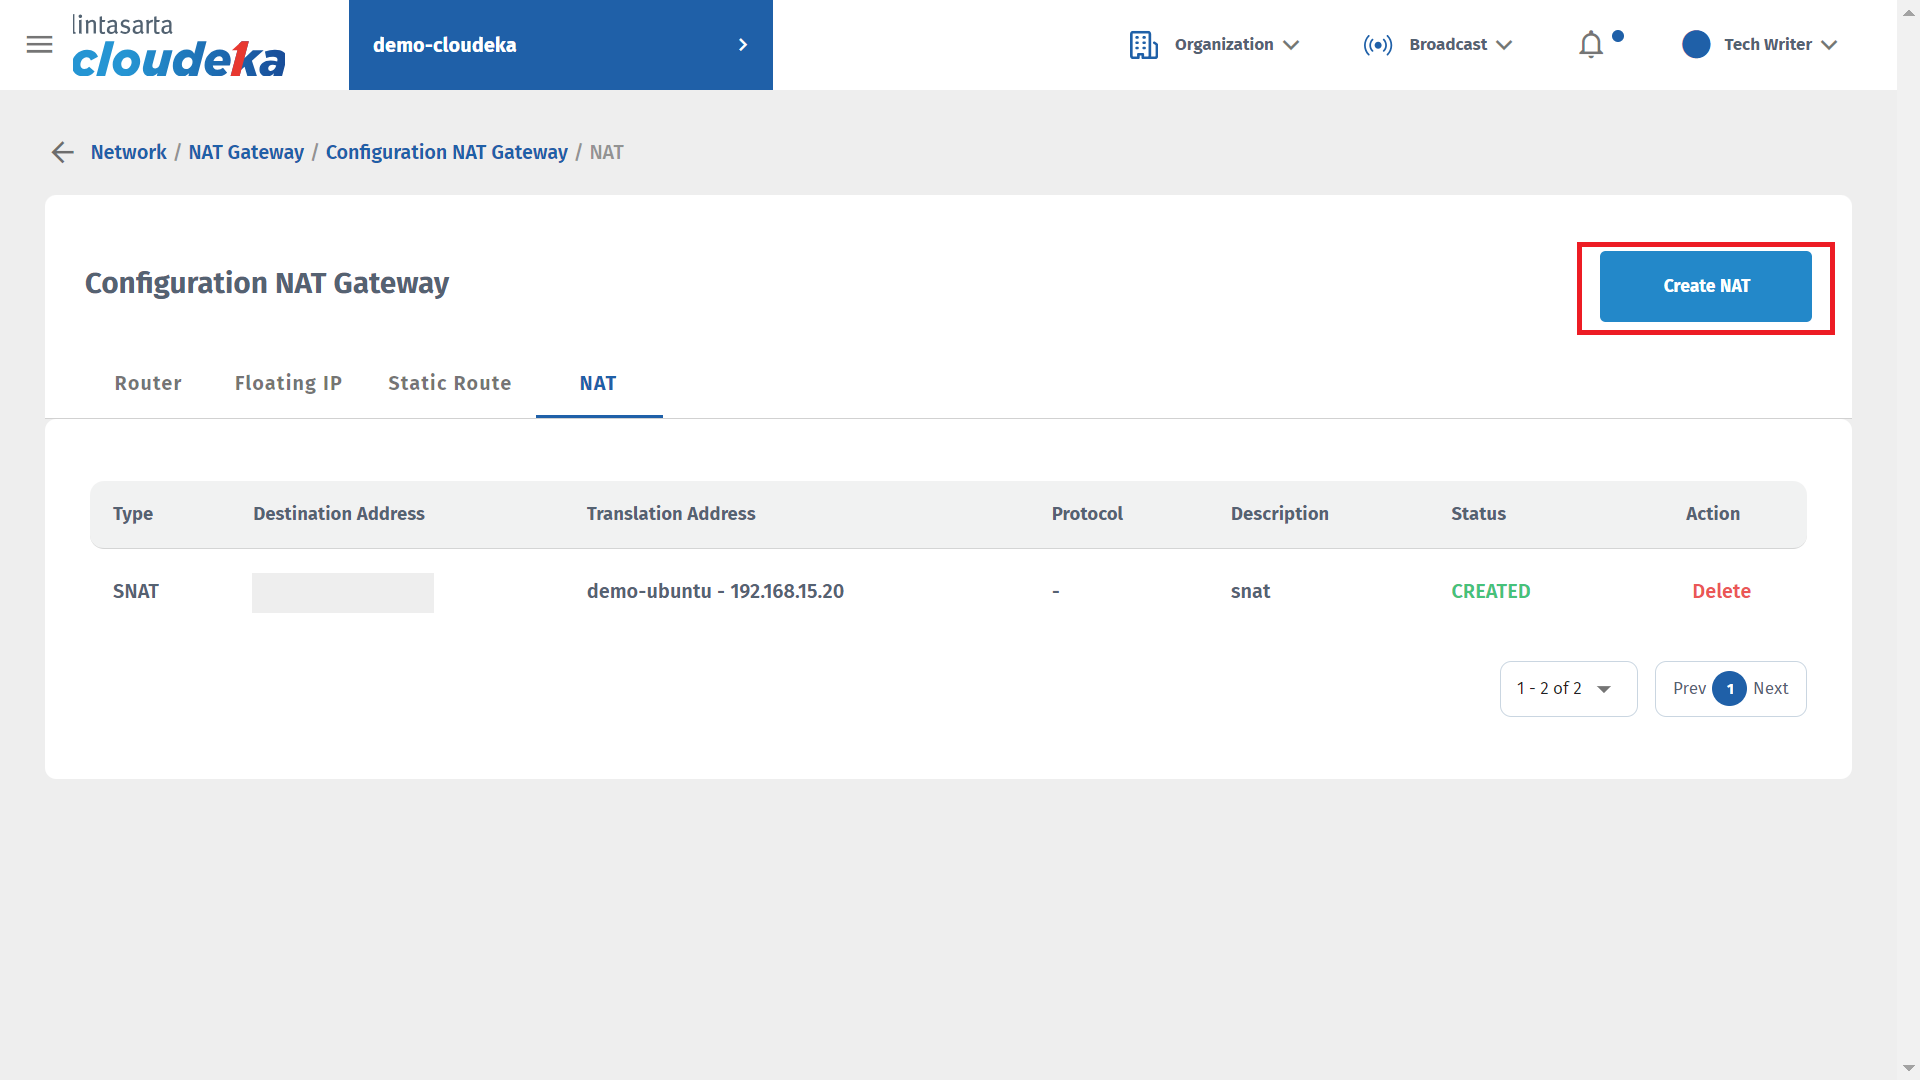
The next step is to add a DNAT configuration so that the virtual machine can be accessed via an external network. On the NAT Gateway Configuration page, select the NAT tab, and press the Create NAT button.
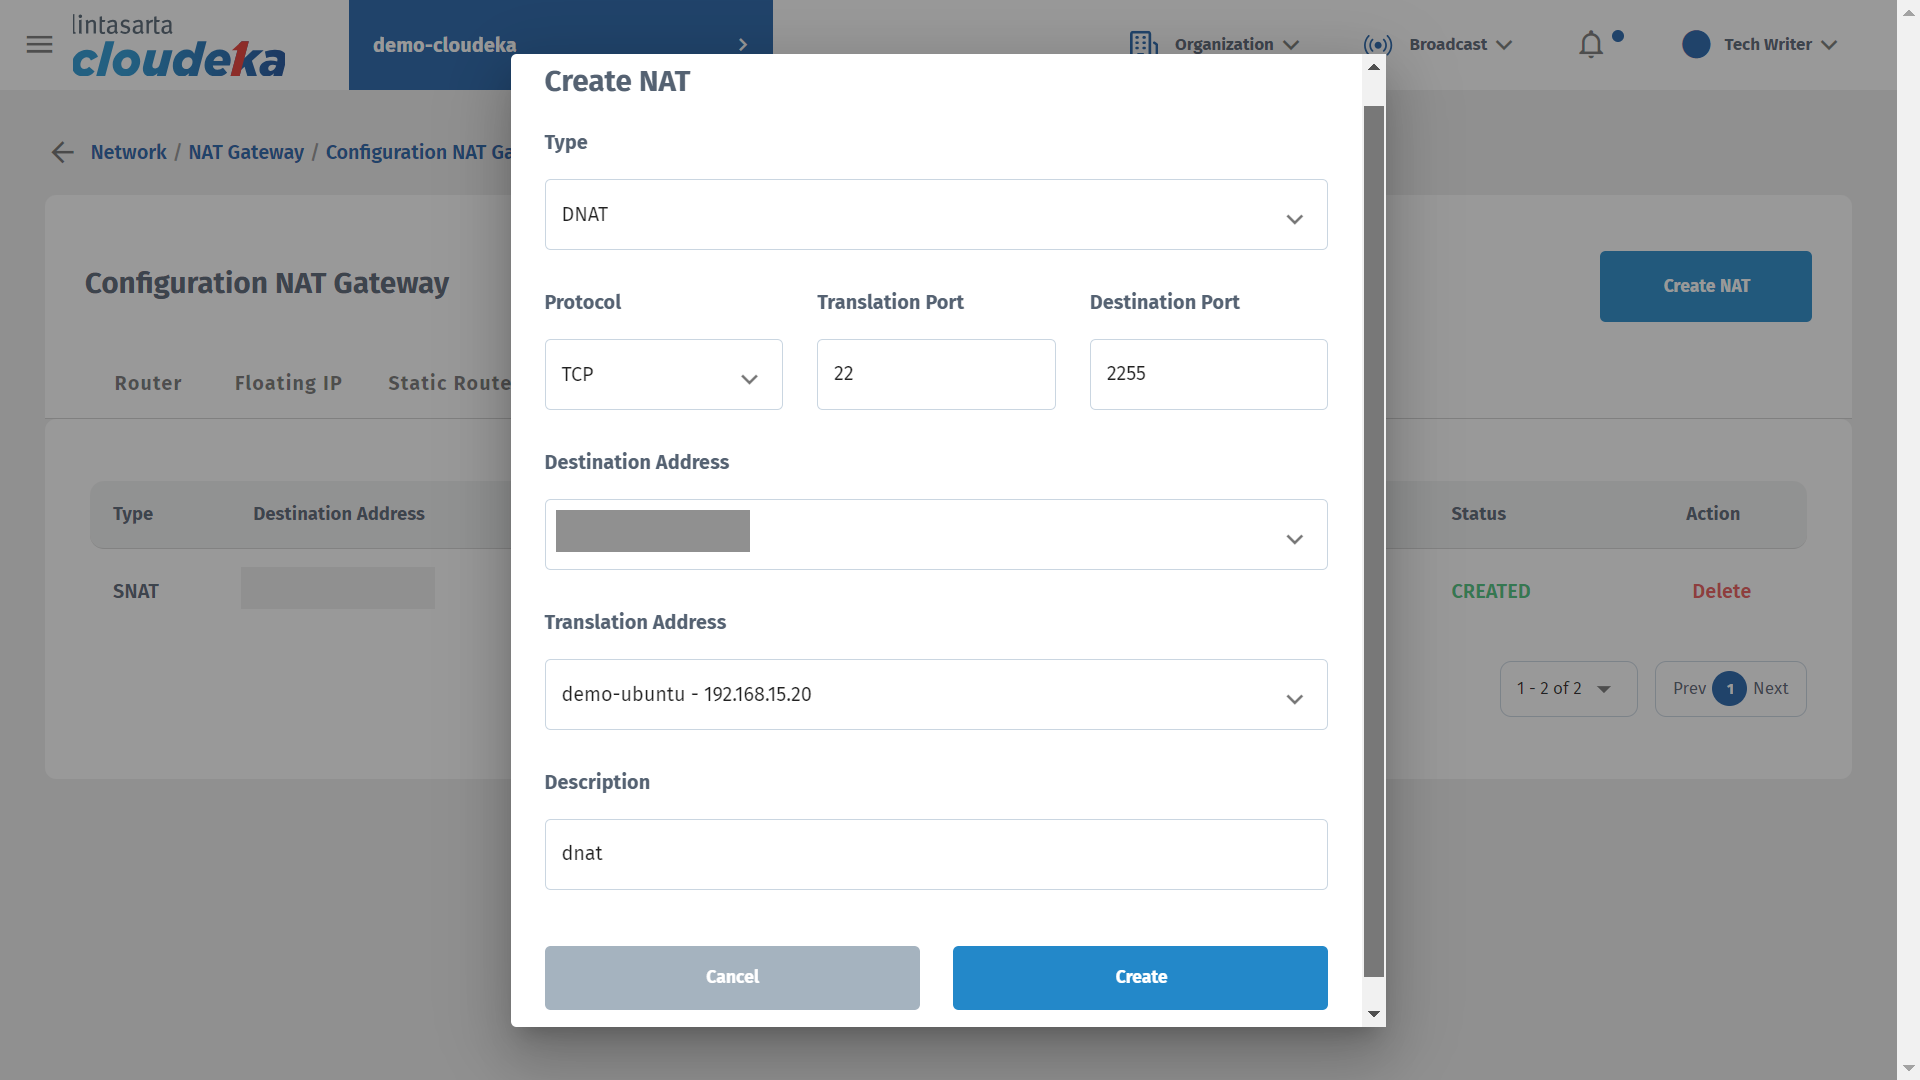
The Create NAT window appears, fill in the Type with DNAT. In the Protocol column, select TCP because the port used by TCP is 22, so fill in the Translation Port as 22 and adjust the Destination Port to the port you want. Select the Destination Address column with the Floating IP obtained, Translation Address select the virtual machine that will be accessed, the Description column fill in an explanation of the type created and press the Create button to add the DNAT configuration.
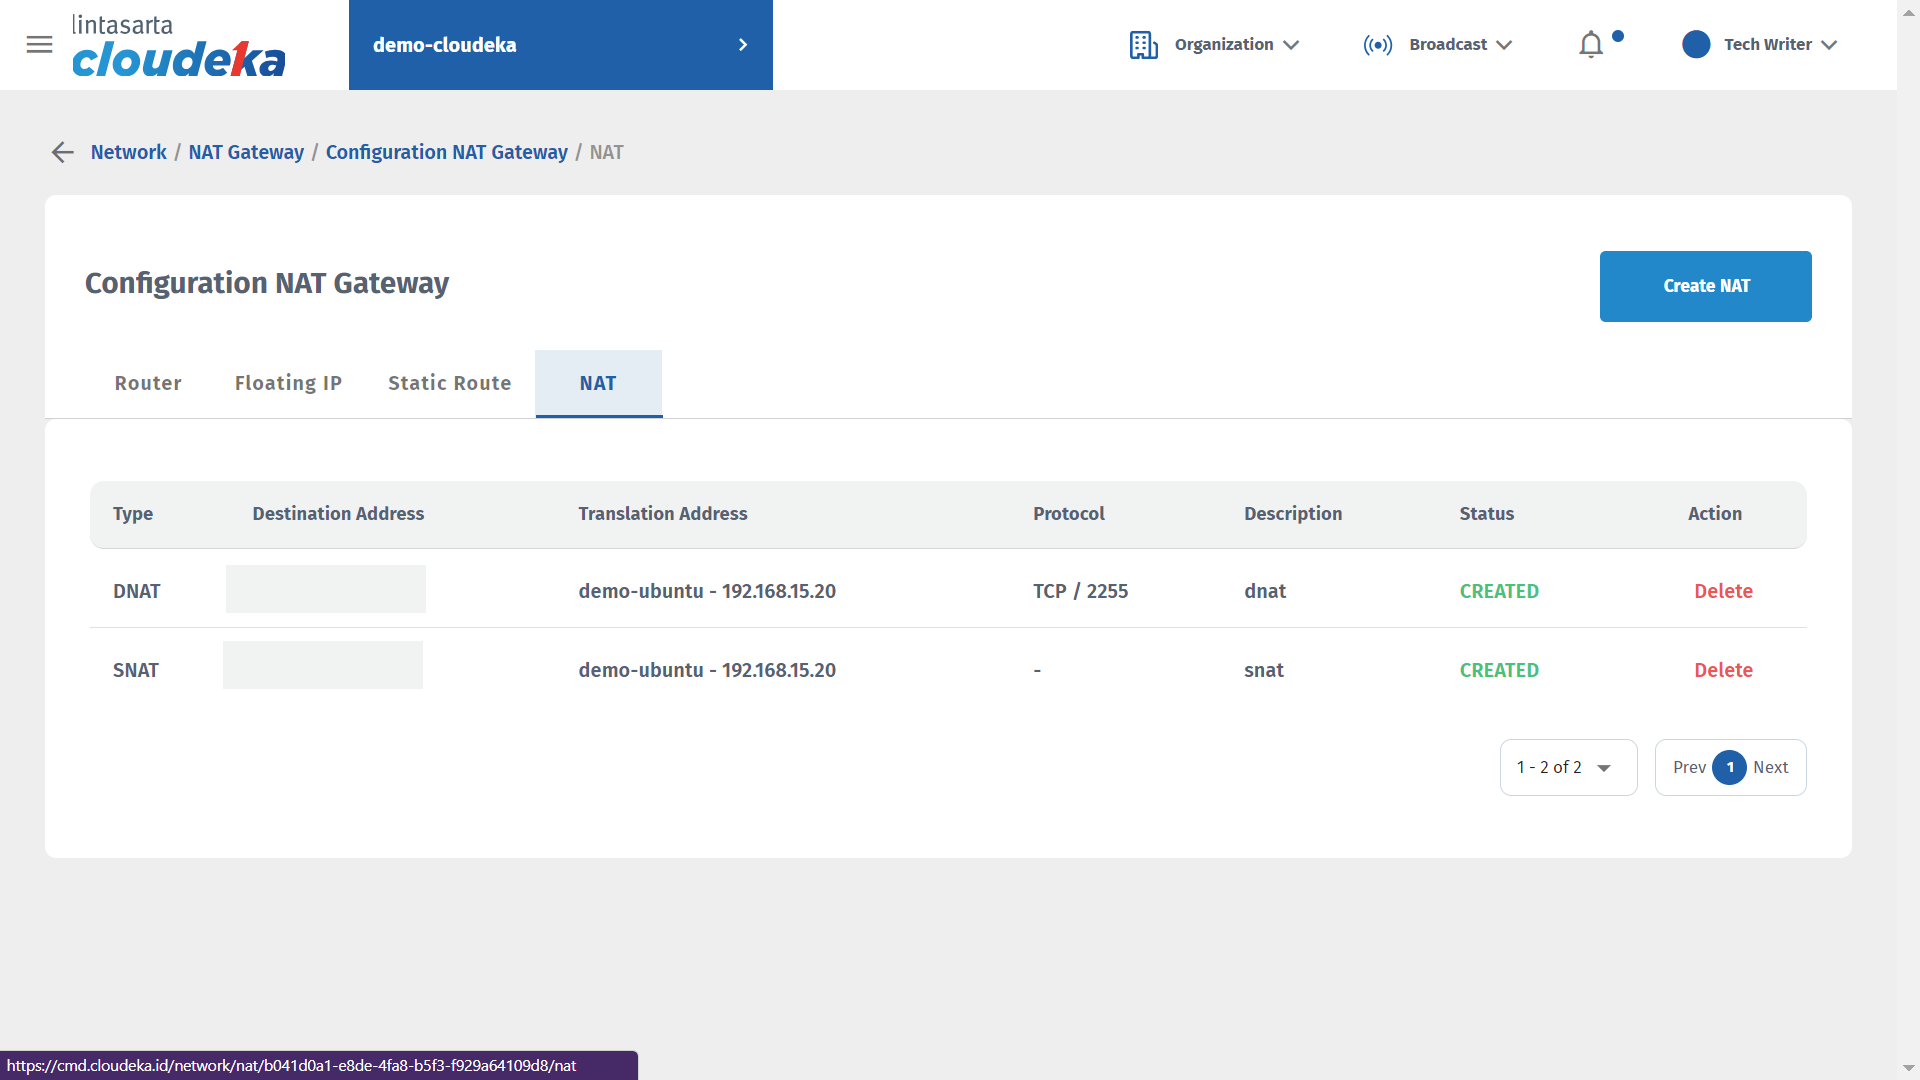
Wait until the process is complete and the status becomes Created.
Last updated
