Configuration Deka SLB
After creating Deka SLB, for the next steps, add backend configuration and frontend configuration. On the Load Balancer page, press the Configuration button.
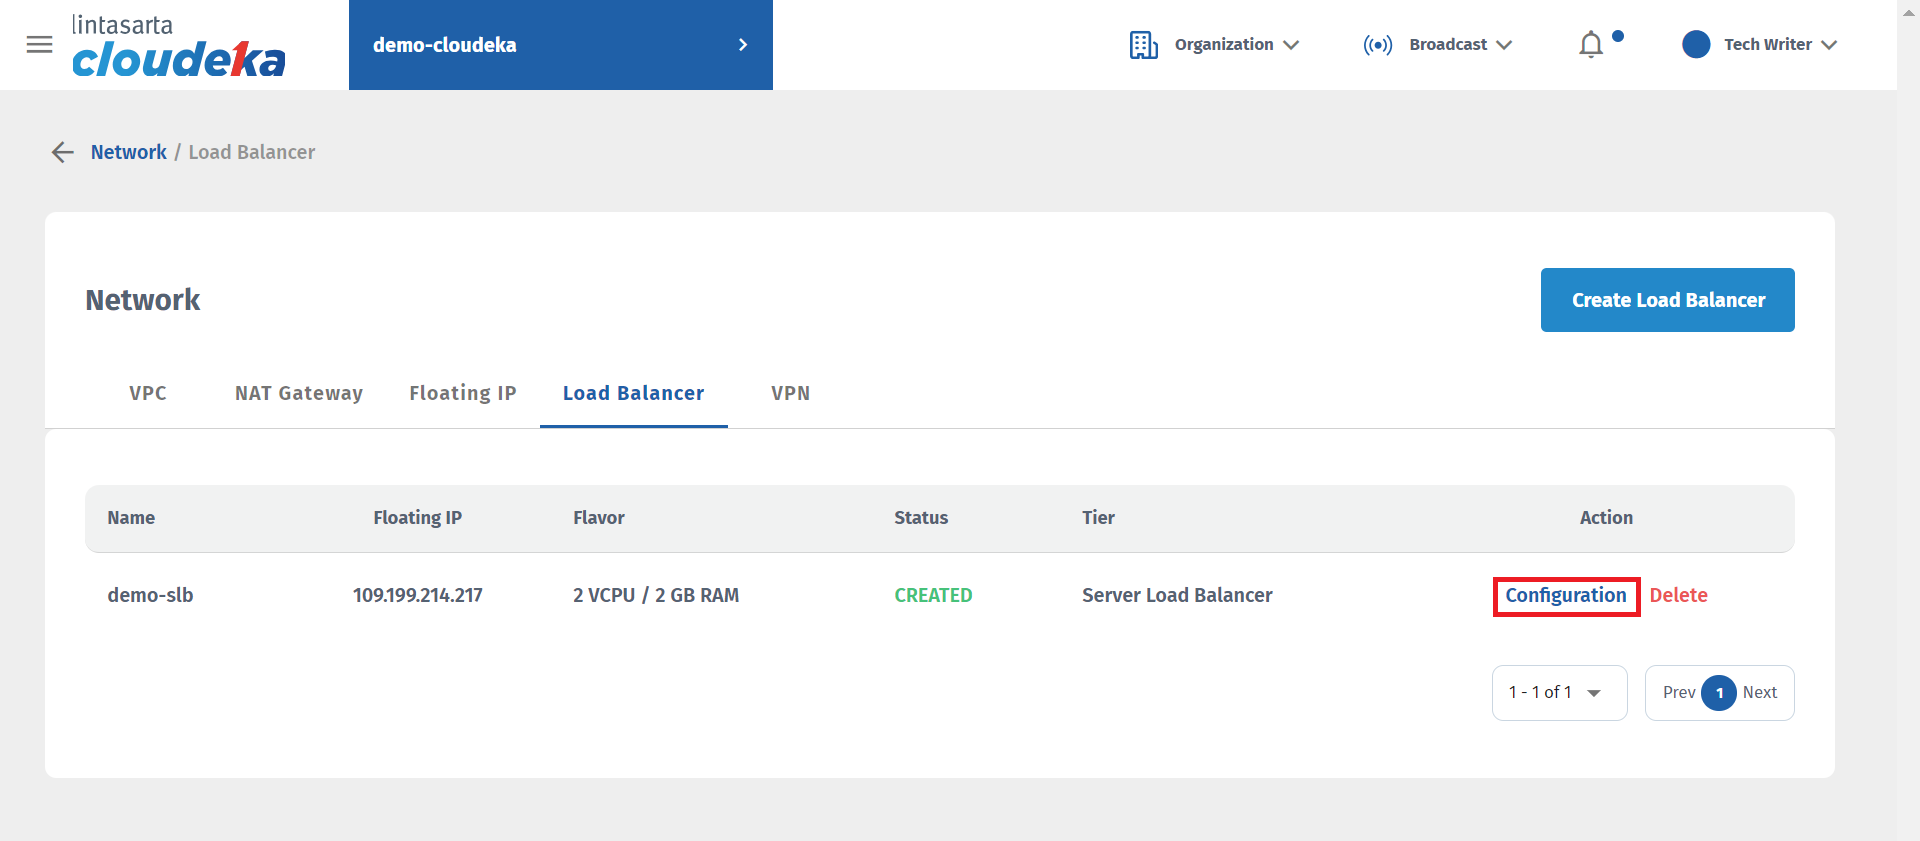
The Load Balancer Configuration page will appear, displaying three tabs.
There are three tabs available on the Load Balancer Configuration page, namely the General tab, Backend tab, and Frontend tab. This section explains some configurations that can be performed.
Add Configuration, for further details, you can follow the steps in subsections Add Backend Configuration and Add Frontend Configuration.
Edit Configuration, for further details, you can follow the steps in subsections Edit Configuration Backend and Edit Configuration Frontend.
Delete Configuration, for further details, you can follow the steps in subsections Delete Configuration.
Add Backend Configuration
Here are the steps to add Backend configuration in Deka SLB on the Cloudeka portal service:
Navigate to the Configuration Load Balancer page and click on the Backend tab, then click Create Backend.
On the Create Backend page, fill in the available form.
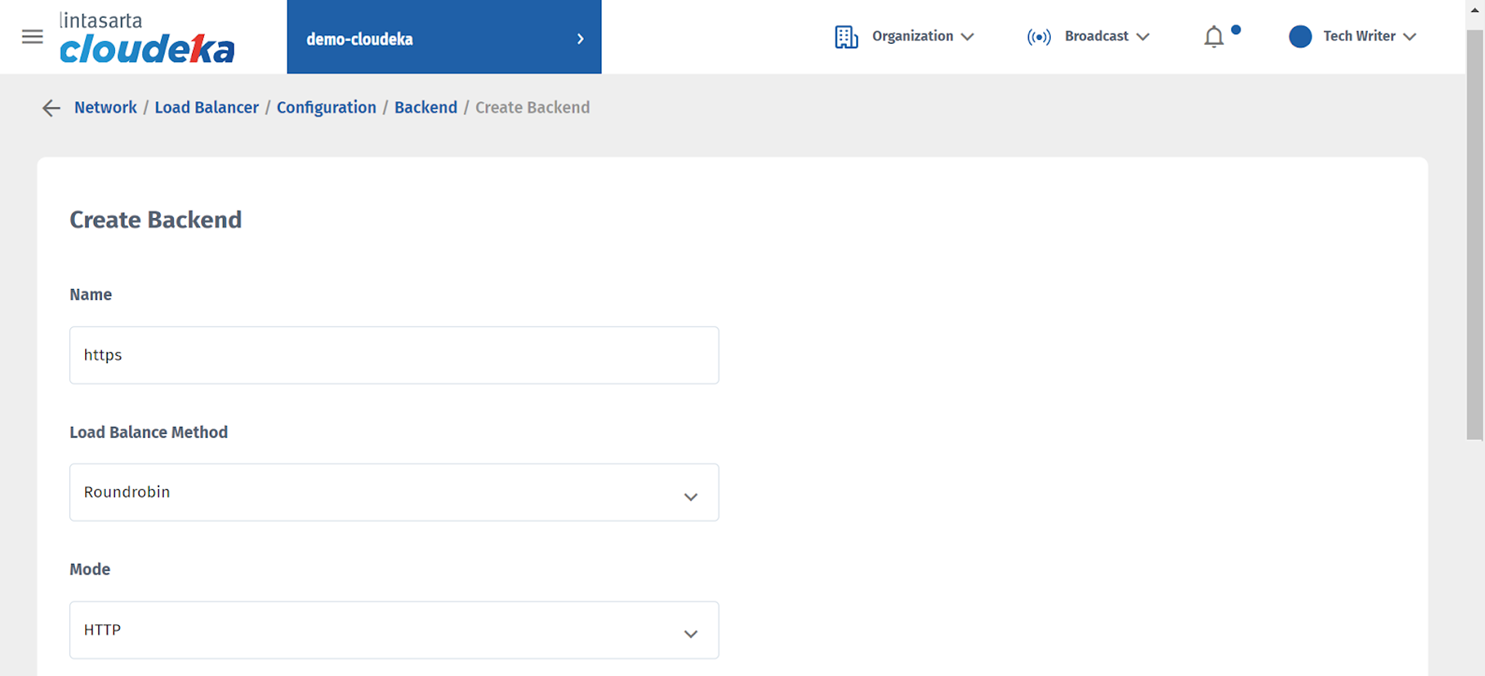
Name
Configure the backend with a name adhering to the character restrictions of using only A-Z, a-z, and "_" underscore.
Load Balancer Method
In this column, there are three options available Roundrobin, Least Connection, and Source.
Mode
There are two modes to choose from:
HTTP
TCP
If you select the HTTP protocol in the Mode column, the following columns will appear:
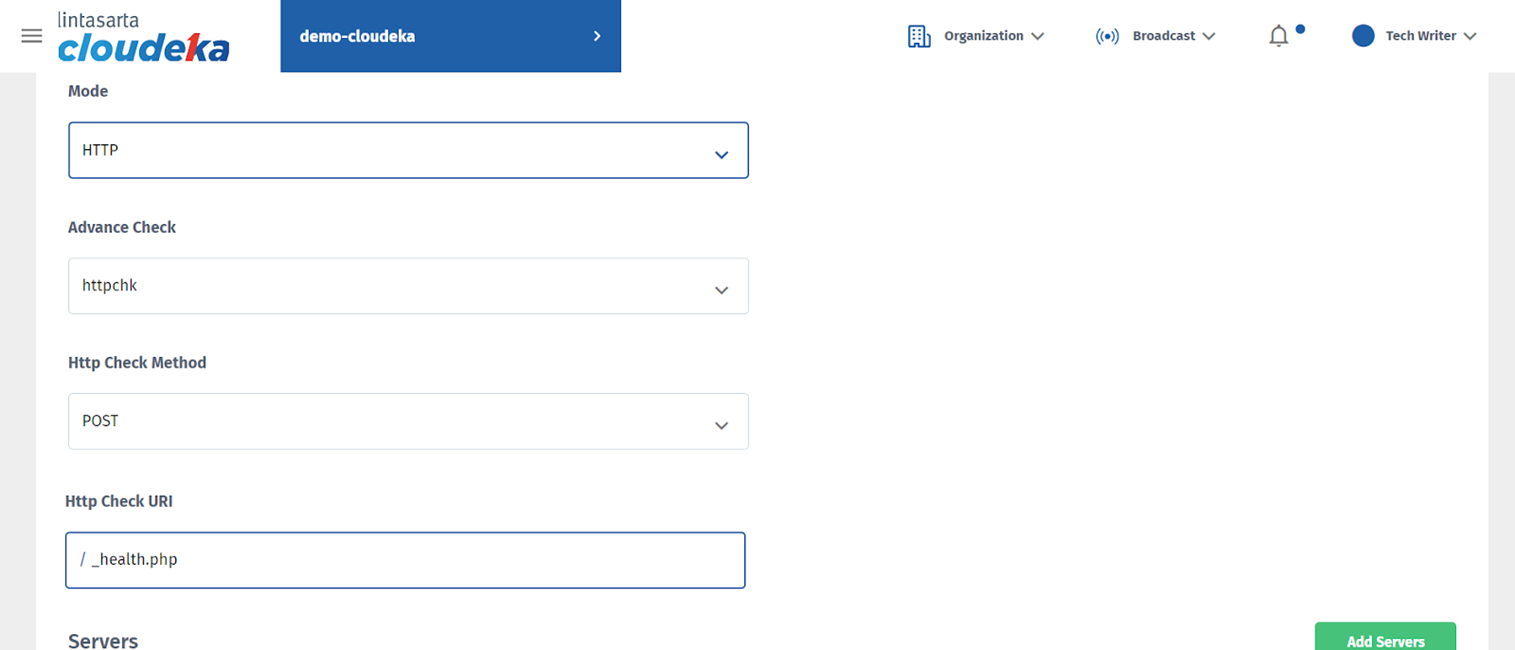
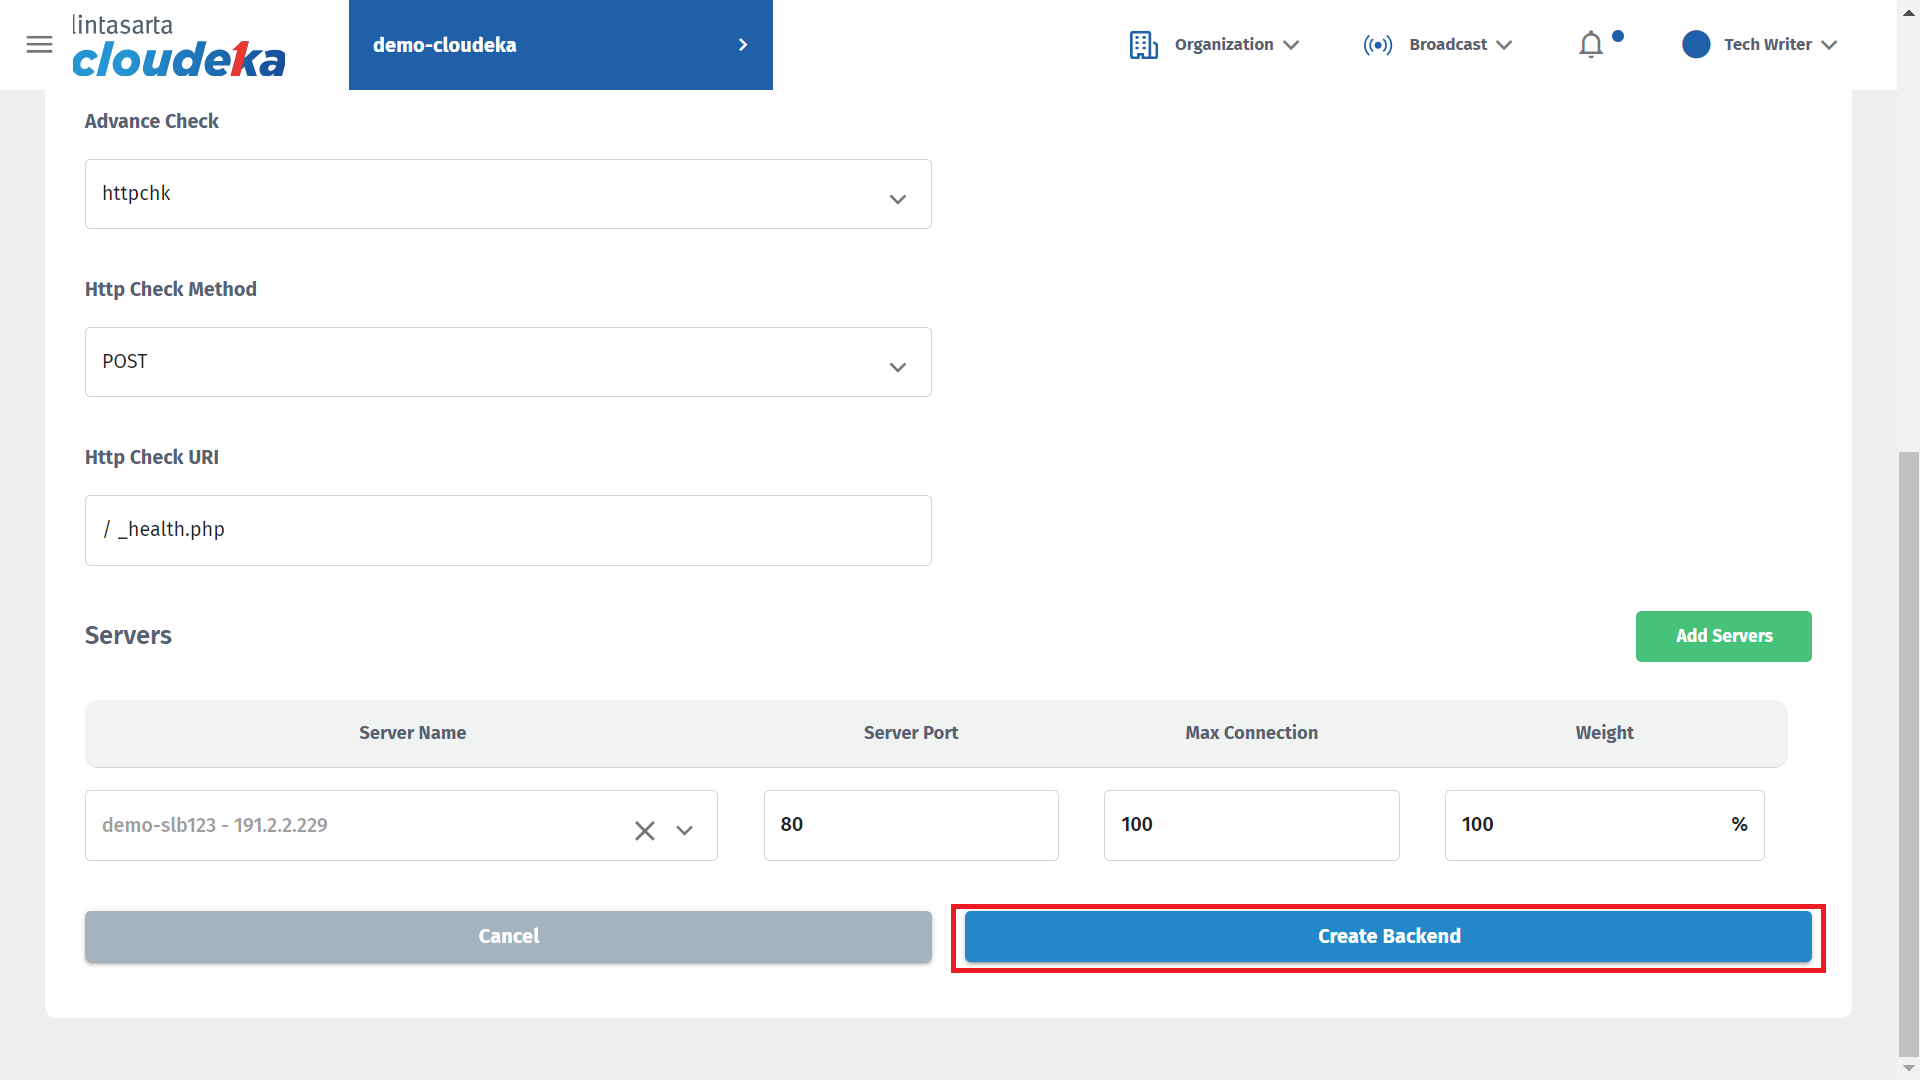
Advanced Check
If you choose HTTP in column Mode, click httpchk.
Http Check Method
You will have 2 options:
GET, used to request data to retrieve information..
POST, used to request the creation of new data.
Http Check URI
This column is used to determine whether the server is active or inactive. In this section, type /_health.php
If you choose the TCP protocol in the Mode column, the following columns will appear.

Advanced Check
There are 2 options available:
SSL Hello Check used to ensure that an SSL connection to the backend server can be successfully established.
TCP Check used for checking the availability or health of a TCP connection between two devices or nodes in the network.
After determining the protocol to be used, in the Server section, you can add more than one server if your backend configuration involves multiple VMs or instances. This allows you to configure load balancing for multiple servers, distributing traffic among them based on the chosen algorithm and health check settings.
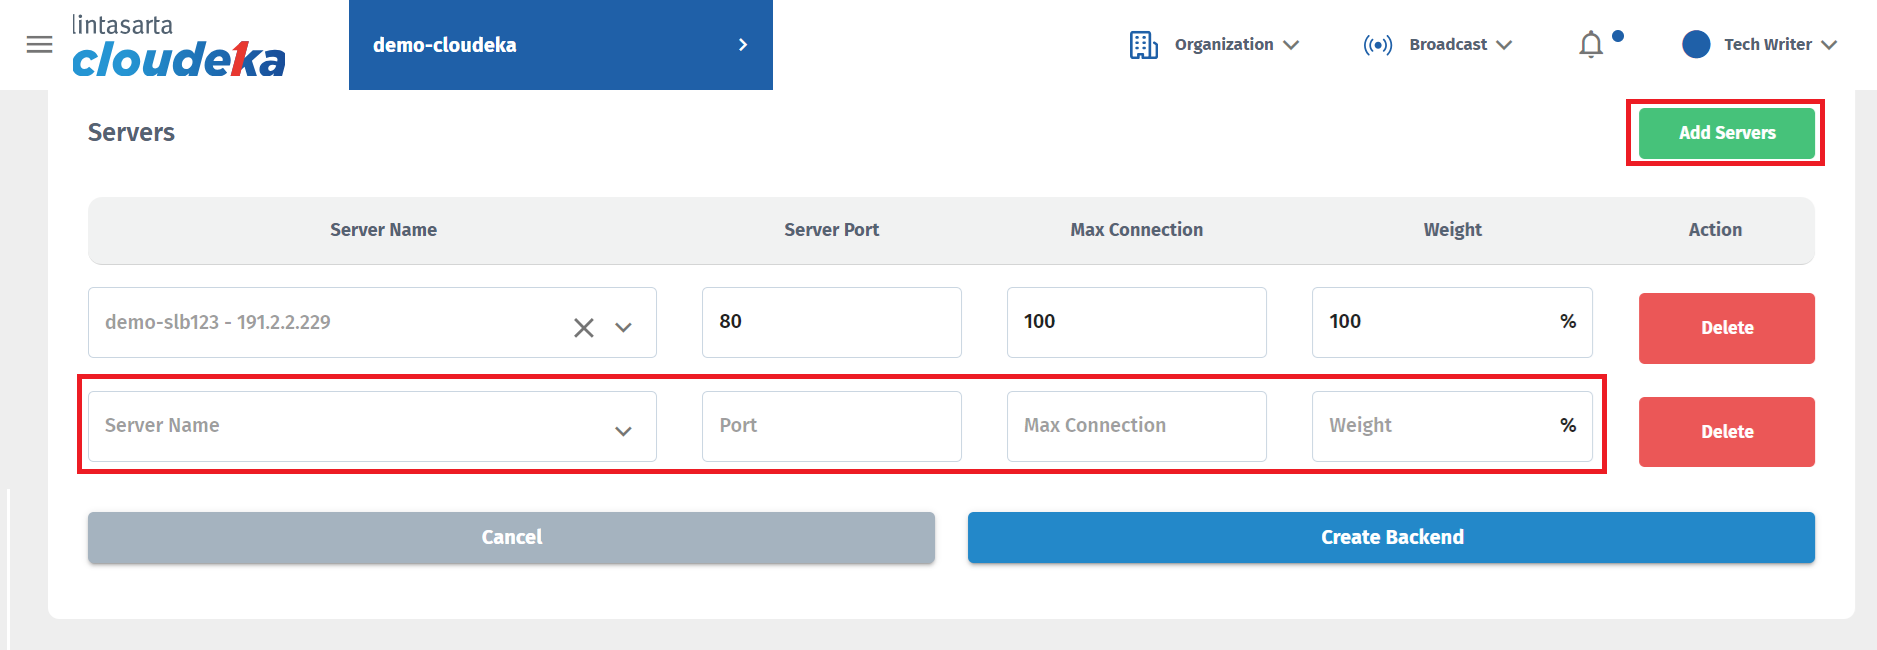
Servers - Server Name
VM instances that have been deployed to the VPC connected to Deka SLB.
Servers - Server Port
The port that the server will use.
Servers - Max Connection
The maximum number of connections accepted by the server.
Servers - Weight
The load that will be received by the server.
After filling out all the forms on the Create Backend page, click the Create Backend button.
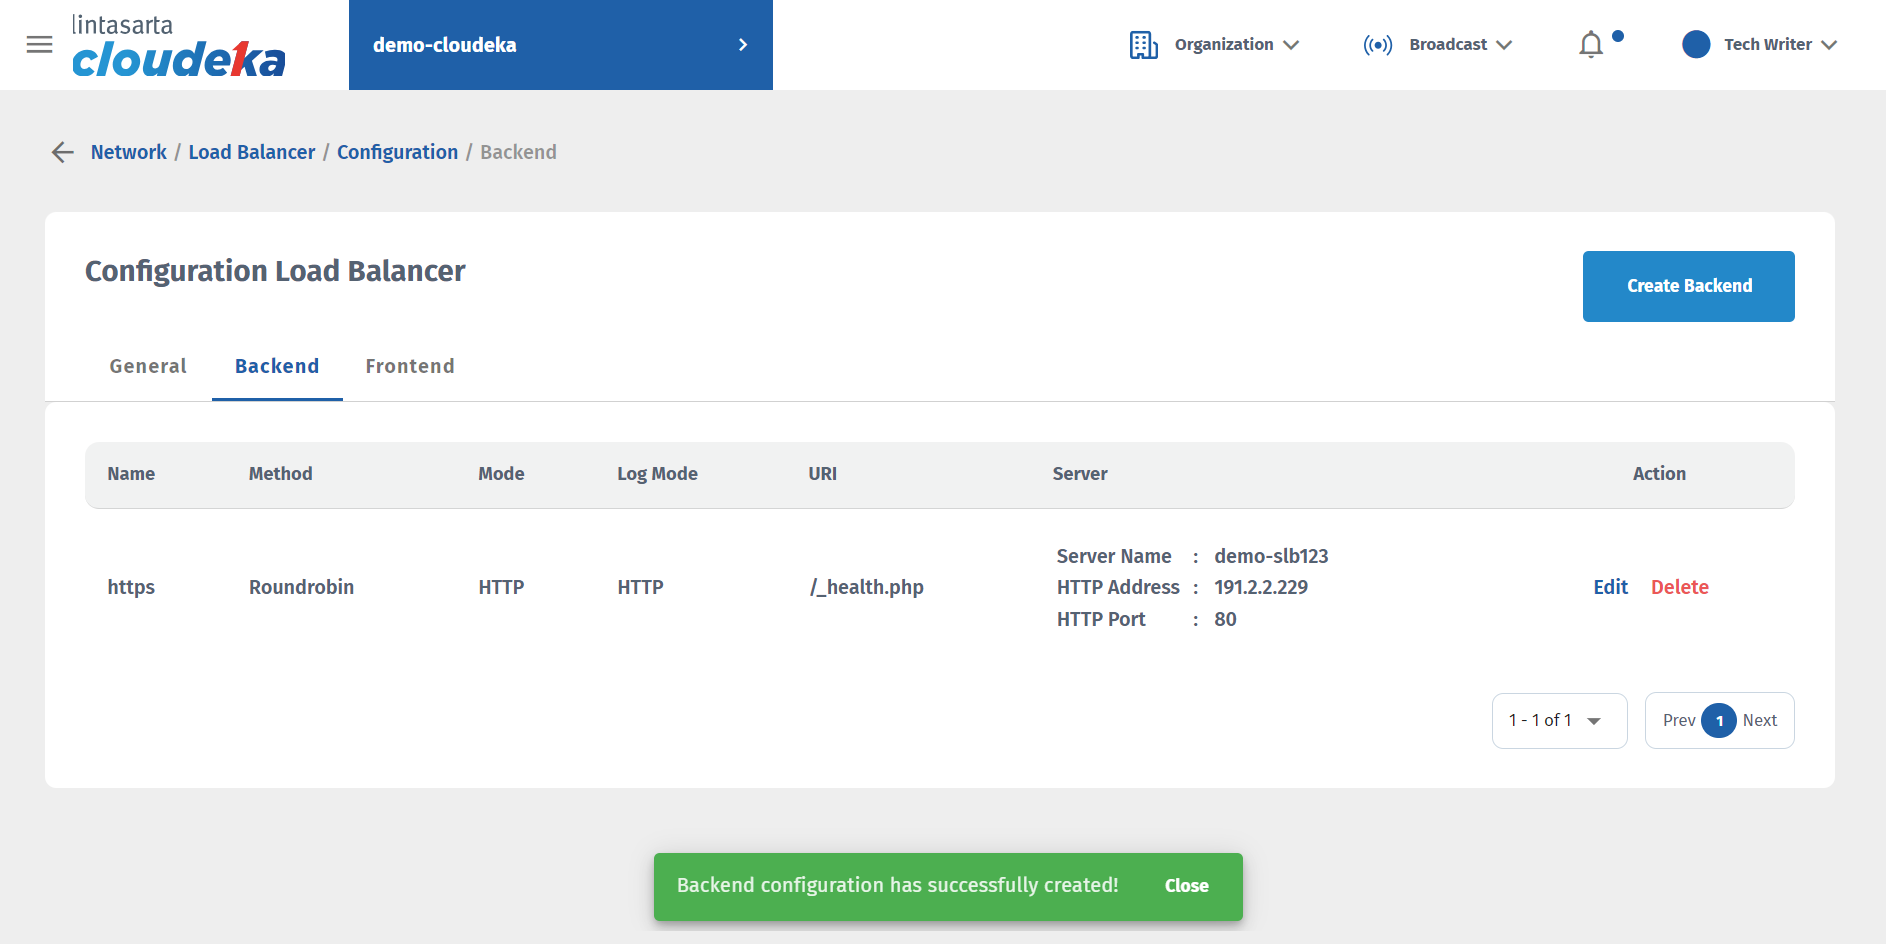
A notification will appear "Backend Configuration has successfully created!"
Add Frontend Configuration
After you have configured the backend, the next step is to configure the frontend by following these steps:
On the Configuration Load Balancer page click on the Frontend tab, and then click Create Frontend.
On the Create Frontend page, fill in the available form.
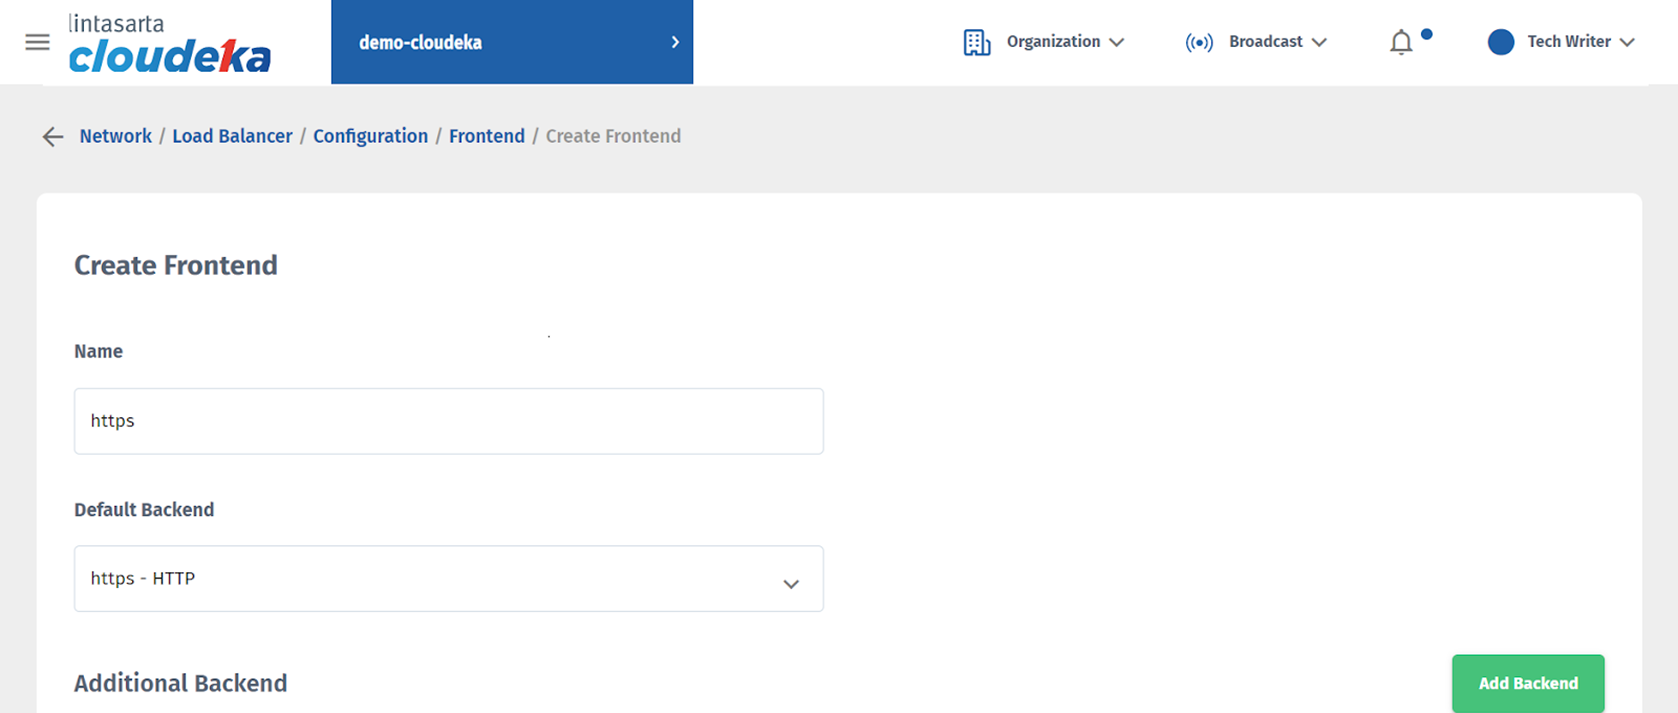
Name
The name of the frontend configuration, and the allowed characters for frontend naming are only A-Z, a-z, and "_" underscore.
Default Backend
Select the previously created backend.
If you want to add a Backend configuration press the Add Backend button.

Backend Name
Backend configuration name.
ACL Name
To define rules that control access or behavior for specific traffic.
Criteria
To determine whether a request should be directed to a specific backend or not. There are 3 options, namely:
req.hdr(Host) this criterion checks the value of the Host header in the HTTP request.
path_beg this criterion checks whether the URL path of the request starts with a specific value.
path_end this criterion checks whether the URL path of the request ends with a specific value.
Value
These criteria are adjusted based on your selection in the Criteria column.
req.hdr(Host) as an example www.example.com
path_beg for paths starting with “/”. Example: “/example.php”
path_end for paths ending with a specific file extension. Example: “.php”
Condition
There are two options:
Equal used to check if a value is equal to the value entered in the ACL Column.
Not Equal used to check if a value is not equal to the value entered in the ACL column.
Action
There is a Delete button to remove added Backend configurations.
After determining the Backend configuration to be used, there are other columns that need to be filled.

Bind Address
There are 2 options:
Internet
Internal
Mode
There are 3 options:
HTTPS
HTTP
TCP
If you choose HTTPS in the Mode column, the following columns will appear:
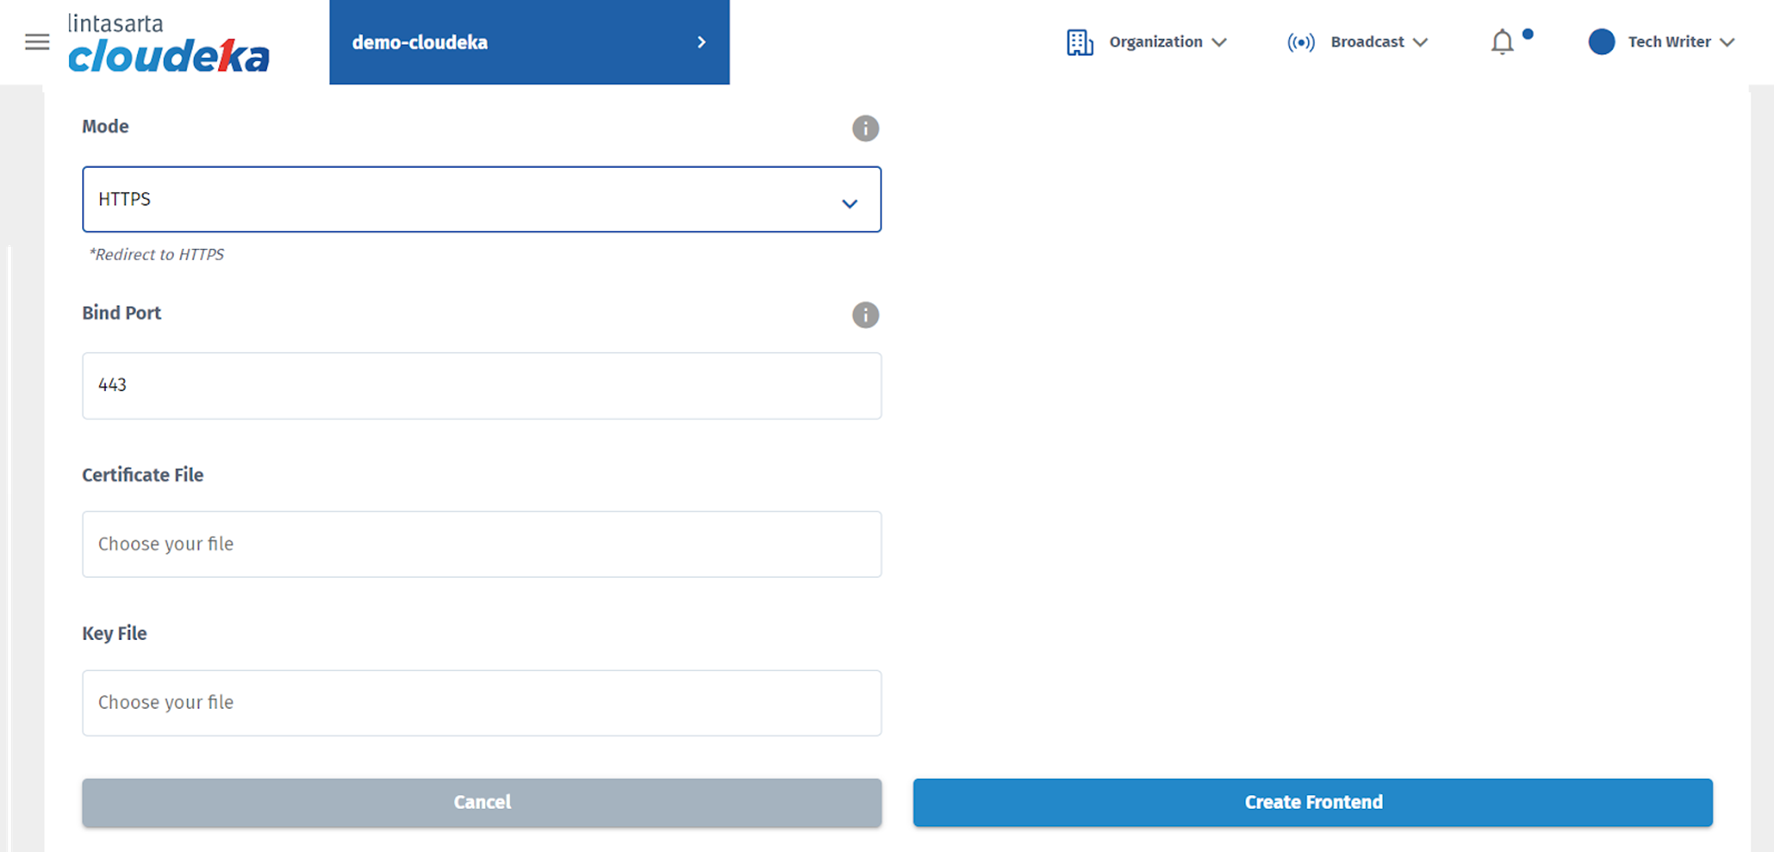
Bind Port
By default, it uses port 443.
Certificate File
You can upload the certificate file you possess. If you are usign the Cloudeka Portal Service, namely Deka SSL, you can download the file in the SSL menu under the Manage Module.
Key File
You can upload the key file you possess. If you are using the Cloudeka Portal Service, namely Deka SSL, you can download the file in the SSL menu under the Manage Module.
If the Mode column selects the HTTP or TCP protocol, the following columns will appear.
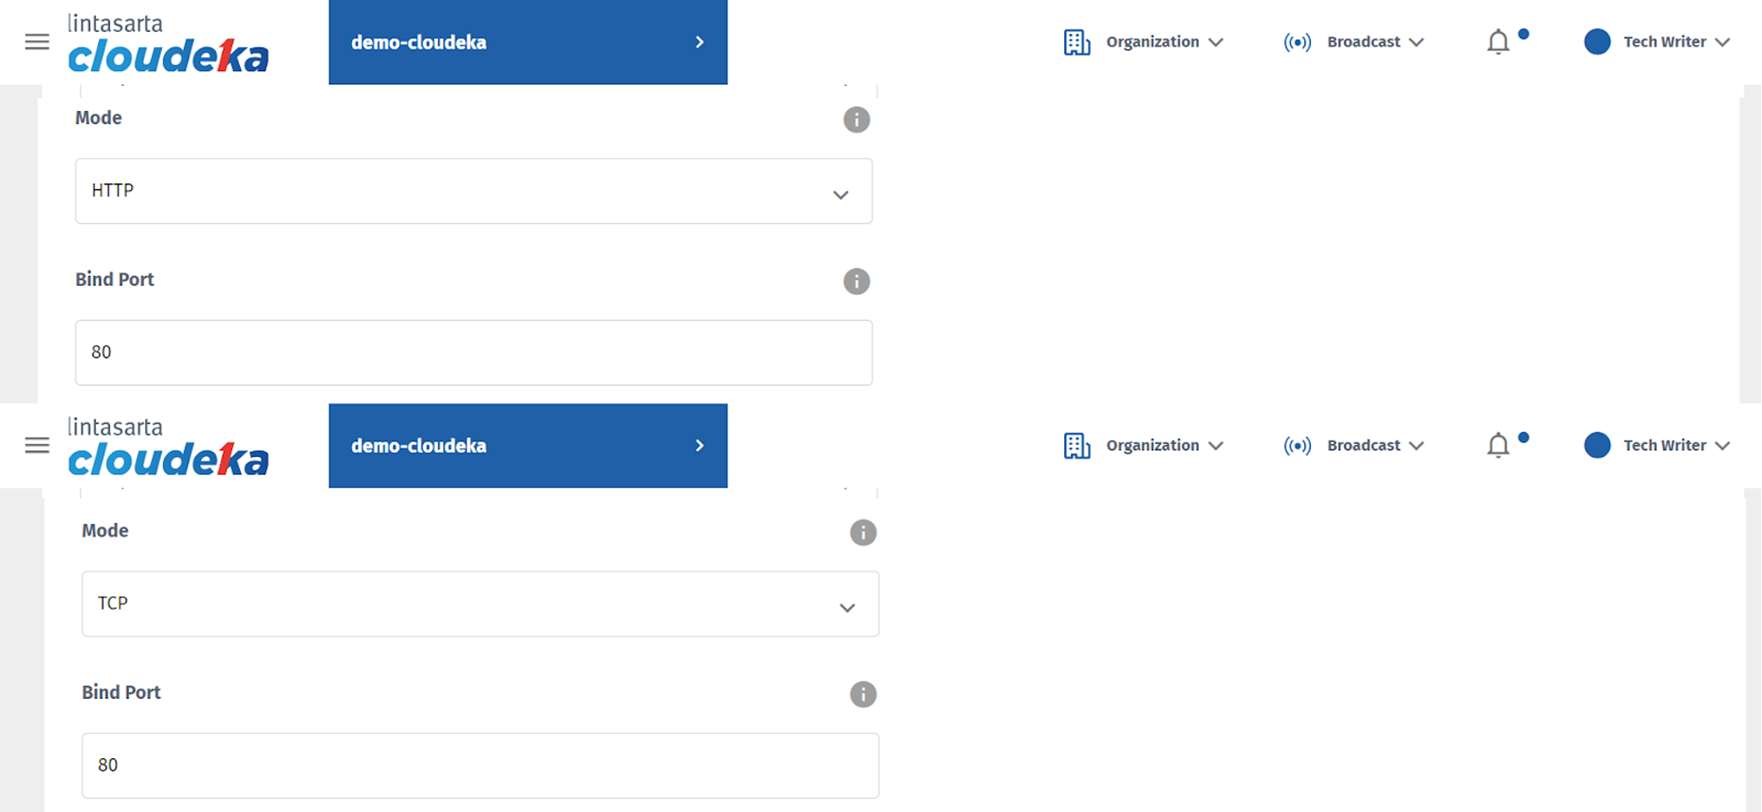
Bind Port
Adjusting to the protocol used:
If the HTTP Protocol is selected, it will be automatically filled with port 80.
If the TCP Protocol is selected, specify the port to be used.
After filling out all the forms on the Create Backend page, click the Create Backend button.
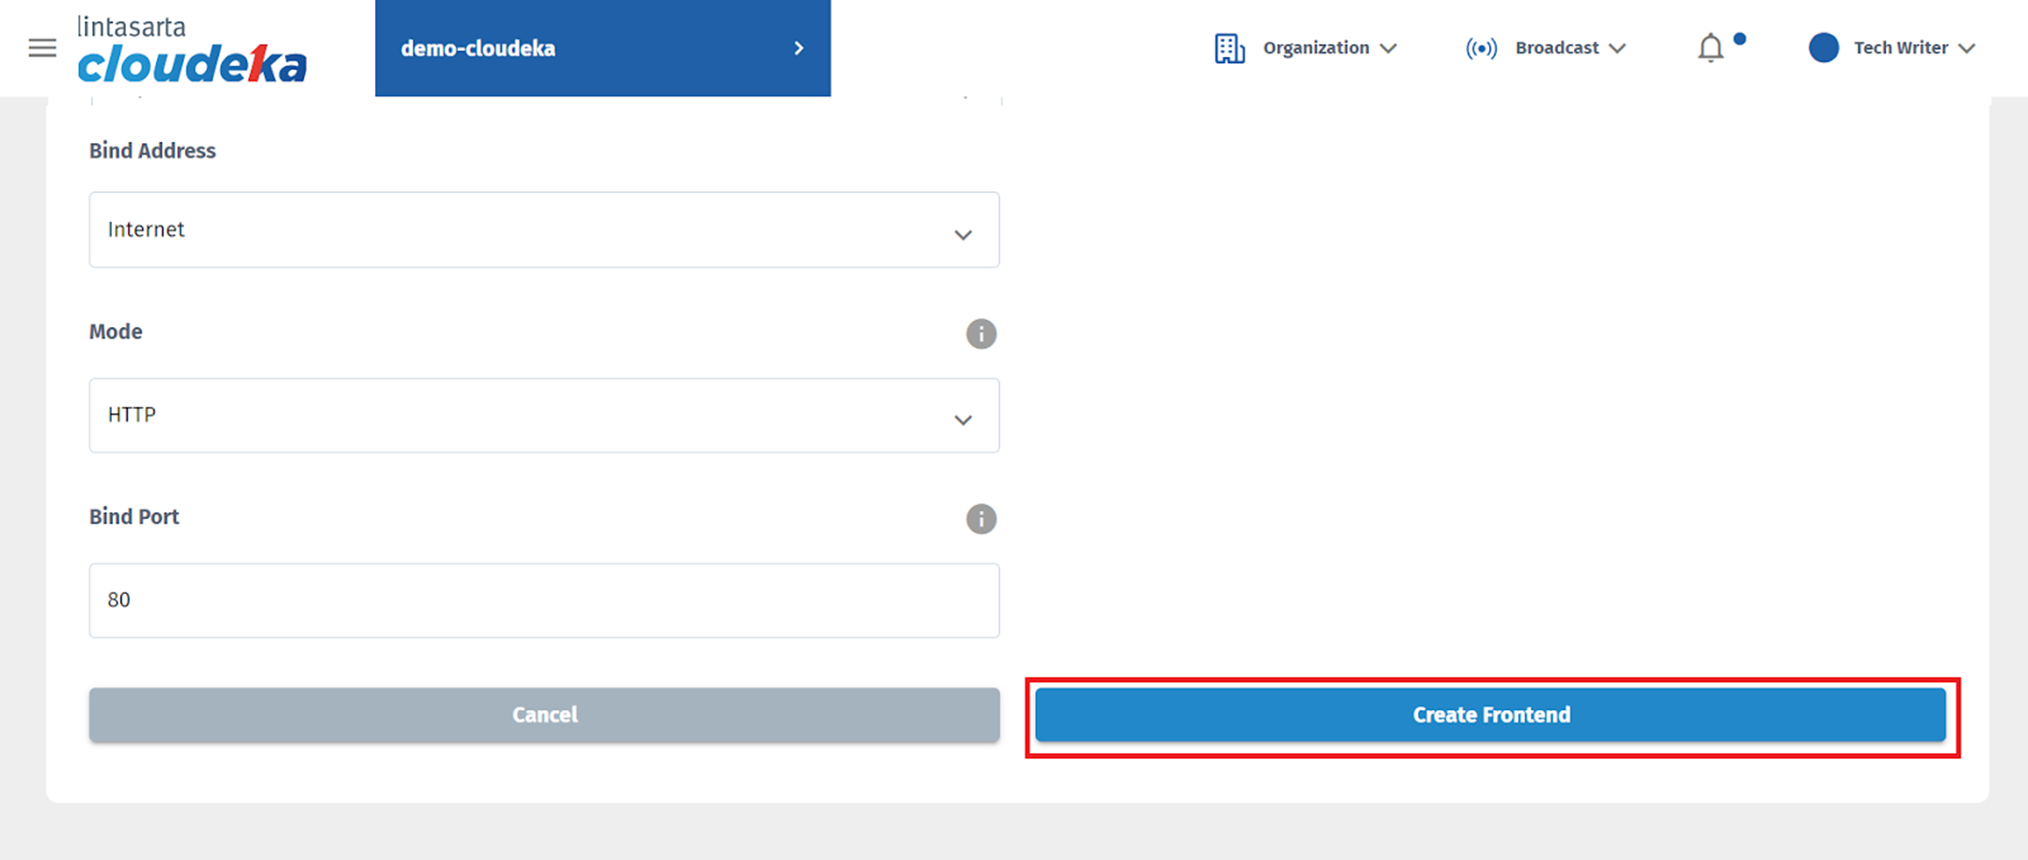
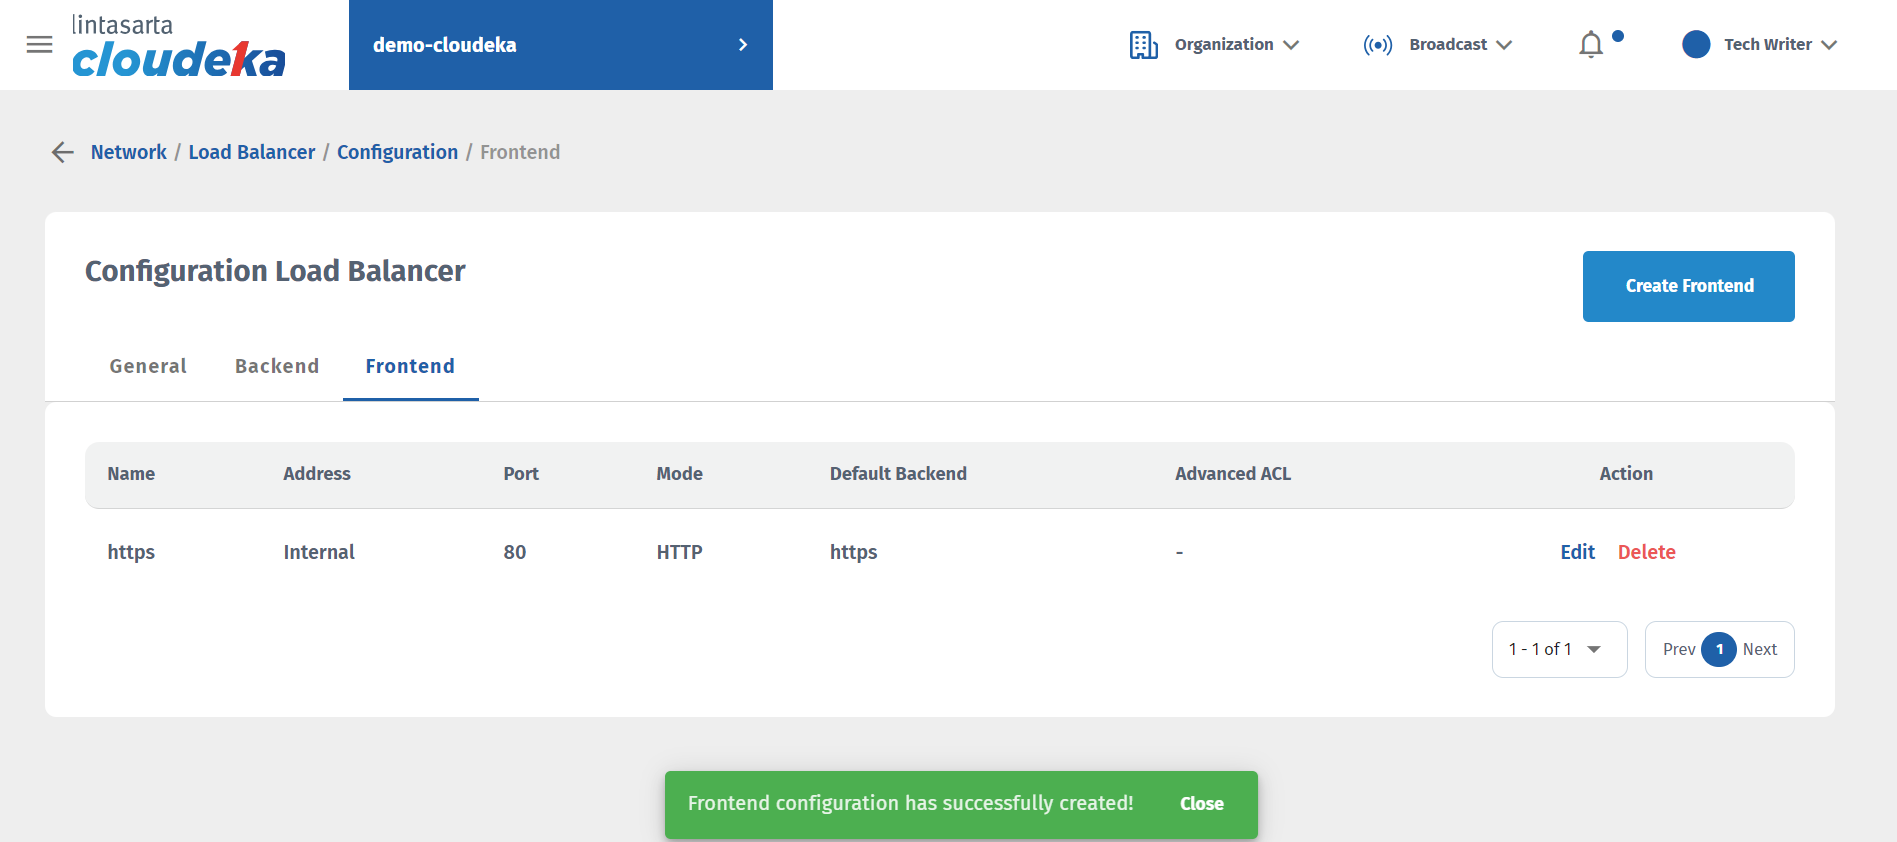
If the HTTPS load balancer frontend is successfully created, a notification will appear “Frontend Configuration has successfully created!”.
Edit Backend Configuration
You can modify the backend configuration you've created by following these steps:
On the Backend tab of the Configuration Load Balancer, select Backend configuration you want to update by clicking the Edit button.
The Edit Backend page, you can modify the Load Balance Method, Advanced Check, Http Check Method, Http Check URI, and add Servers by click Add Servers. Then click Update Backend.
A notification will appear Backend Configuration has successfully updated!
Edit Frontend Configuration
Here are steps to modify the existing Frontend configuration:
On the Configuration Load Balancer, click on the tab Frontend. Select the frontend configuration you want to update by click the Edit button.
The Edit Frontend page will appear, you can modify Default Backend, Additional Backend if you want to add another backend, click the Add Backend button, Bind Address, and Bind Port. Then click Update Frontend.
A notification will appear Frontend Configuration has successfully updated! indicating that the frontend Load Balancer configuration has been successfully modified.
Delete Configuration Backend/Frontend
To delete the backend and frontend configuration in the Deka SLB configuration. The initial step is to delete the frontend configuration and then delete the backend configuration. On the Configuration Load Balancer page, on the Frontend tab, select the Delete button.
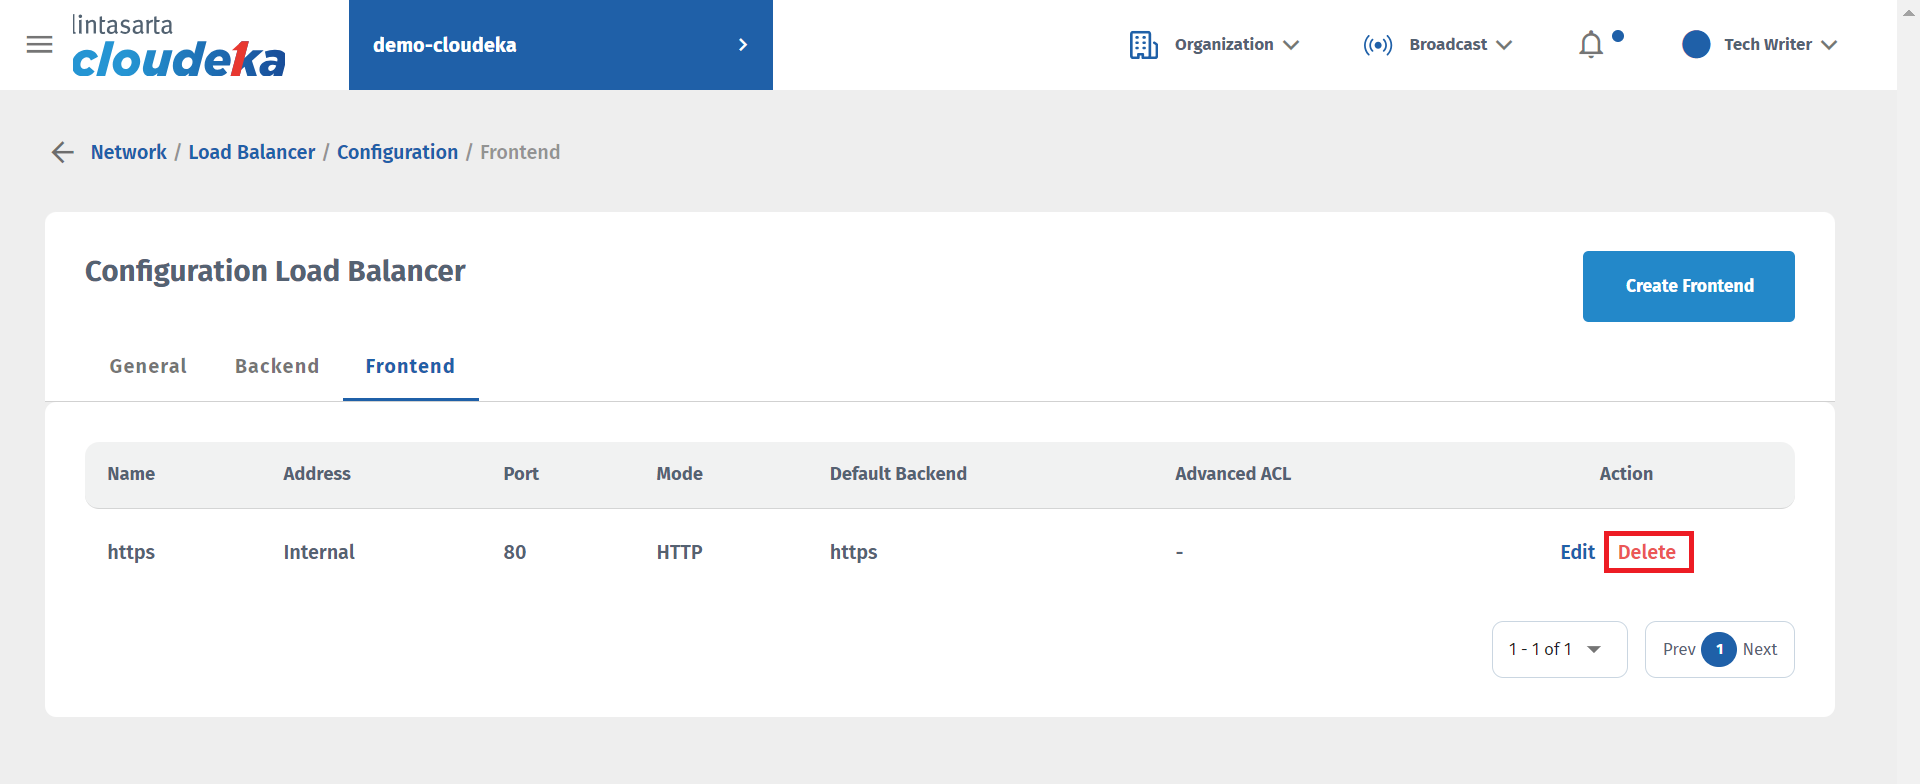
The Delete Frontend window appears, enter the frontend configuration name and click the Confirm button to continue the configuration deletion process.
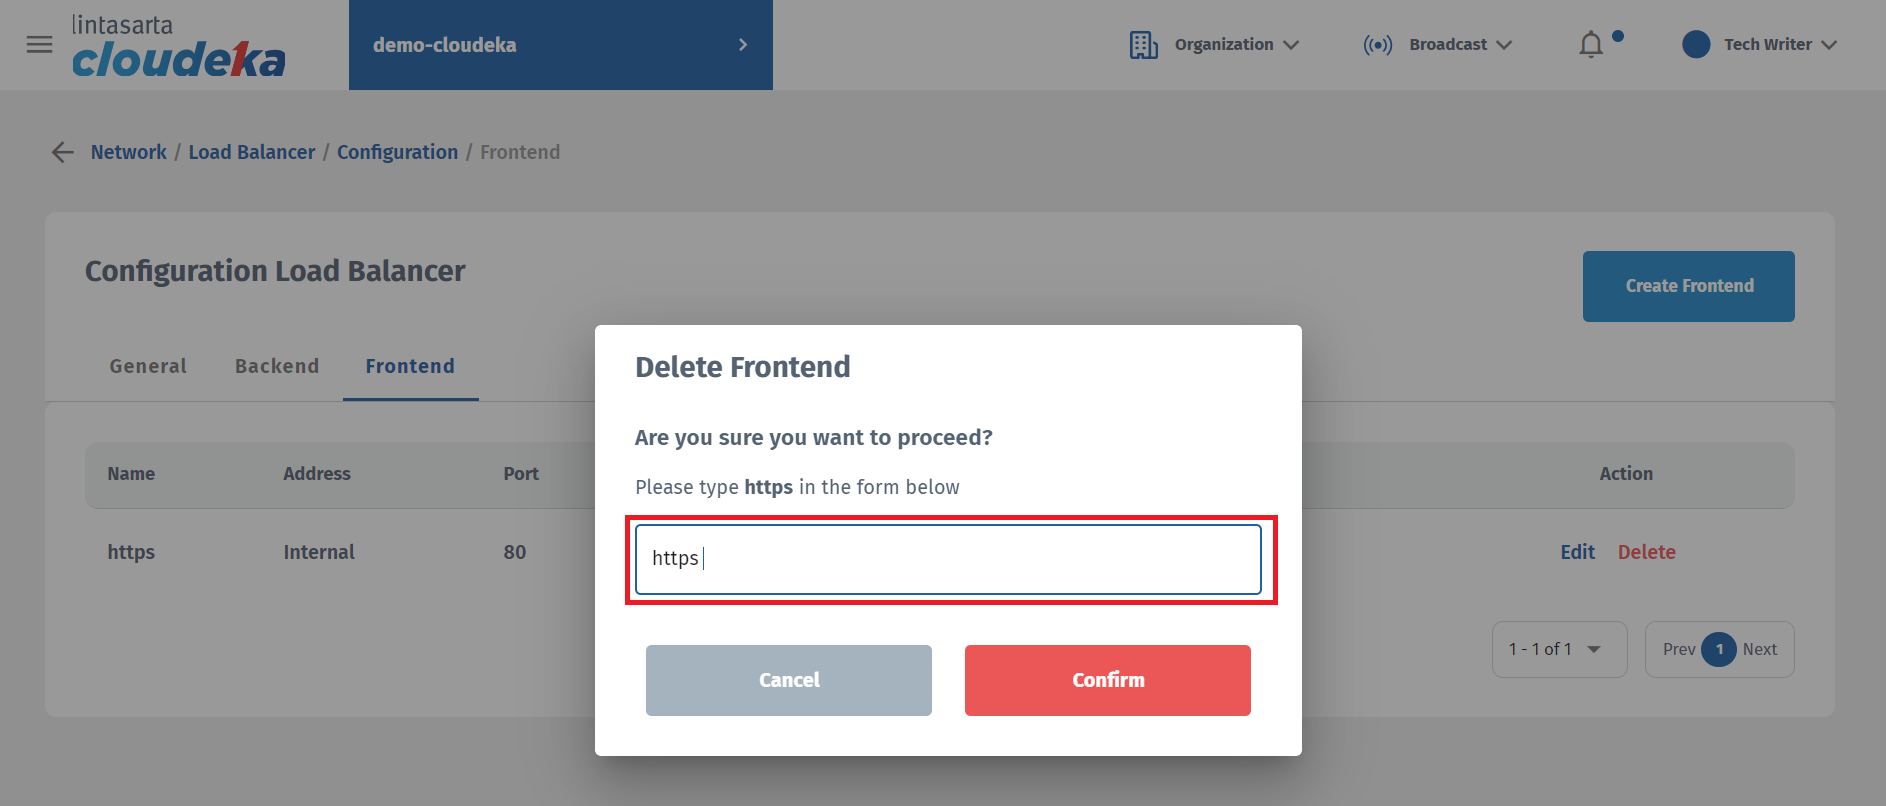
Wait until the process is complete and the notification "Frontend configuration has been successfully deleted!" appears.
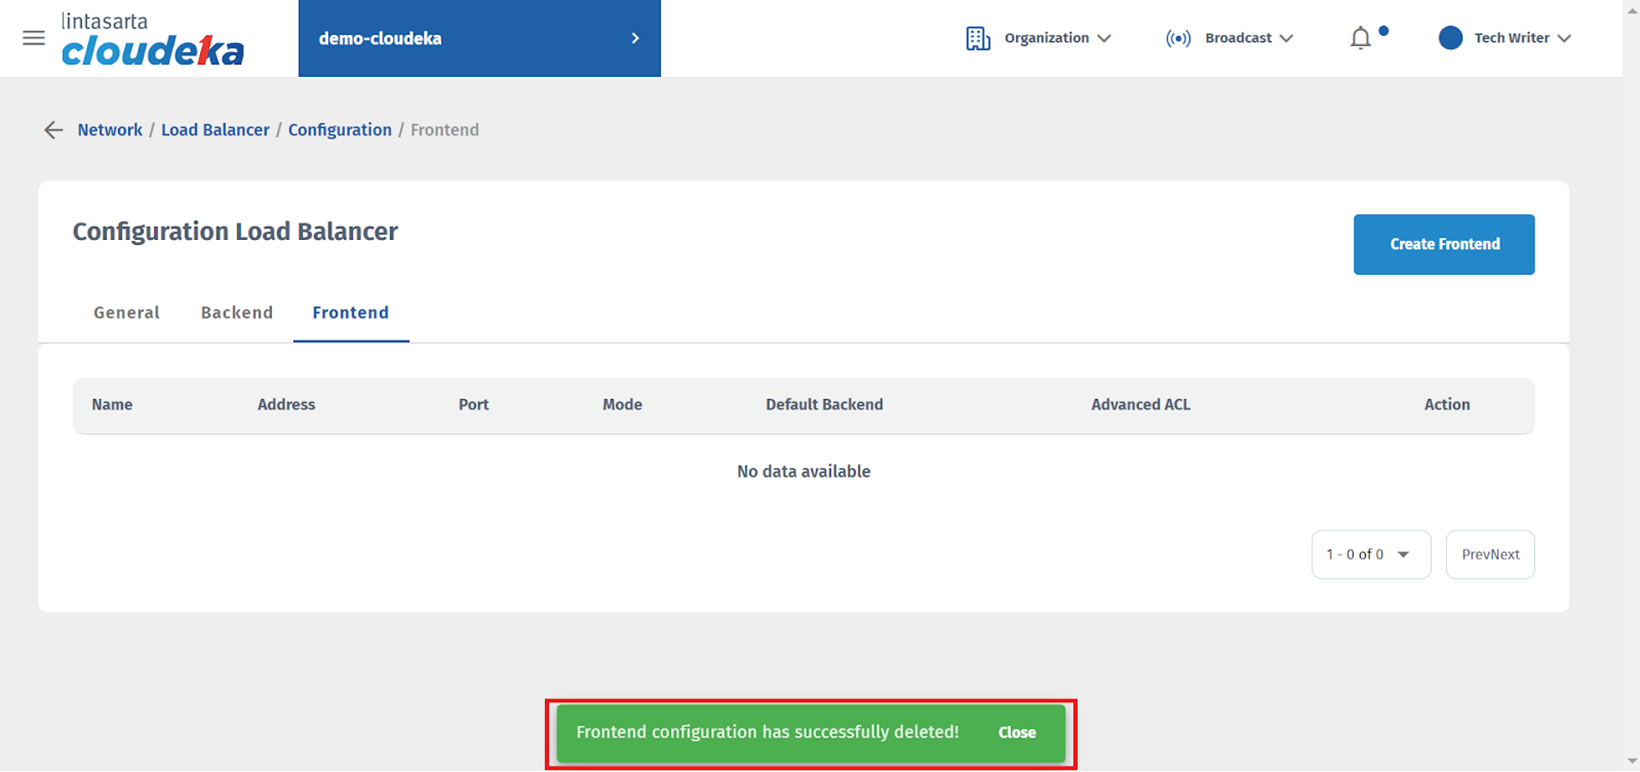
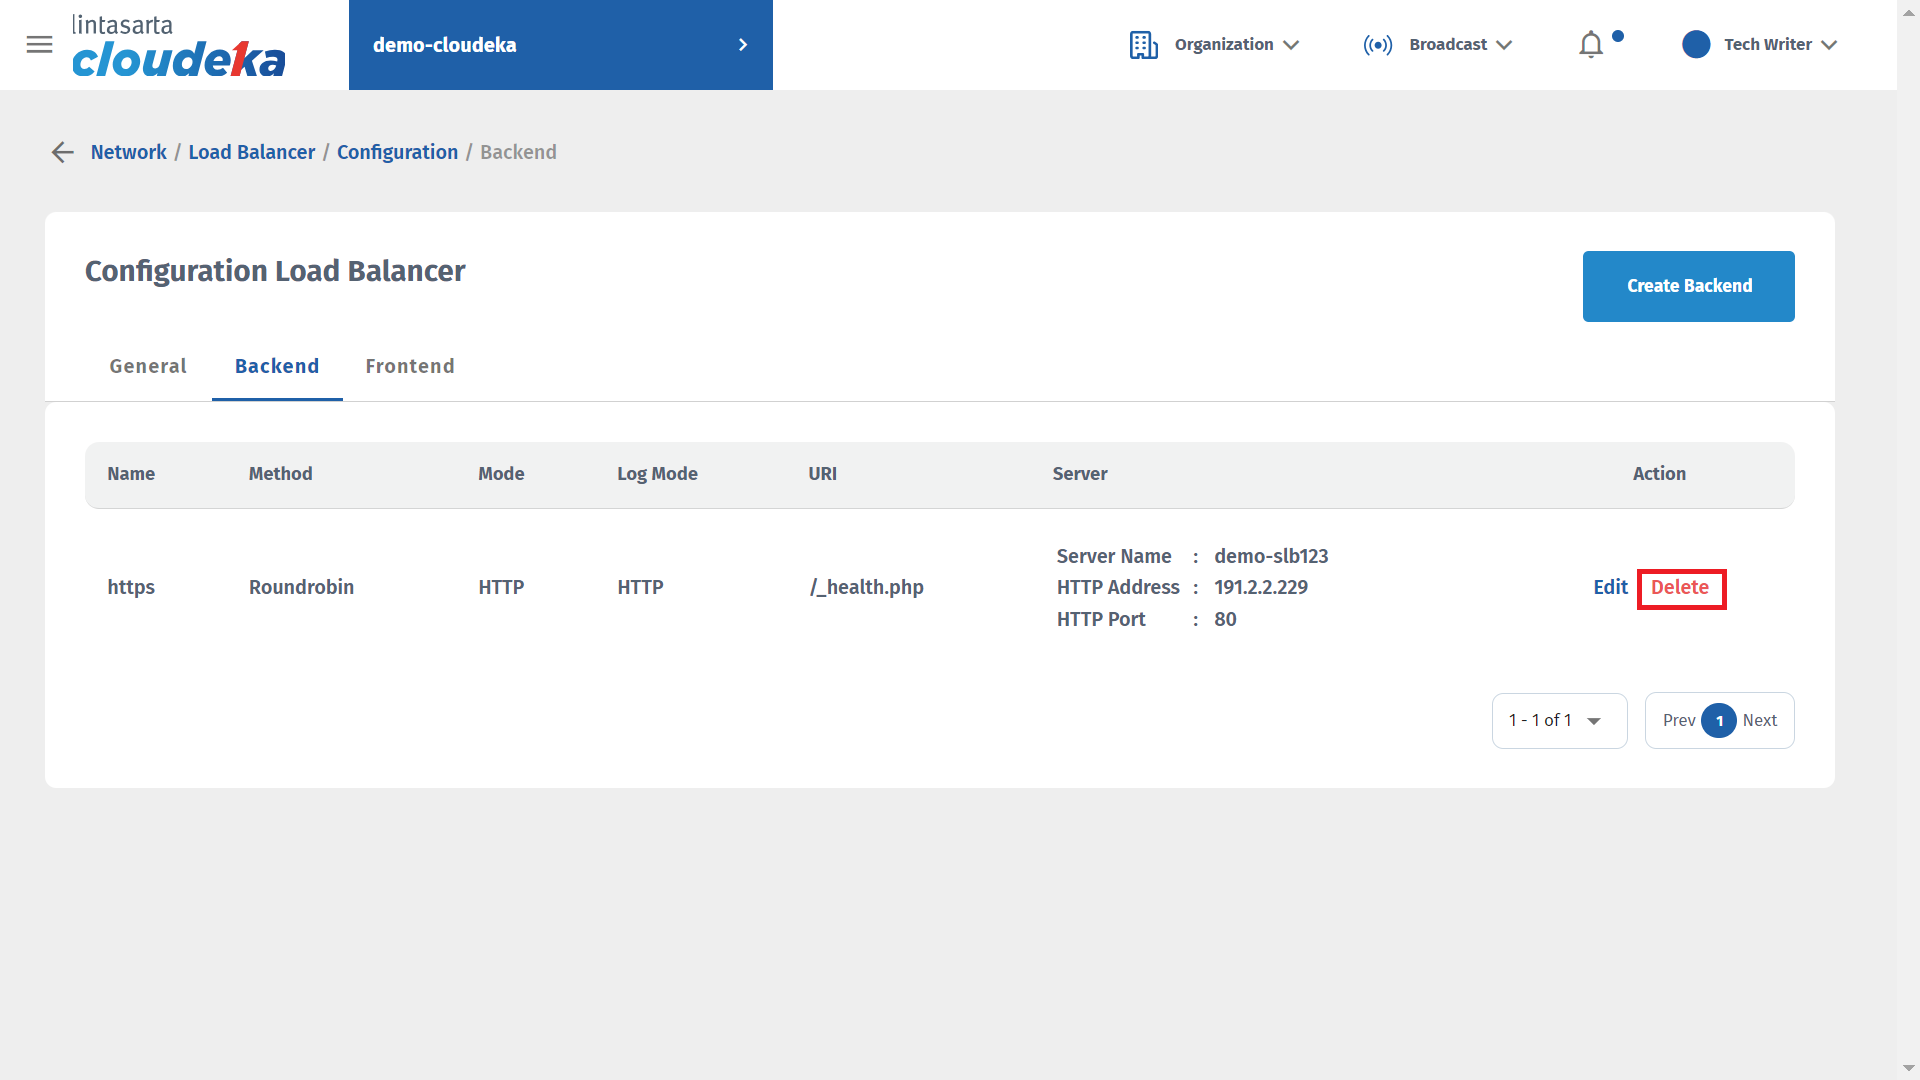
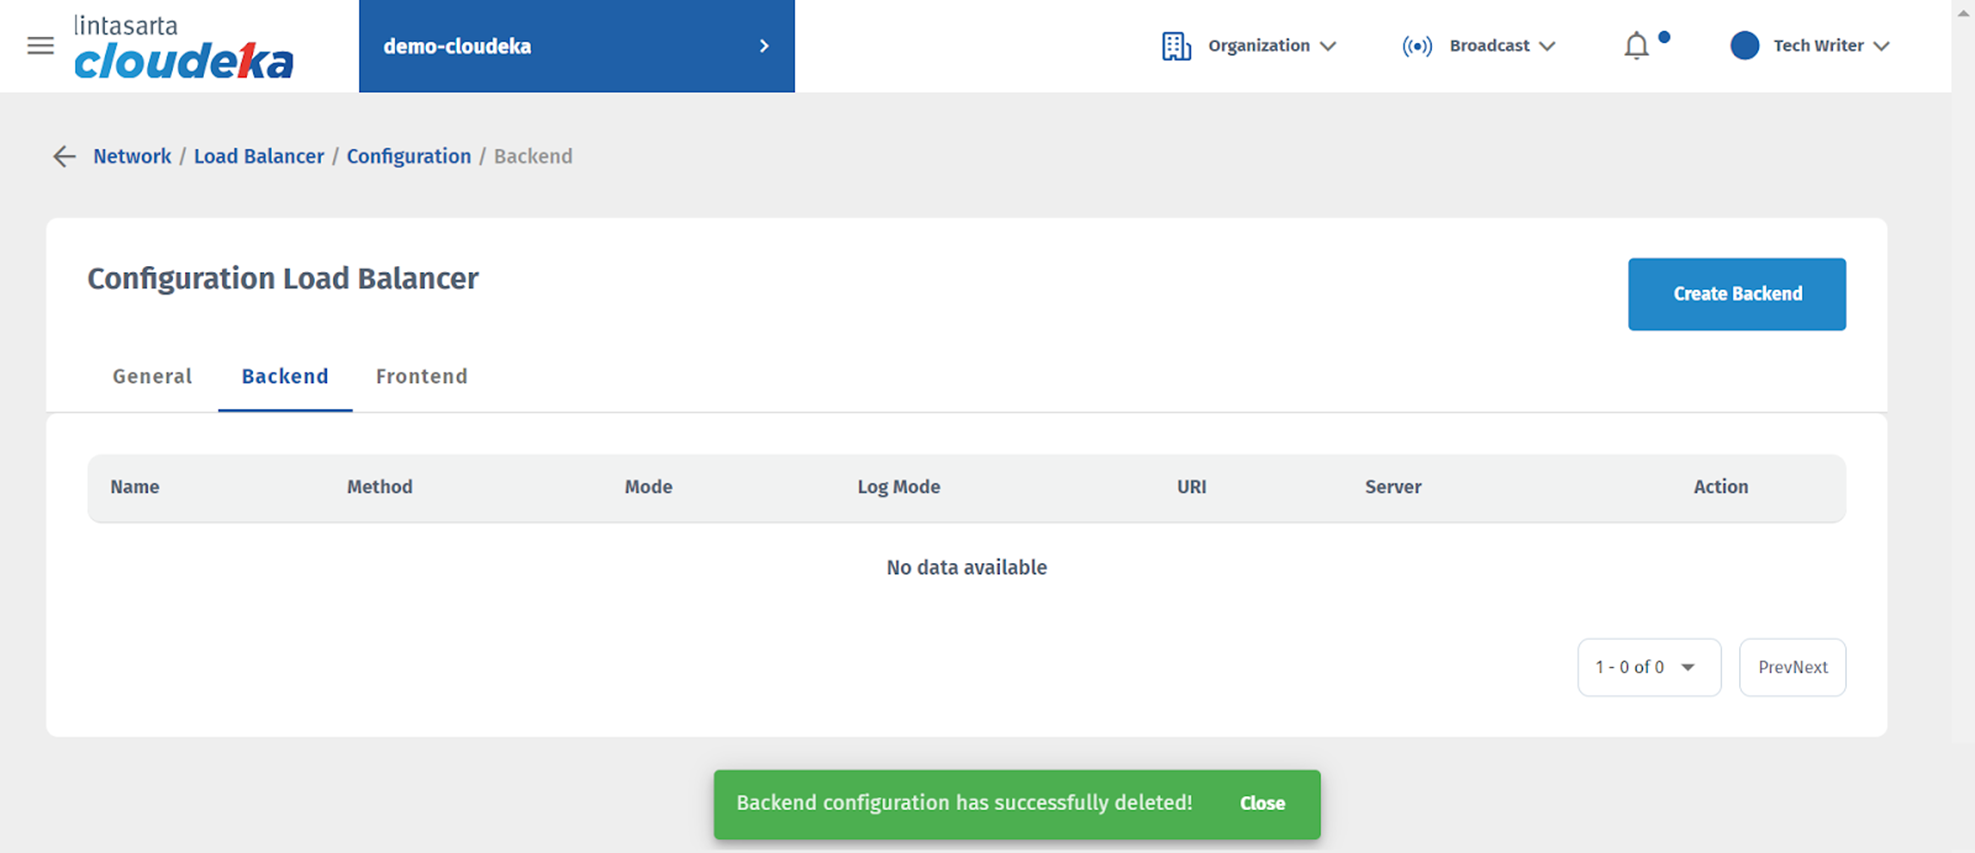
After successfully deleting the frontend configuration, the next step is to delete the backend configuration. If you haven't deleted the frontend configuration, a notification will appear "Please detach default backend from frontend configuration!" On the Backend tab, select the Delete button.
The Delete Backend window appears, enter the frontend configuration name and press the Confirm button to continue the configuration deletion process.
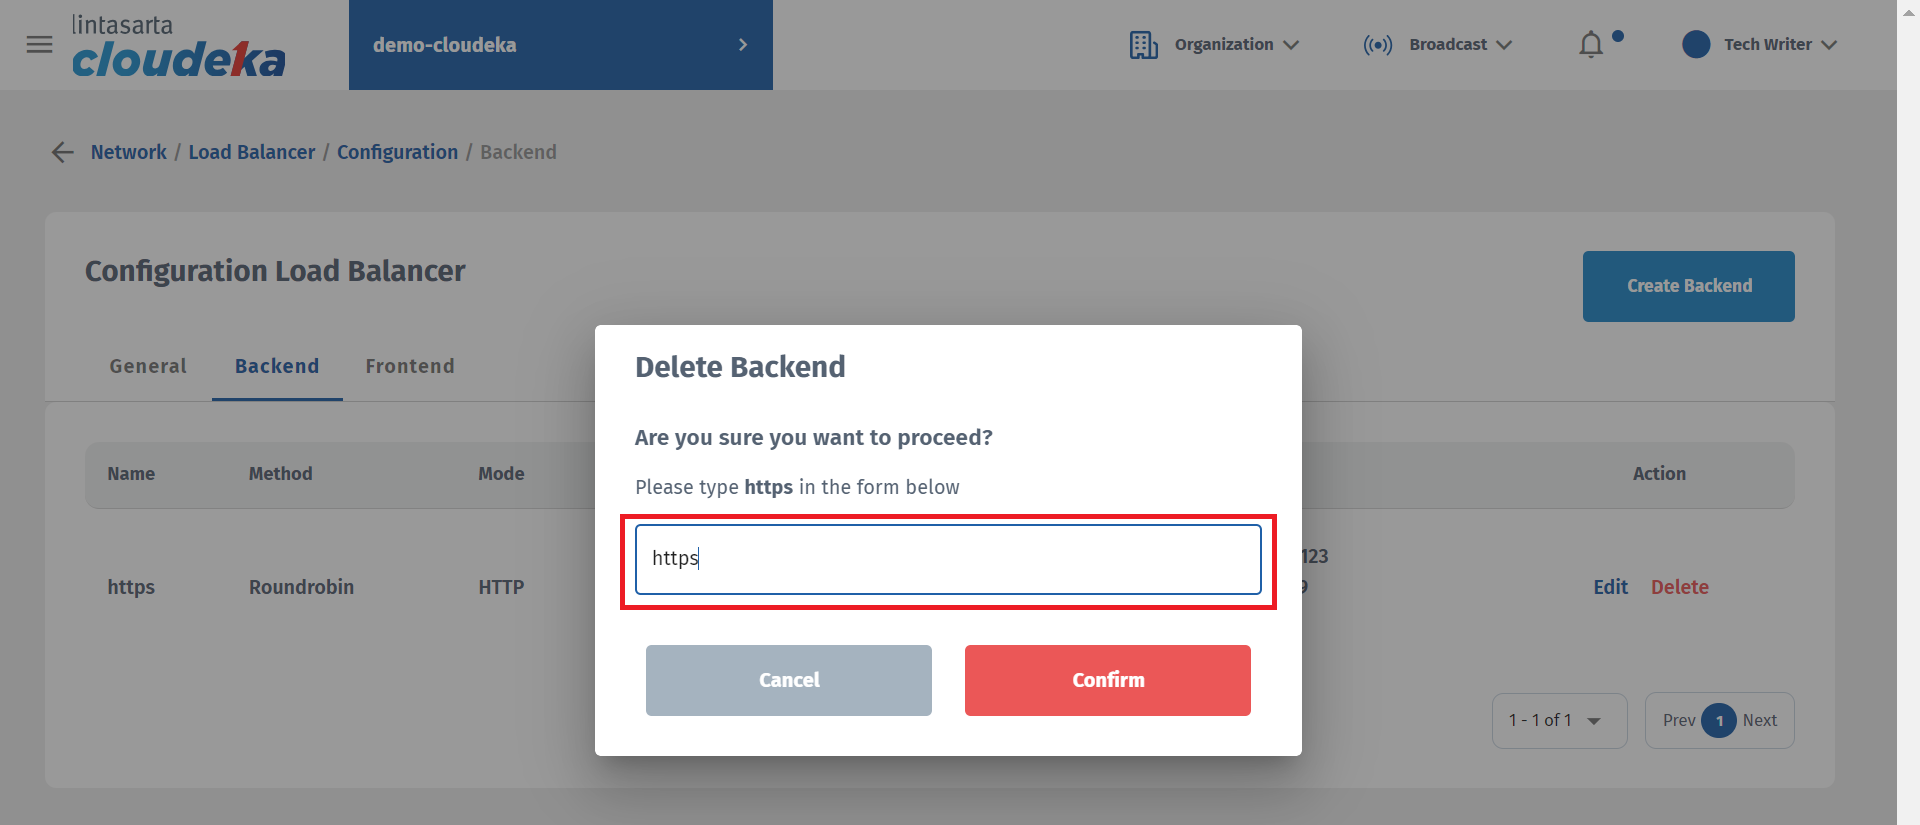
Wait until the process is complete, and a notification will appear “Frontend configuration has successfully deleted!”
Last updated
