> For the complete documentation index, see [llms.txt](https://docs.cloudeka.id/llms.txt). Markdown versions of documentation pages are available by appending `.md` to page URLs; this page is available as [Markdown](https://docs.cloudeka.id/deka_flexi/deka_volume_block_storage/formatting-a-disk/formating-and-mounting-a-disk-on-linux.md).
# Formating & mounting a disk on Linux
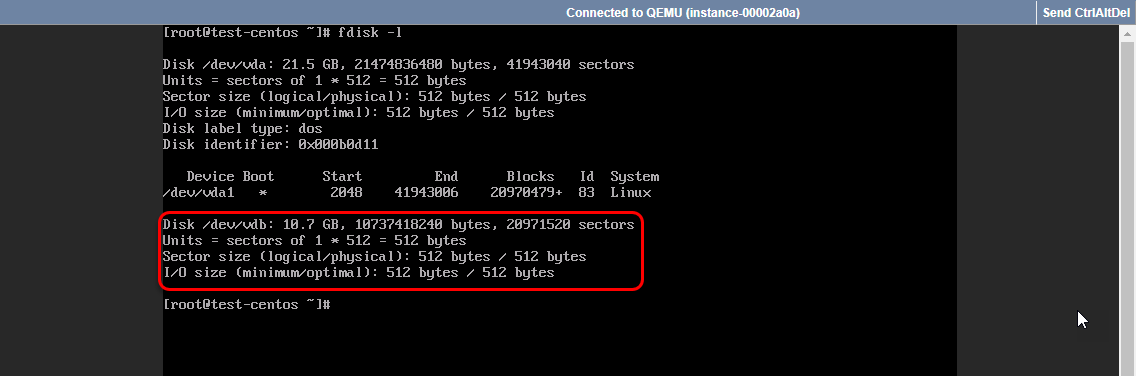
* On your Linux VM, to do this we need to be the root user and run the following command: **fdisk -l**, as we can see the new hard drive, 10GB, is assigned to the path **/dev/vdb**.
VM Linux
* After the new hard disk has been identified, the next step is partitioning, for this, we will use the following syntax:
```linux
fdisk /dev/vdb
```
{% hint style="info" %}
Common fdisk parameter are:
* n: Create a new partition.
* P: Print the partition table.
* d: Remove a partition.
* q: It leaves without saving the change.
* w: Save the changes and exit the command. With this in mind we will perform the following process once the **fdisk /dev/vdb** command has been executed: Enter the letter n to create the new partition. - Enter the letter p to define as a primary partition - Number 1 to establish a single partition of the new disk. - Establish the value of the first sector which is 2048 by default. - Establish the value of the last sector which is 20971519. - Save the changes using the letter w.
{% endhint %}
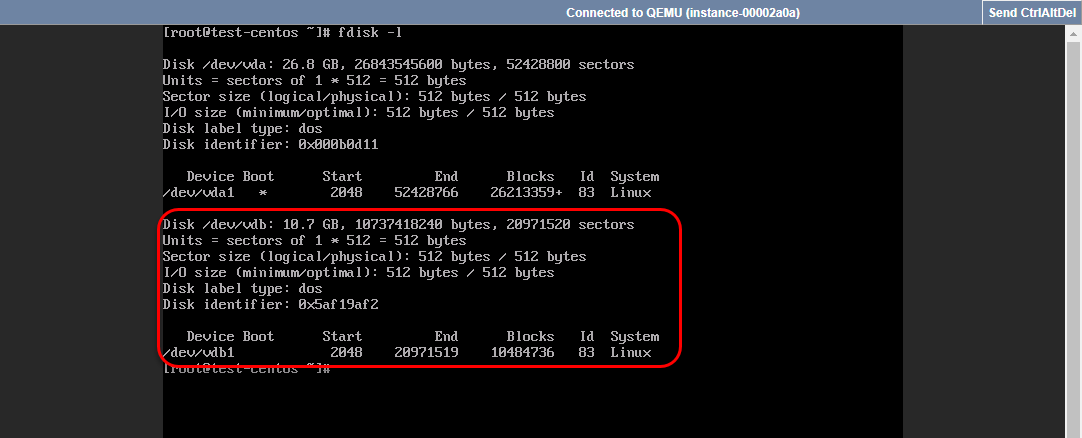
VM Linux - Fdisk
* We can see that the process is executed correctly. If we run **fdisk -l** we can look at the changes in the new disk (/dev/vdb).
VM Linux - Fdisk - New Disk
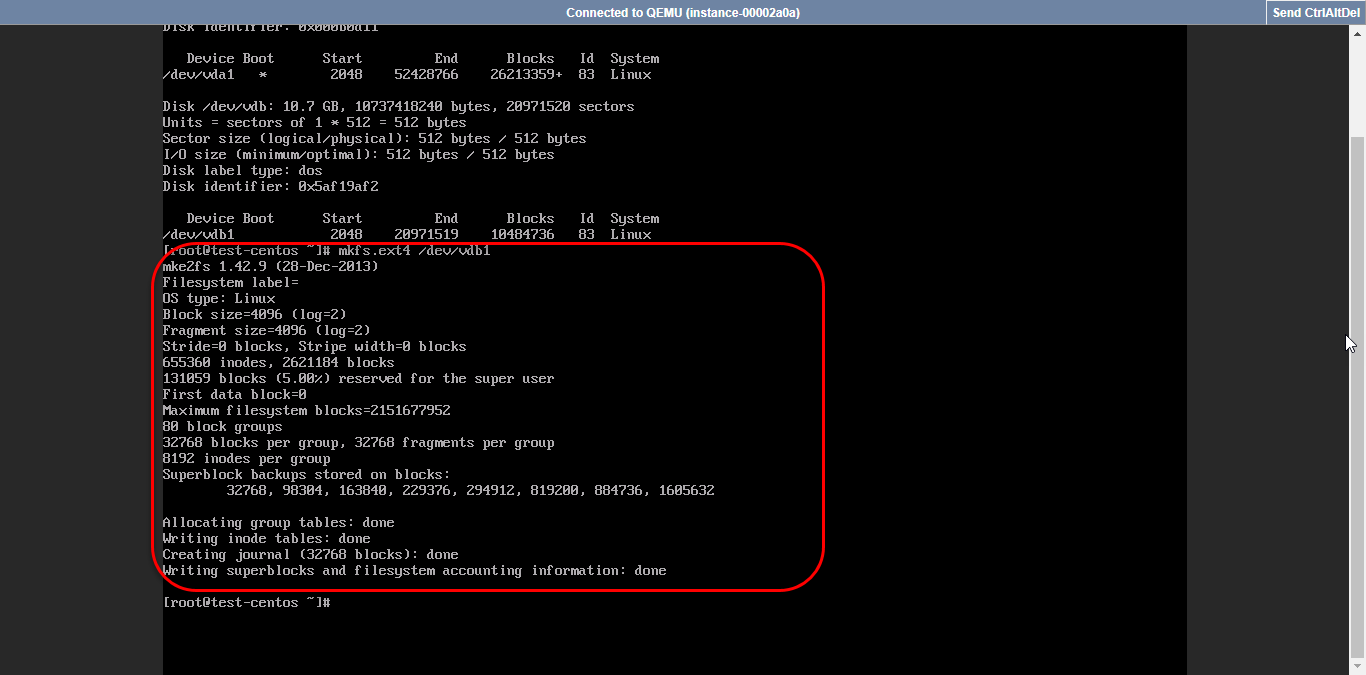
* Next step is to format the new hard drive with the desired file system using the command
```linux
mkfs.ext4 /dev/vdb1
```
{% hint style="info" %}
**mkfs** is make file system
{% endhint %}
VM Linux - MKFS
* After that we need to create a new directory, in this tutorial we create a new directory called /data:
```linux
mkdir /data
```
VM Linux - New Directory
* The Next step is to mount the new disk in the desired location, in this tutorial we have created a new directory called /data. use command
```linux
mount /dev/vdb1/ /data
```
VM Linux - Mount
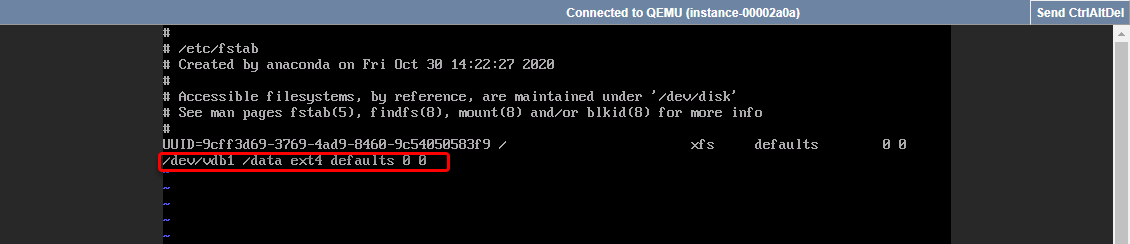
* If we want that partition to be mounted permanently, it will be necessary to edit the file /etc/fstab using the preferred editor and to enter the following line. We keep the change.
```linux
/dev/vdb1 /data ext4 default 0 0
```
VM Linux - Mount Permanent
VM Linux - Mount Permanent
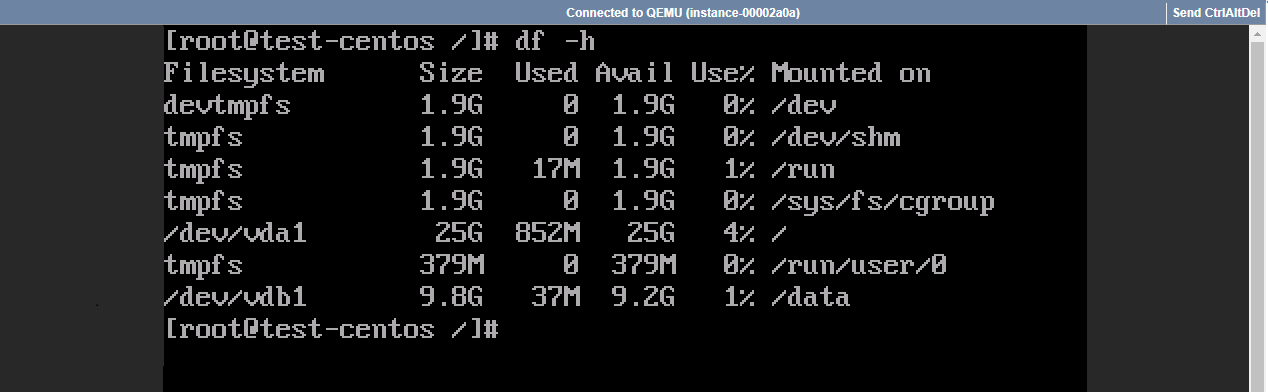
* After that, use **df -h** command to see mounted hard drive.