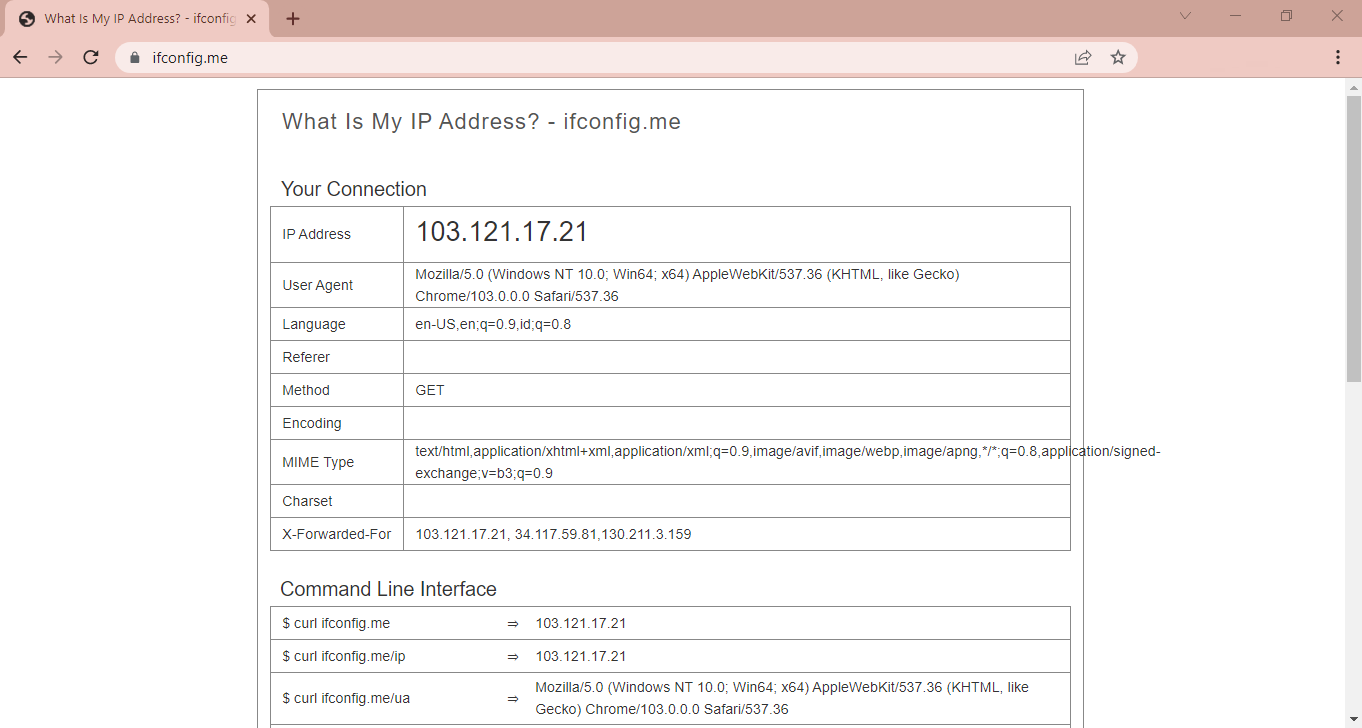
IP check display - https://ifconfig.me/
IP check display - https://ifconfig.me/

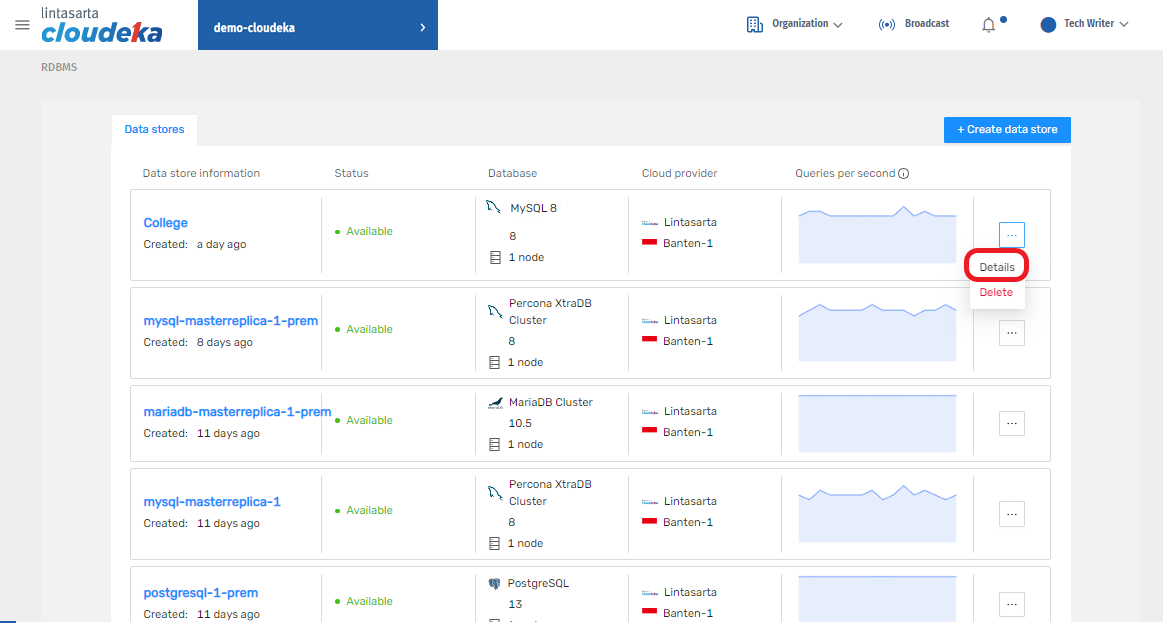
Data Stores Page - Details
Data Stores Page - Details
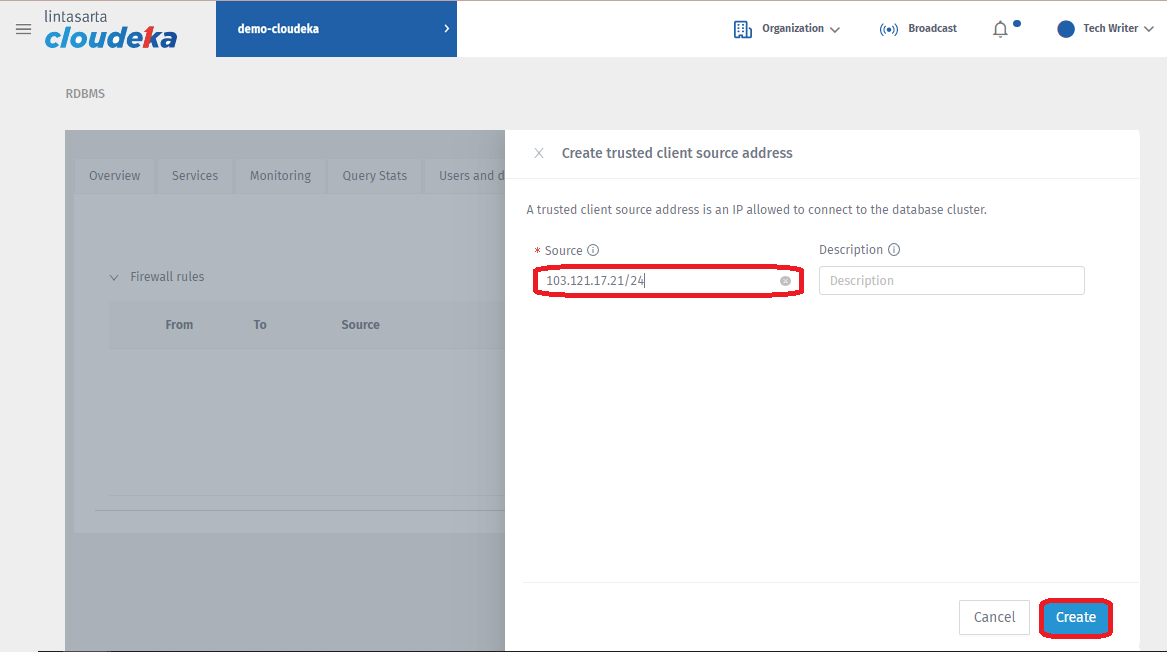
Input IP Address
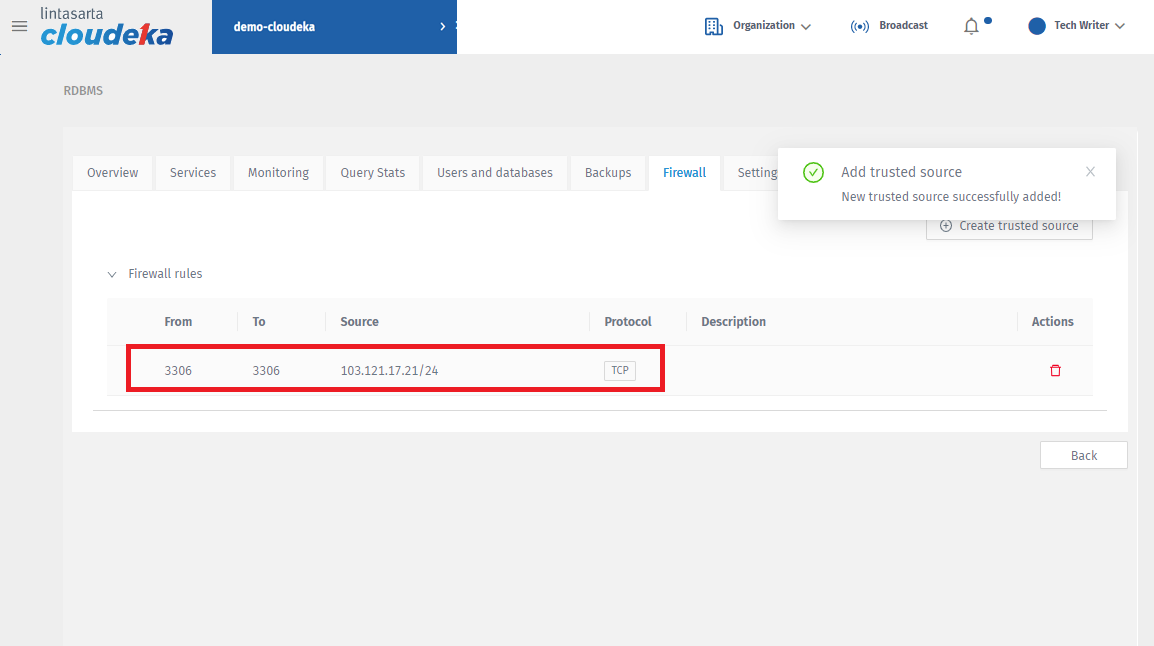
Success Notification

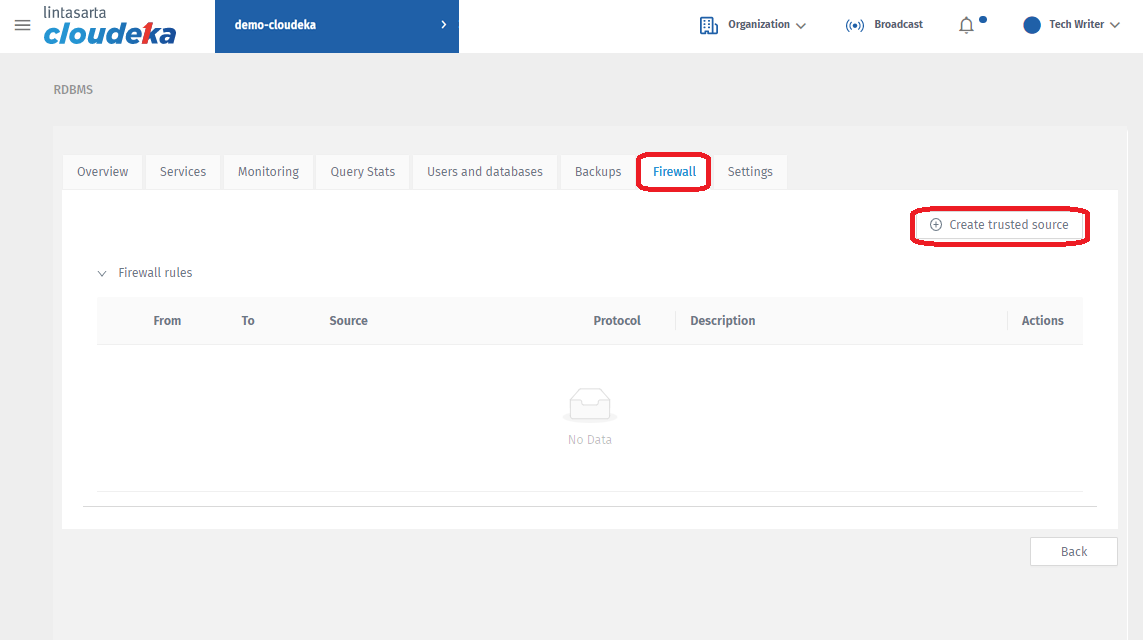
Services Tab
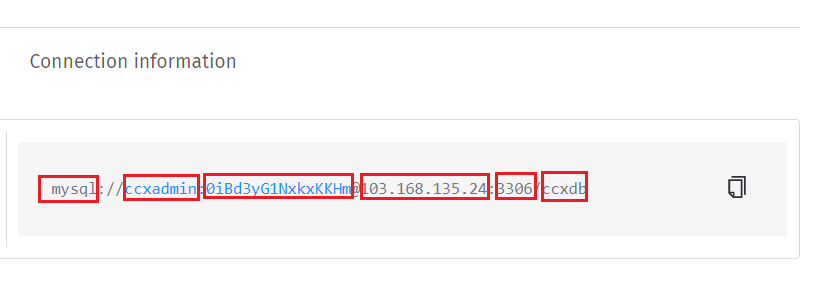
Services Tab - Connection Information
| Description | |
|---|---|
| mysql | Type of database connection used |
| ccxadmin | The username used to log in to the database |
| 0iBd3yG1NxkxKKHm | Password used to enter the database |
| 103.168.135.24 | Host servers |
| 3306 | Server ports |
| ccxdb | Database name |
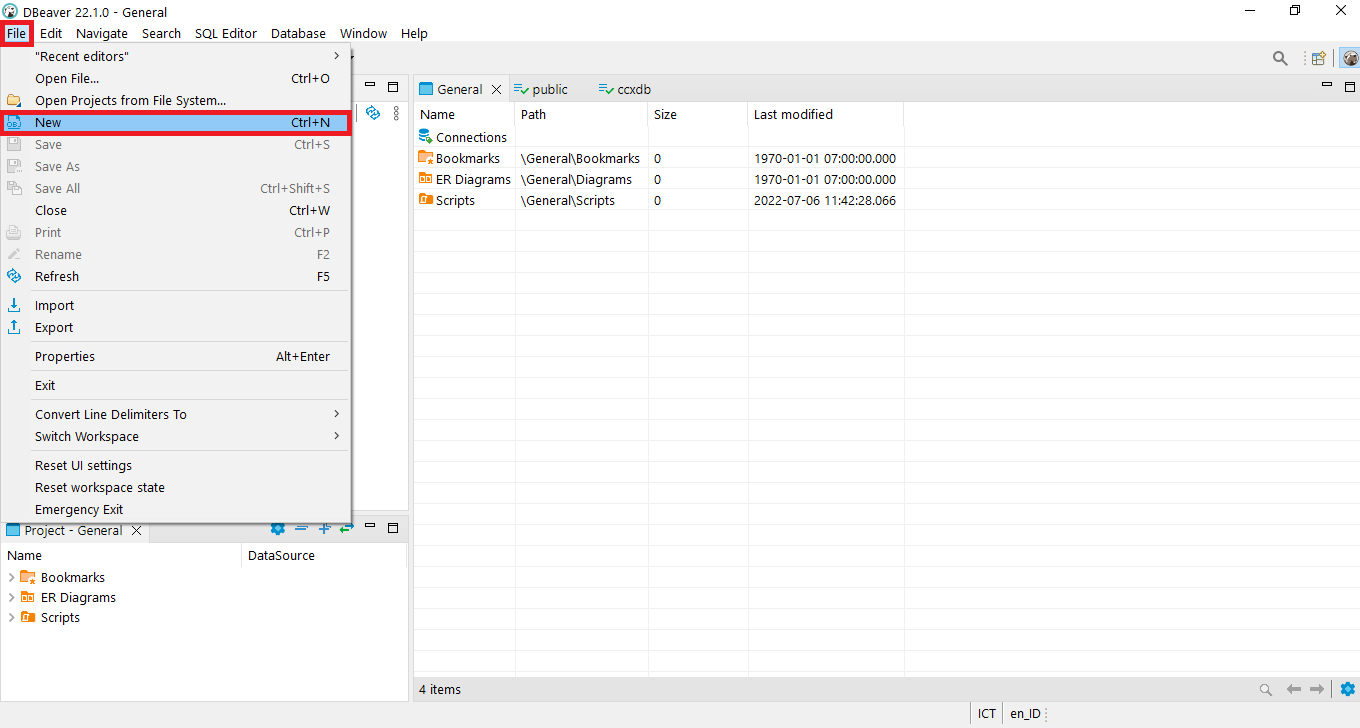
DBeaver - New Connection
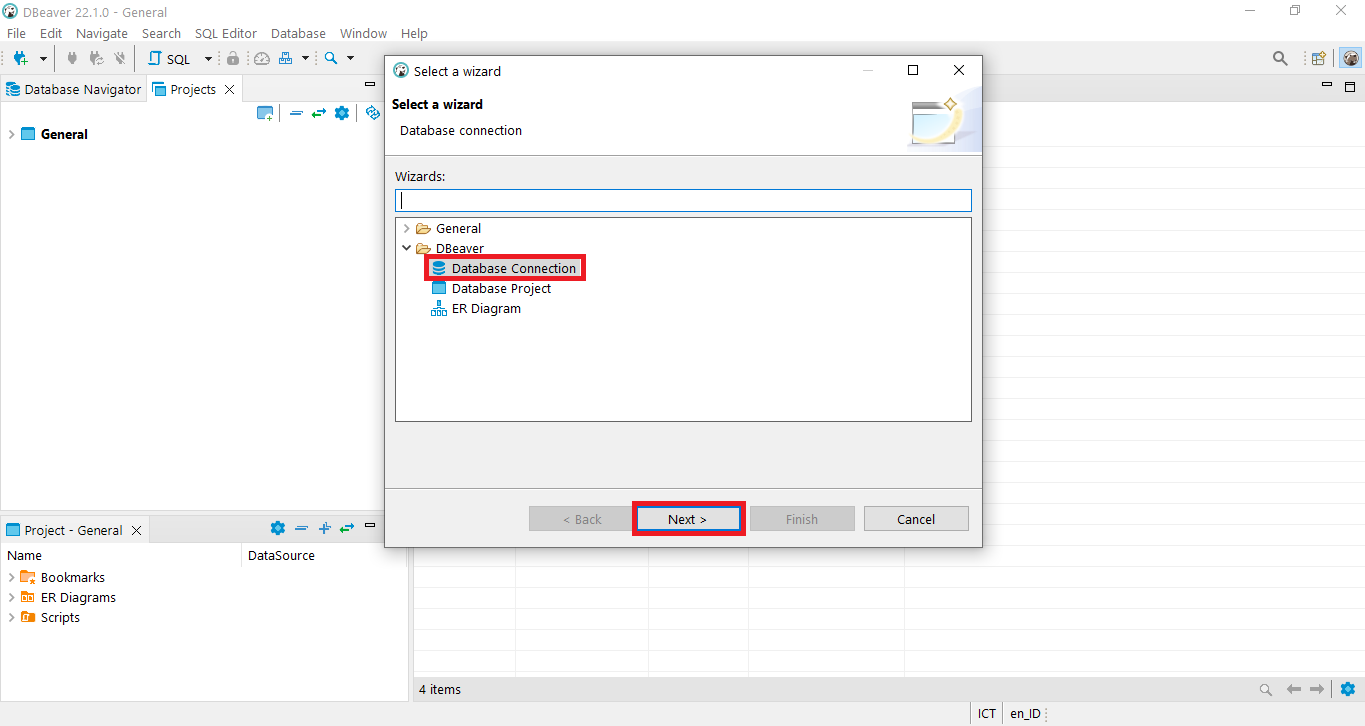
DBeaver - Database Connection
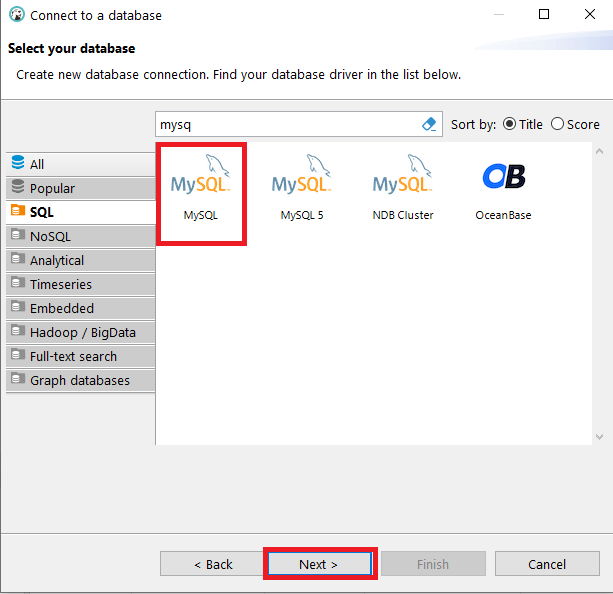
DBeaver - Select Database

Image DBeaver - Connection Settings
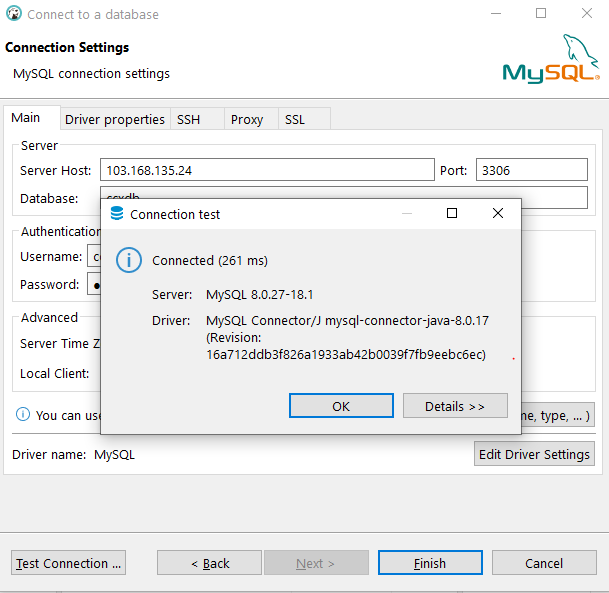
DBeaver - Connection Test Results
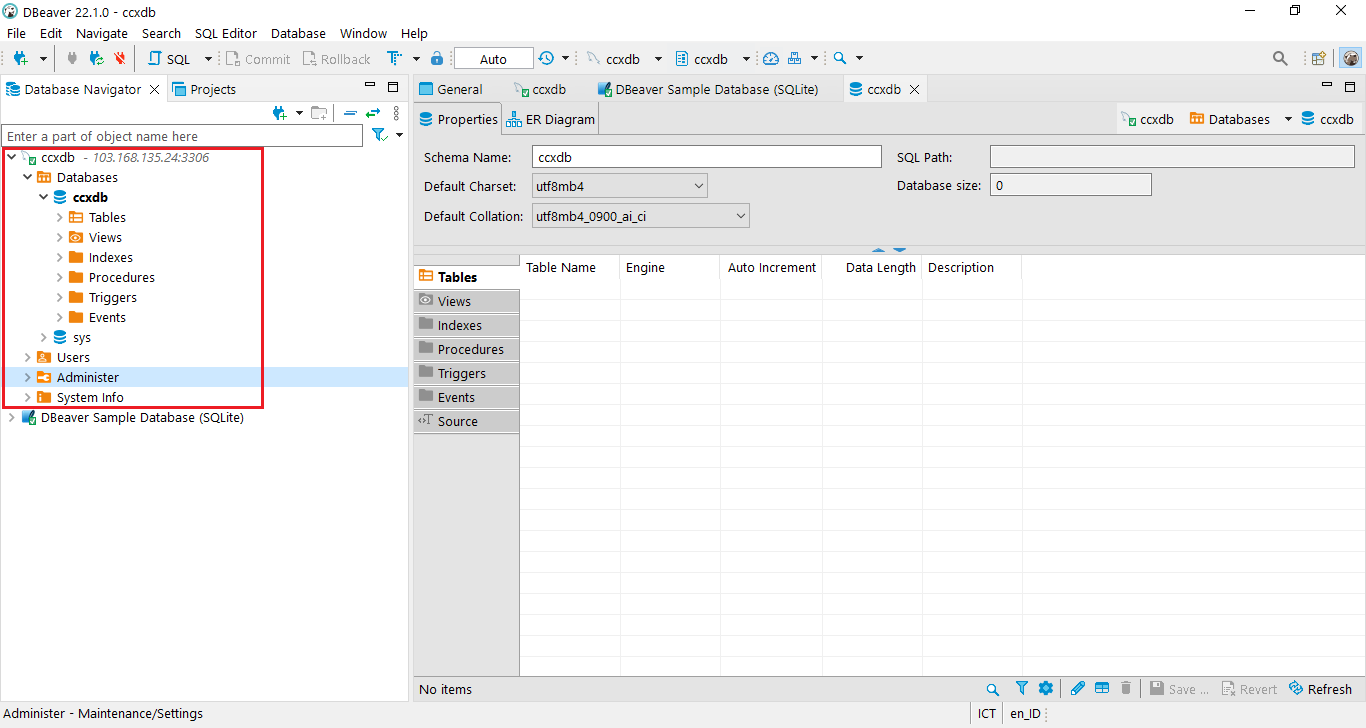
DBeaver - Database ccxdb