VPC Configuration
VPC Configuration

Virtual Machine

Configuration Floating IP

Access Console

Access Console - Login

Update Packet

Install Apache2

Install Apache2
Install Apache2

Install Apache2

Check Status Apache2

GLB Configuration

glb1 Configuration

glb2 Configuration

Security Configuration

Security Configuration

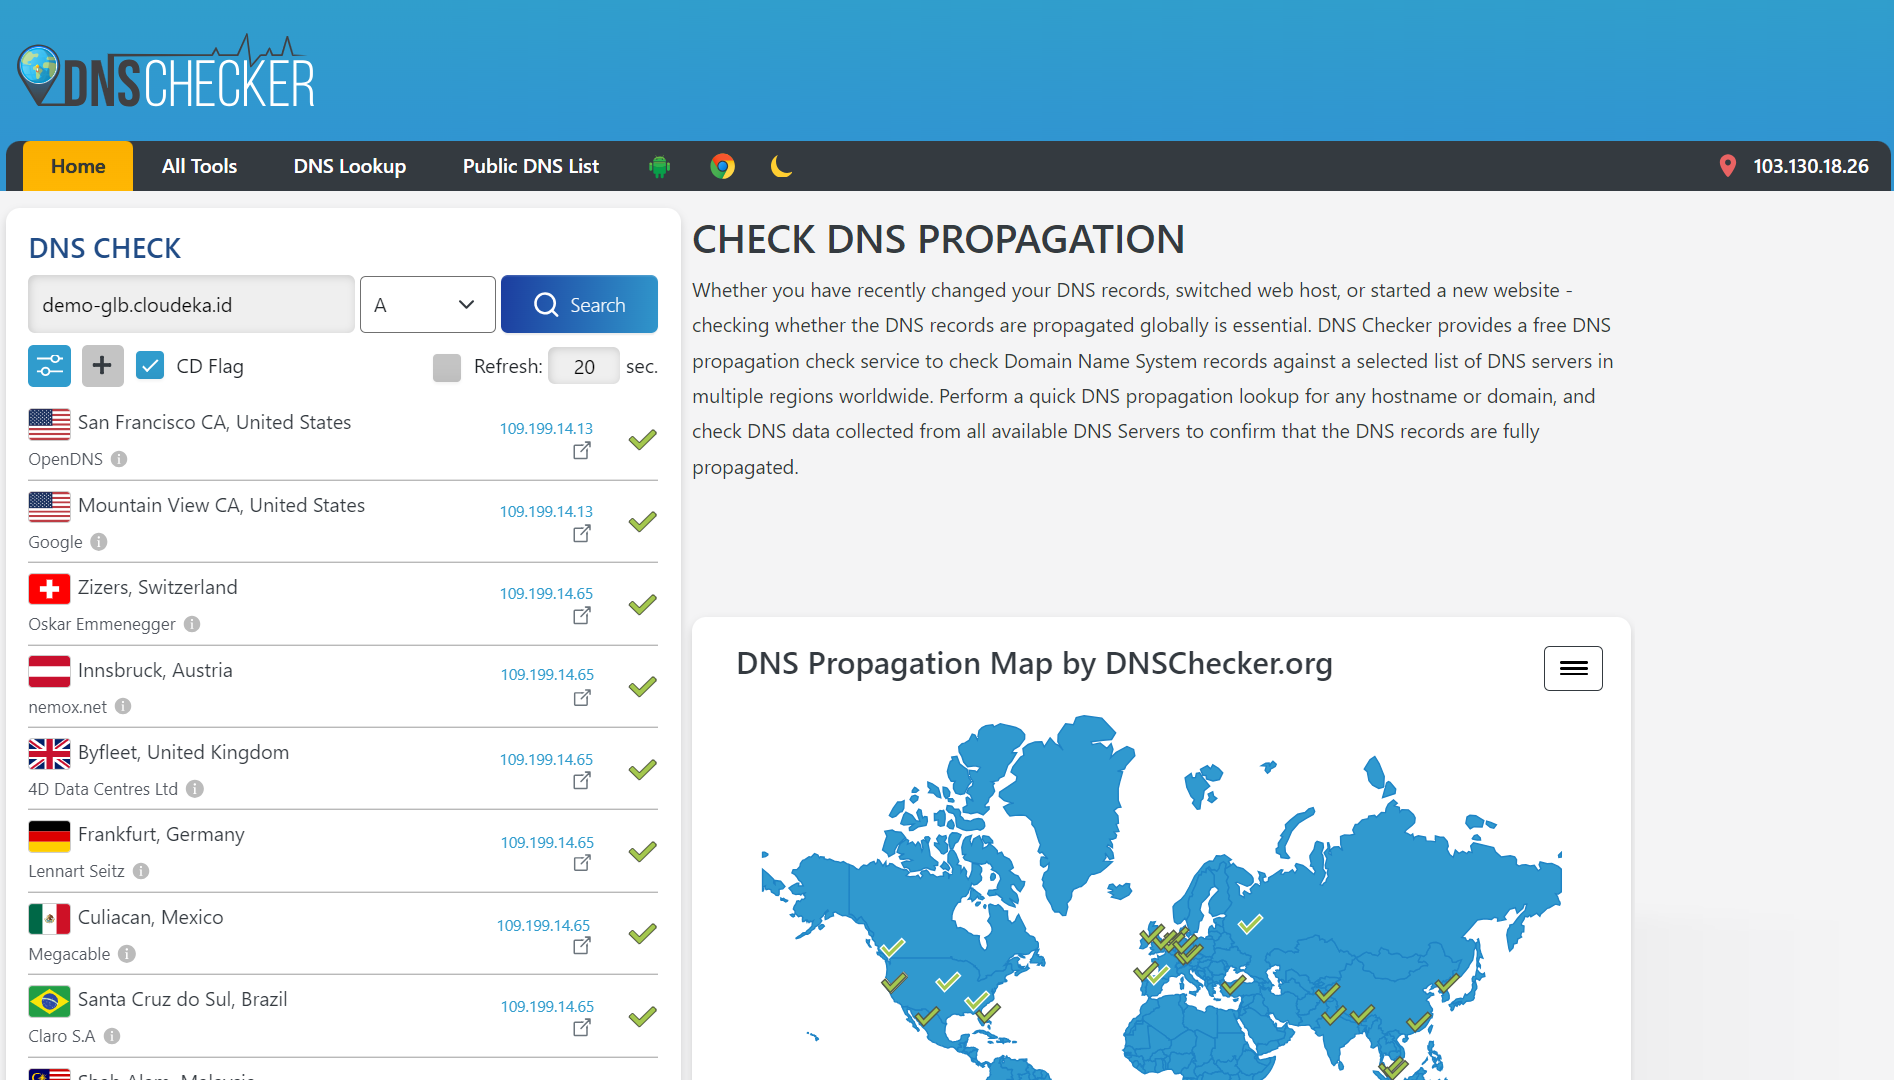
DNS Checker (a)